Building a Behavioral Indicator Search:
Note: Please ensure you've deployed both the index defining search macros required by this app before building an indicator for the first time. You can validate by going to Configure > Configure Indexes and Collections within the app
Build a new behavioral indicator search by enterring the Behavioral Indicators page underneath the Deploy dropdown menu on the navigation bar and clicking Create Behavioral Indicator. Behavioral indicator searches are effectively KPIs and are used to turn entity data points into statistical aggregations which are used to profile entity behaviour against their peers and historic behaviour.
The Create Behavioral Indicator workflow allows you to build and schedule indicator searches which are used to populate the defined indicator index in the following steps:
- Define the data source for the indicator search
- Select the entity field and any other relevant fields
- Define the indicator search
- Save and schedule the indicator search
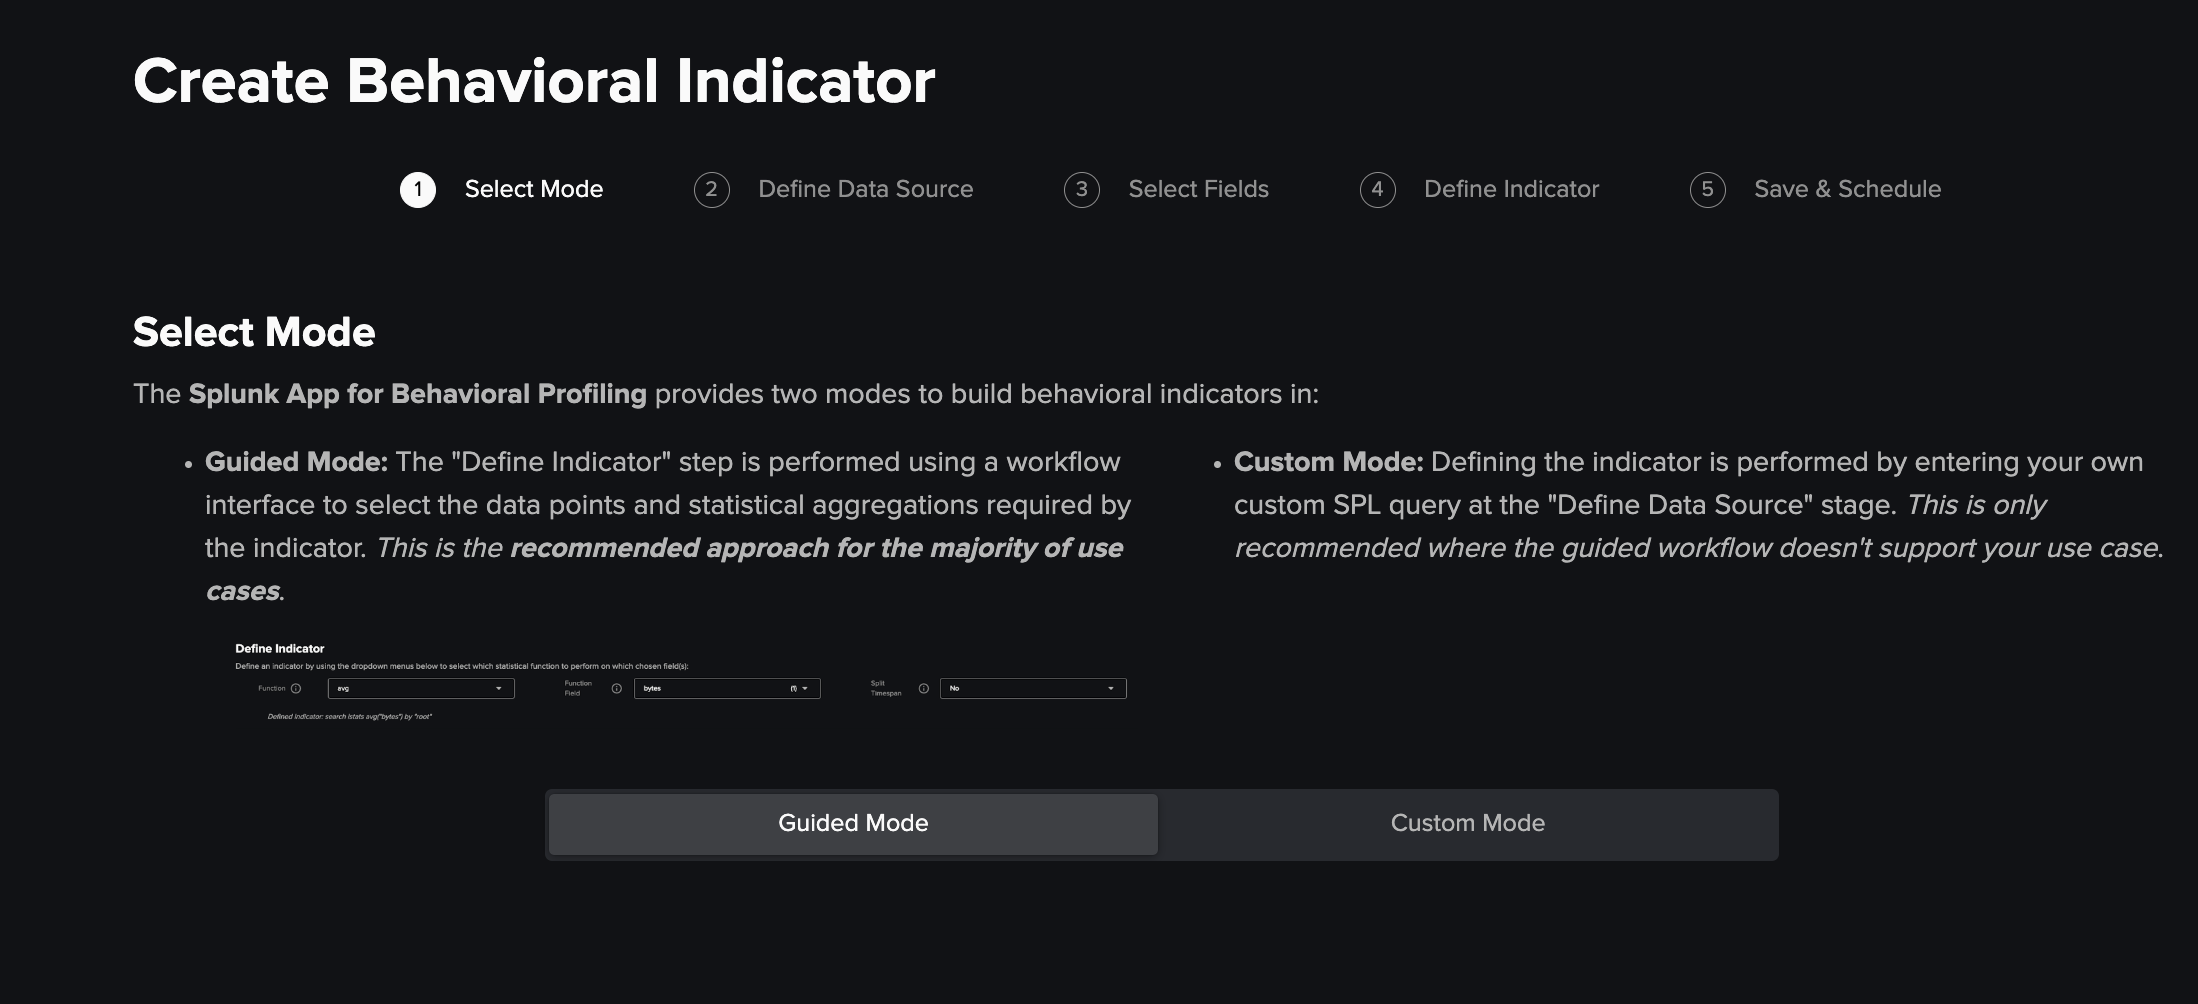
1) Select Mode
Within the Splunk App for Behavioral Profiling there are two modes to build new indicators in, these are chosen by toggling the radio bar and can be switched between at any point up until saving the behavioral indicator by returning to the Select Mode step by using the next/back buttons in the bottom right hand corner of the screen:
Guided Mode: Defining the indicator is performed using a workflow interface to select the data points and statistical aggregations required by the indicator. This is the recommended approach for the majority of use cases and for SPL query language beginners.
Custom Mode: Defining the indicator is performed by entering your own custom SPL query at the "Define Data Source" step. This is only recommended where the guided workflow doesn't support your use case.
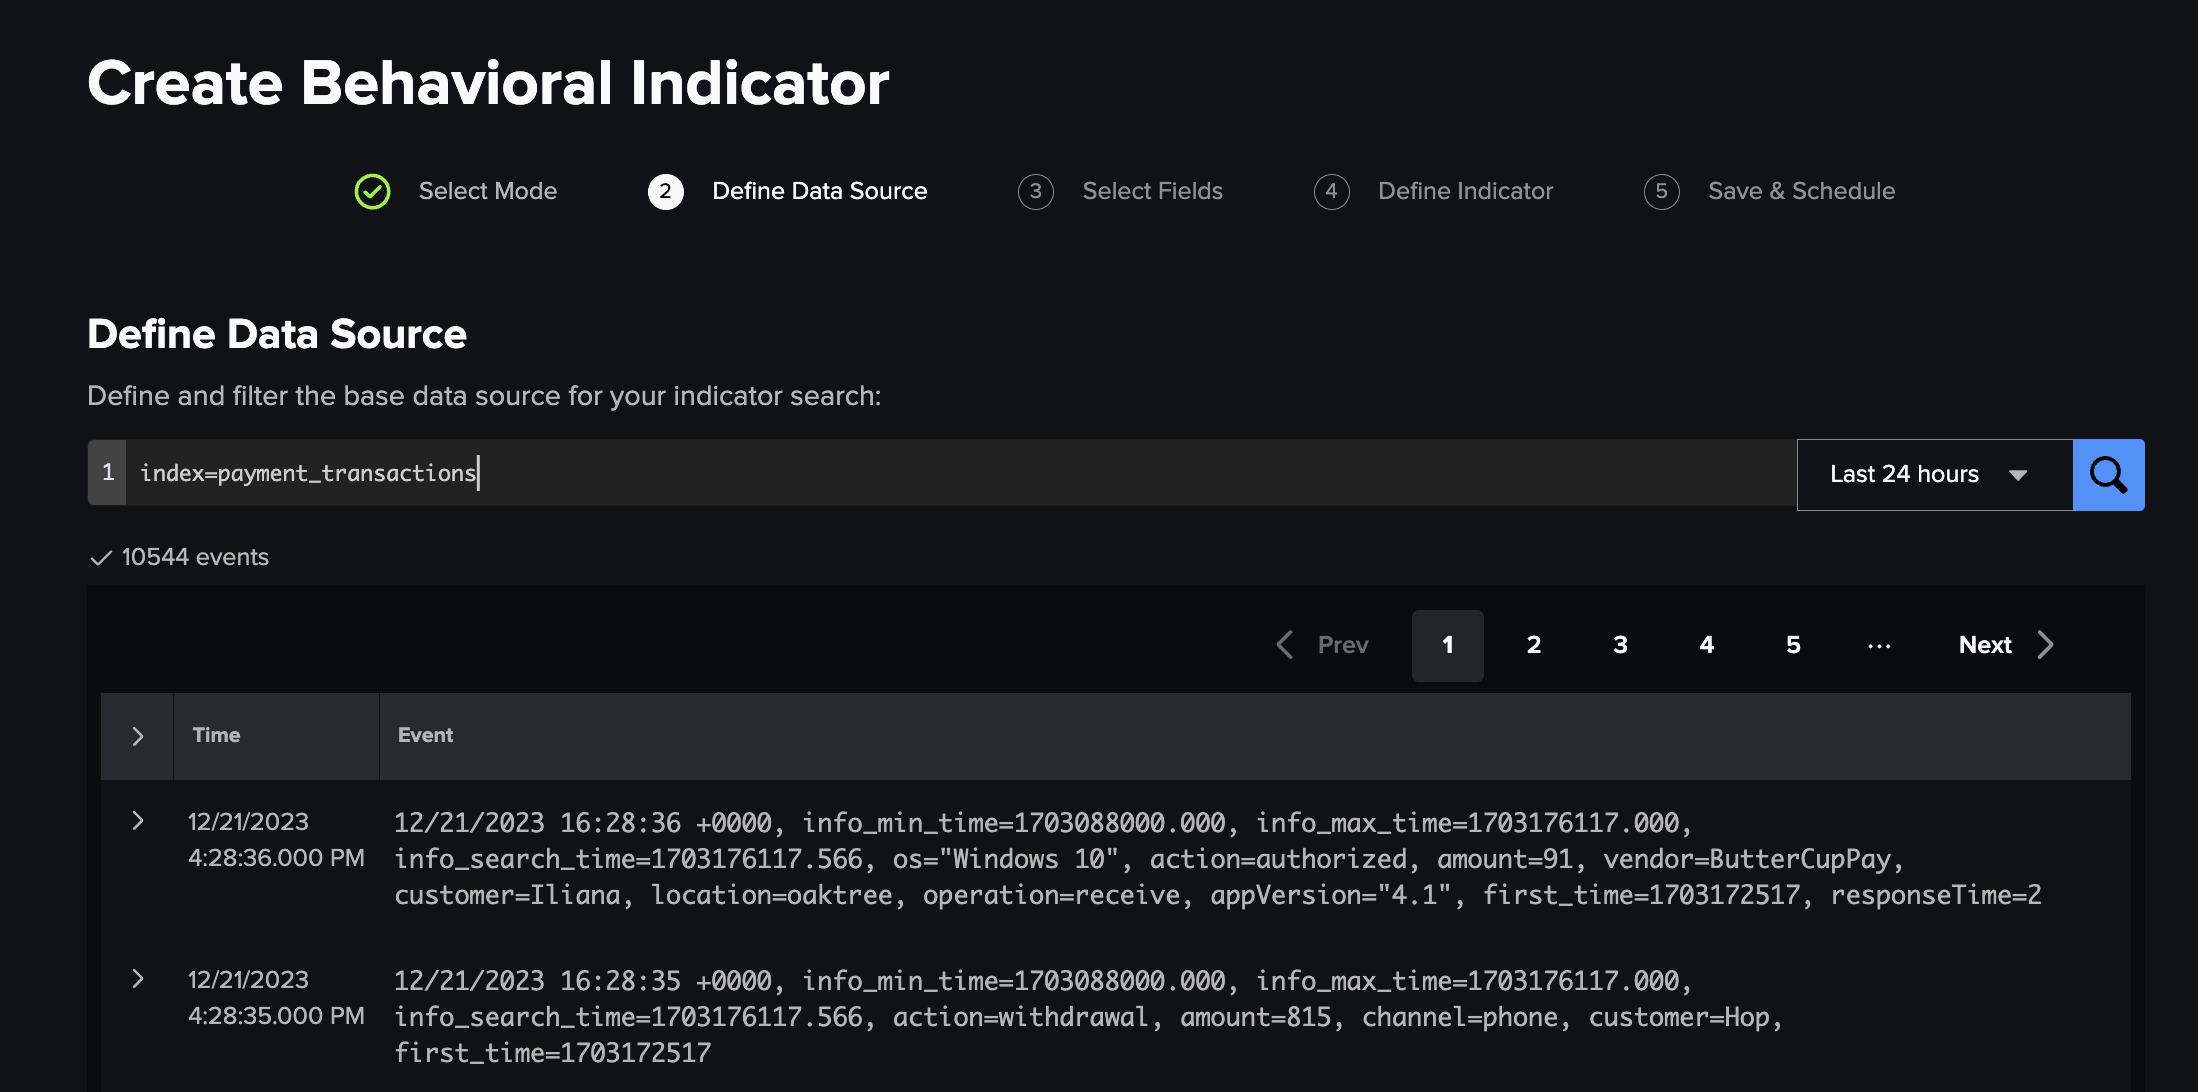
2) Define Data Source
Define and filter the data source for your indicator search. For guided mode this is simply pointing the workflow towards the base dataset which you're going to build an indicator with, for custom mode the query needs to generate the behavioral indicator search and the Entity Field (see below) must be defined.
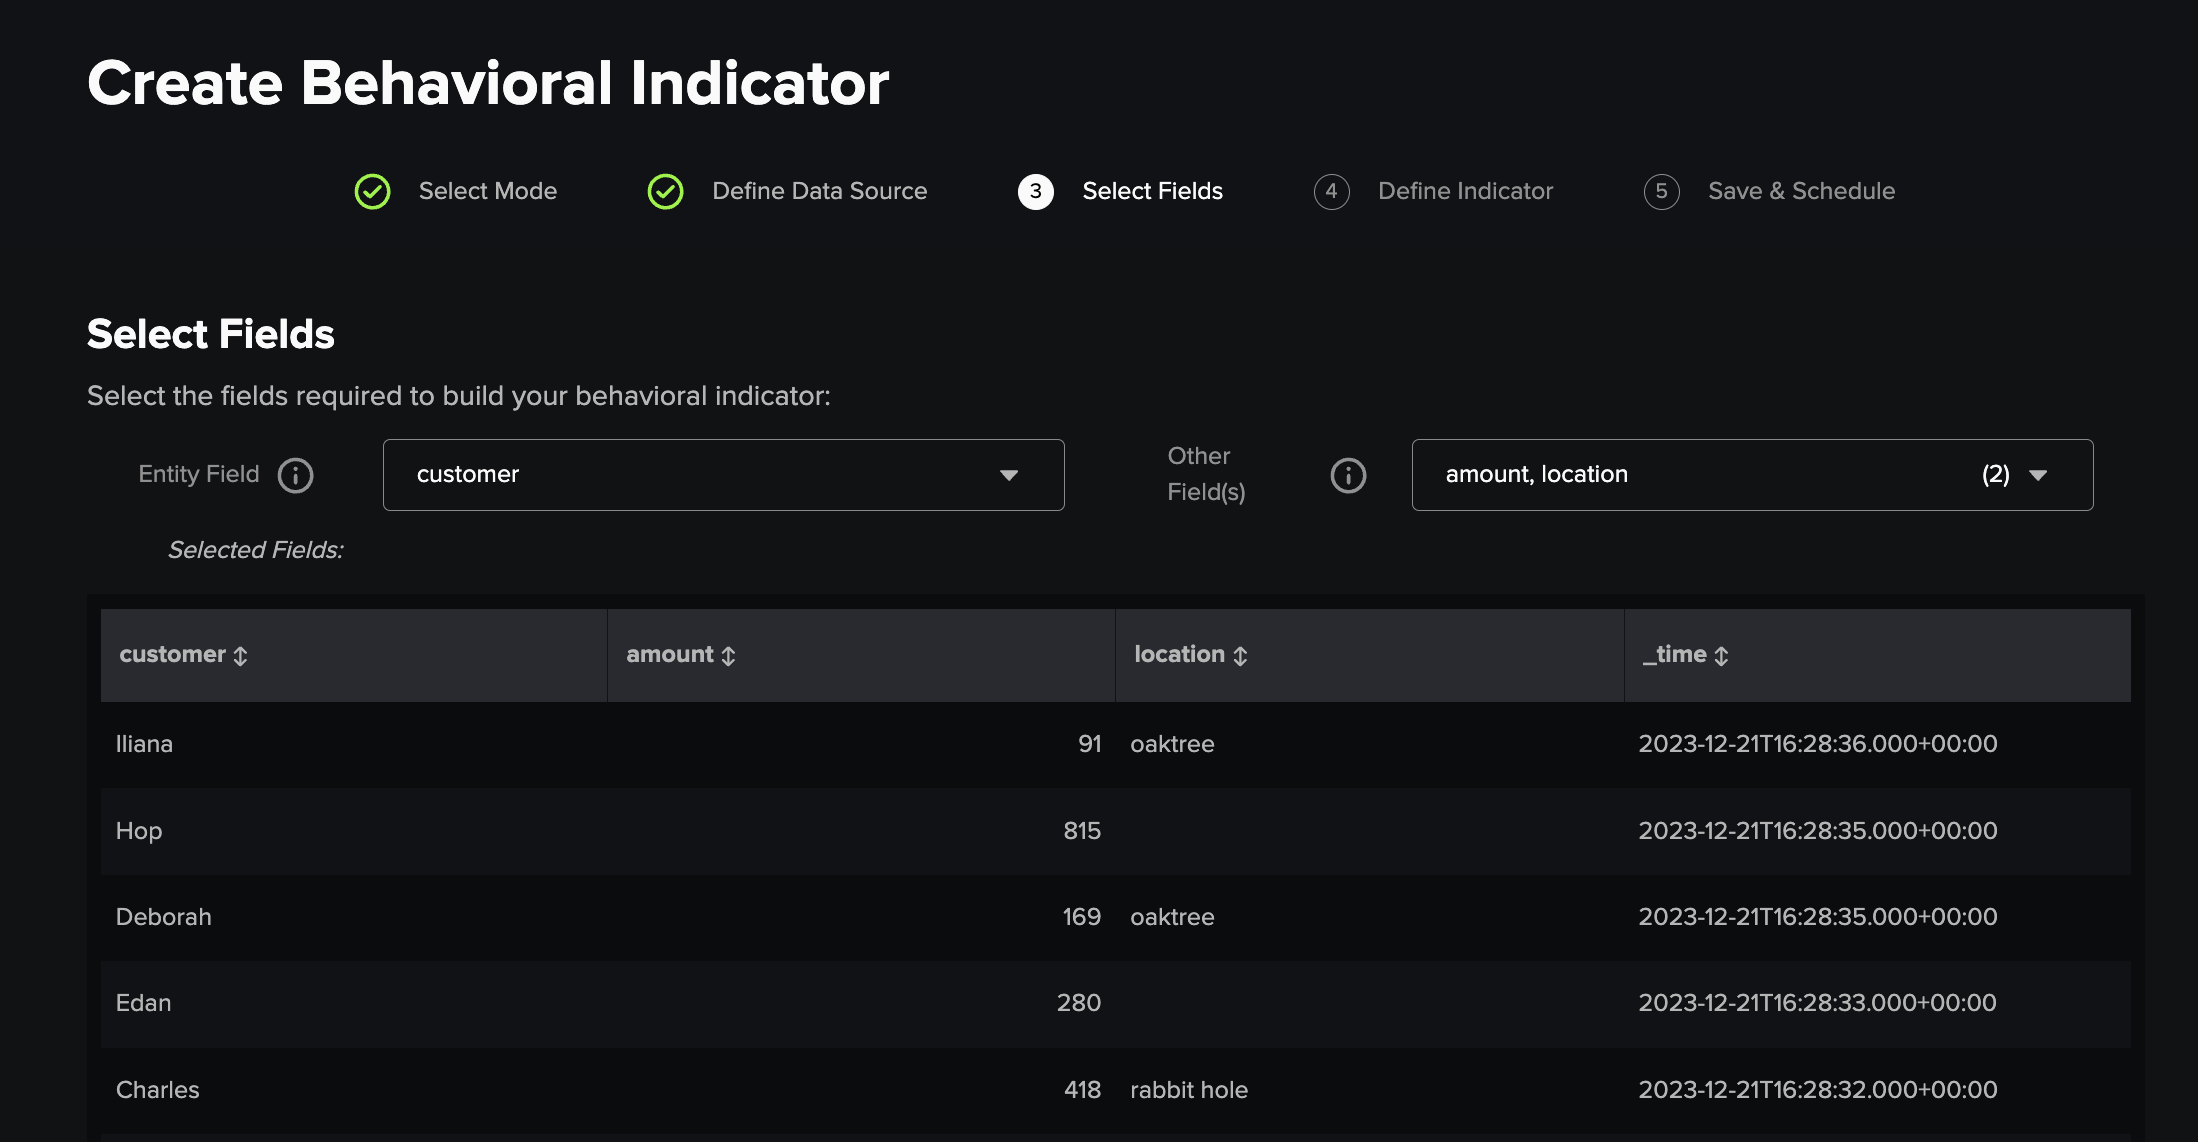
3) Select Fields (Guided Mode)
Select the Entity Field which represents and identifies the entity you are building the behavourial indicator for, this should be field for which the values uniquely resolve to the individual entities you're monitoring.
Additionally any other fields which will be used to either calculate the indicator, or provide context in investigation of an indicator value need to be defined in the Other Fields(s) selection box here.
4) Define Indicator (Guided Mode)
This step of the process is done via the search bar for custom mode, in guided mode this is where the field(s) defined in the previous step are used to calculate a behavioral indicator using the input boxes to specify a statistical function and chosen field(s) to calculate the metric(s) used as the behavioral indicator against your entity field.
There's the additional option to split the timespan into bins, so that the indicator can be split by this span for each entity - providing more indicator values each time the search is run.

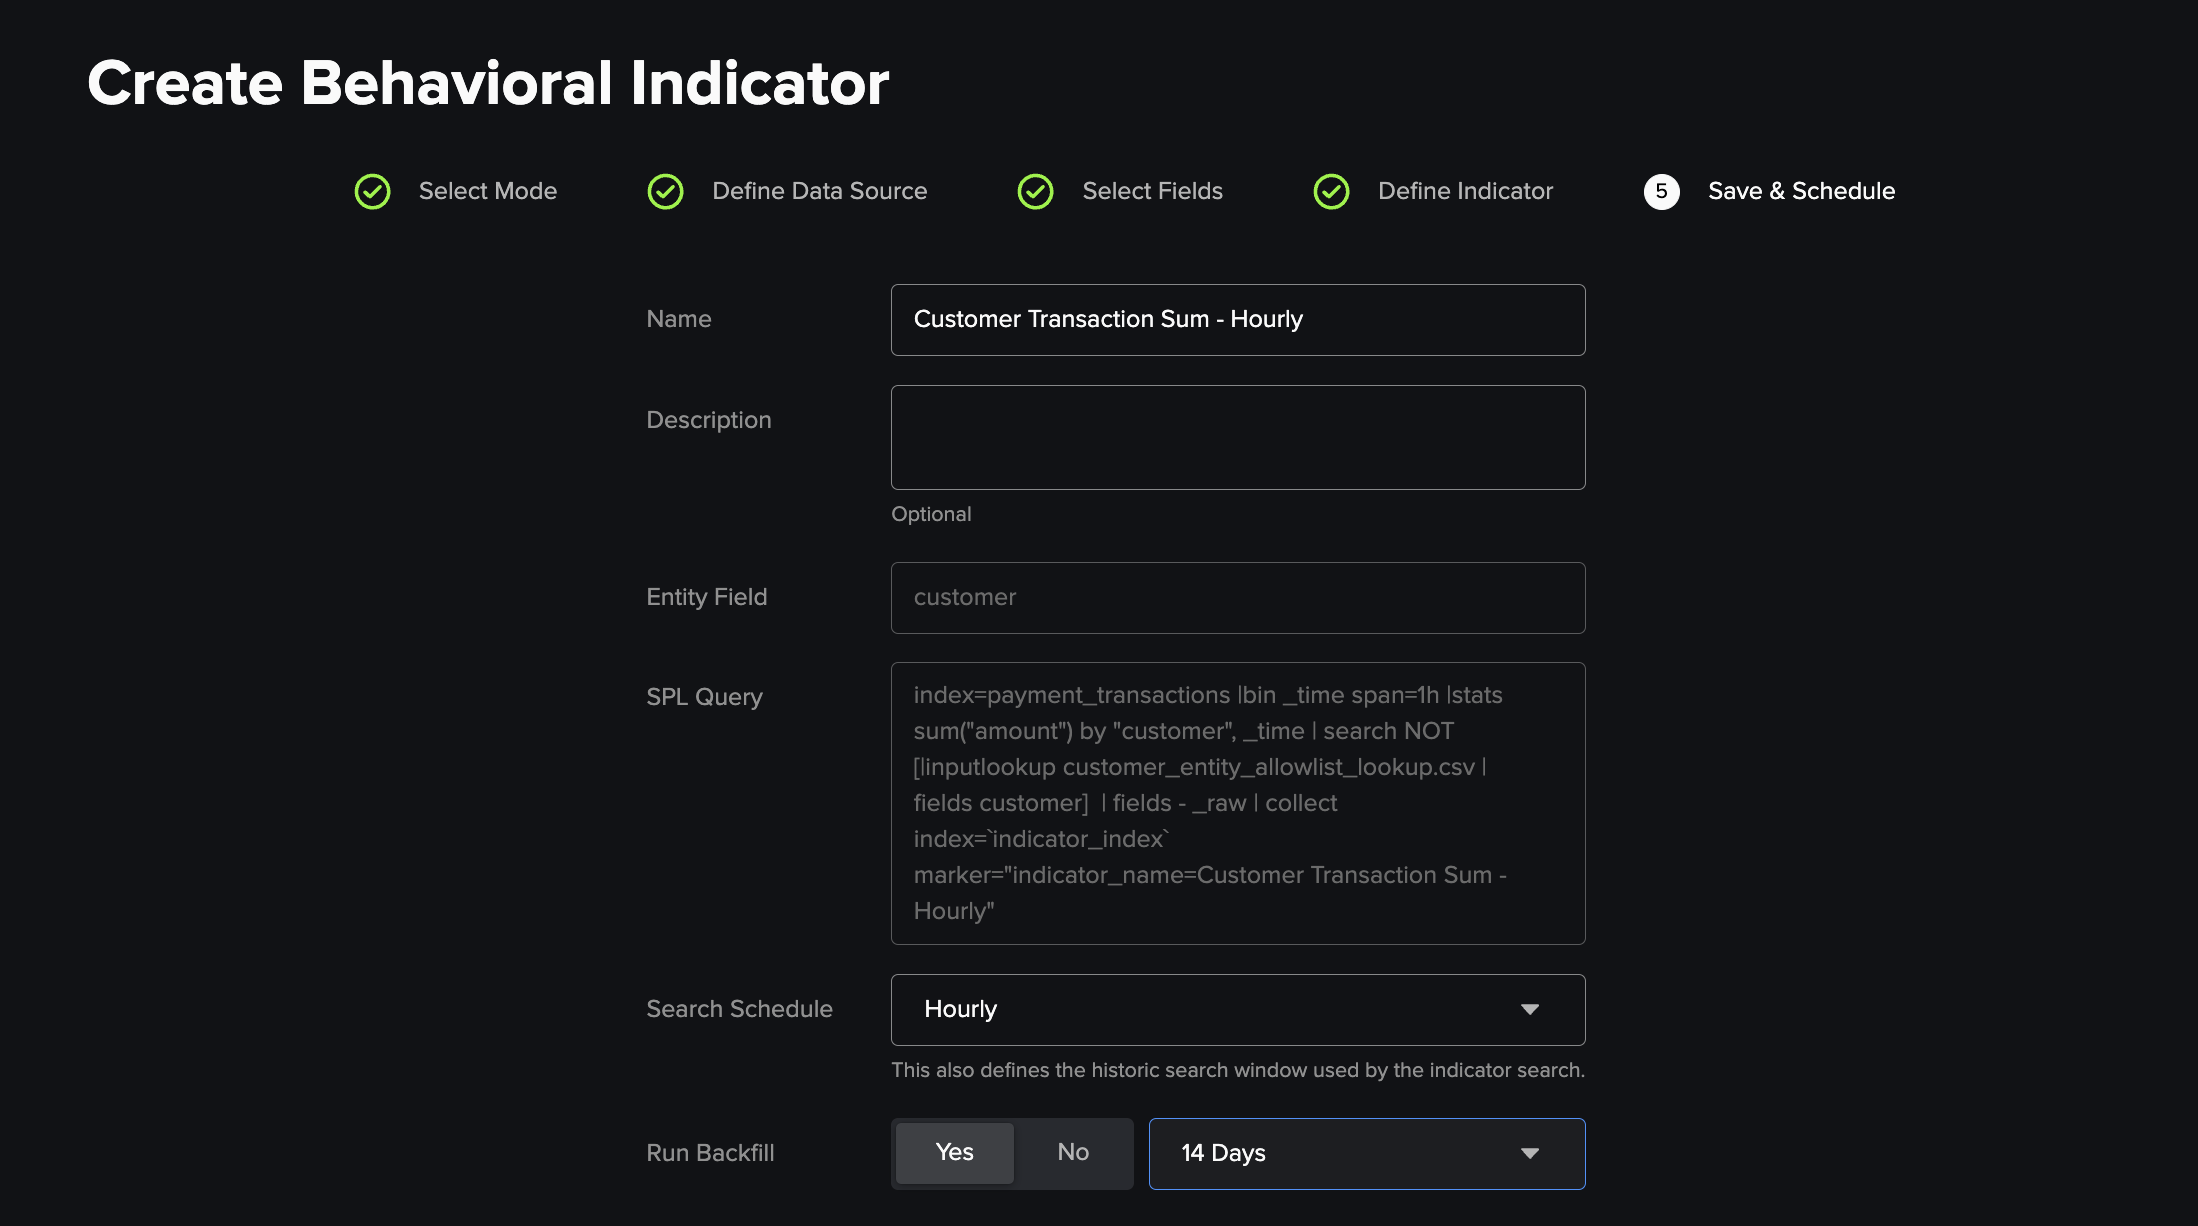
5) Save & Schedule
Specify a name, description and schedule for the behavioral indicator. These are used, when Save is clicked and Submit selected in the pop up modal, to generate and schedule a saved search which runs on the provided schedule and outputs to the defined indicator_index. If backfill is ticked, the search will additionally run immediately over the selected time window so it can populate views and be used to build a new anomaly scoring rule.
Additionally, logging is provided on the build status of the search, its associated KV metadata and backfill.