Creating Services in ITSI

Creating Services in ITSI with Dependencies Based on Entity Type

This workshop outlines how to create a service in Splunk IT Service Intelligence (ITSI) using an existing entity and establishing dependencies based on the entity’s type. We’ll differentiate between entities representing business workflows from Splunk Observability Cloud and those representing AppDynamics Business Transactions.

Scenario:

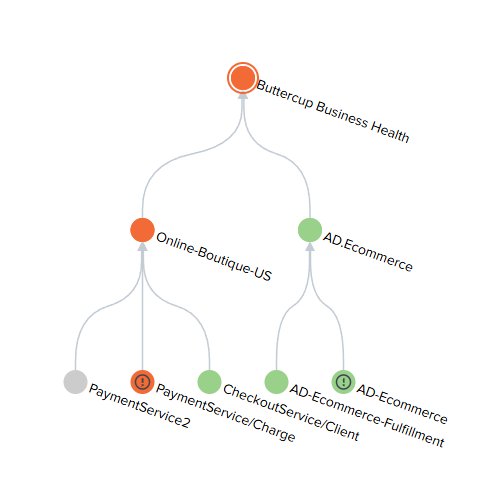
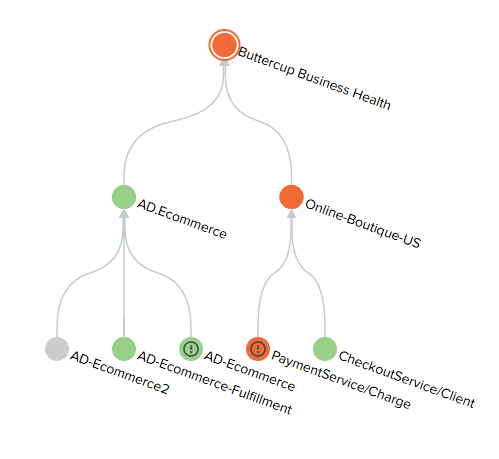
We have two existing services: “Online-Boutique-US” (representing an application running in Kubernetes and being monitored by Splunk Observability Cloud) and “AD.ECommerce” (representing an application monitored by AppDynamics). We want to create a new service and add it as a dependent of one of those services. It is not necessary to create a service for both during your first run through this workshop so pick one that you are more interested in to start with.

show-entry show-entry

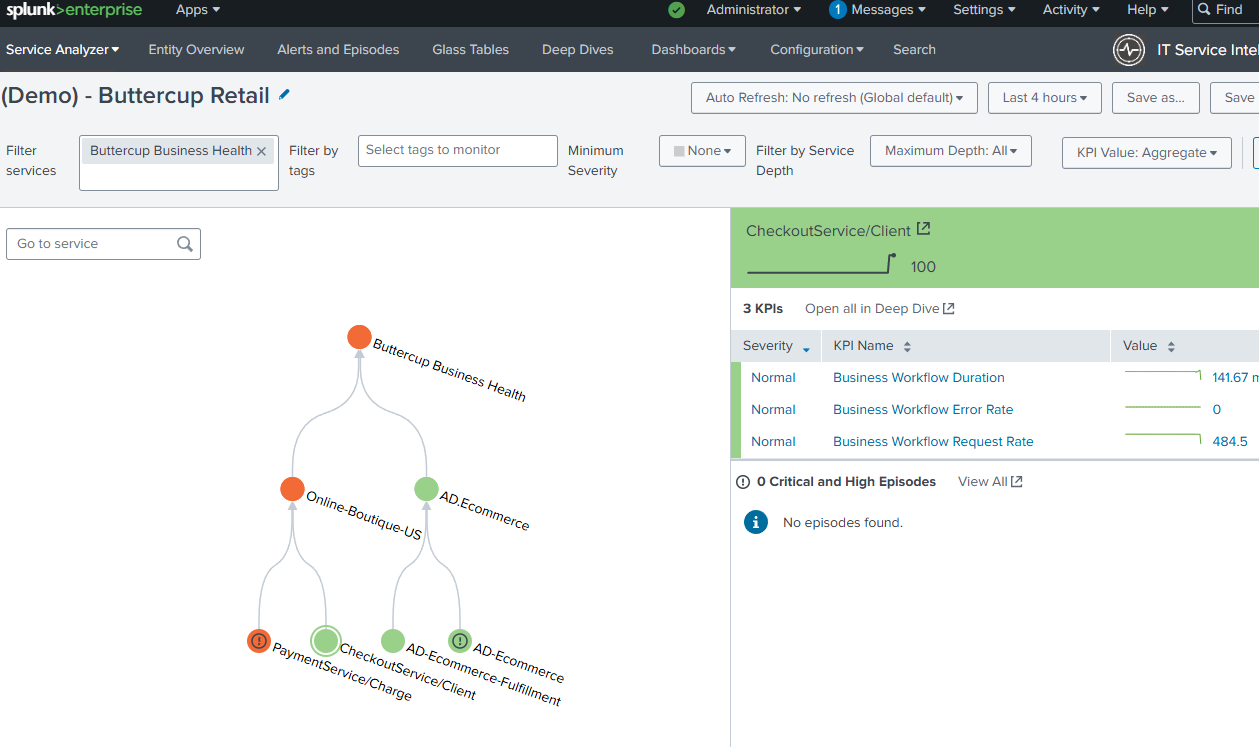
Return to your Splunk Environment and under Apps, select IT Service Intelligence

In the Default Analyzer update the Filter to “Buttercup Business Health”

Last Modified Jul 23, 2025

Subsections of 3. Creating Services in ITSI

Creating an O11y Based Service

Starting with an Observability Cloud Based Service

  1. Access Services: In ITSI click “Configuration”, click on “Services”.

  2. Create New Service: PaymentService2: Click “Create New Service”.

  3. Service Details (PaymentService2):

    • Title: “PaymentService2”
    • Description (Optional): e.g., “Payment Service for Hipster Shop - version 2”
  4. Select Template: Choose “Link service to a service template” and search for “Splunk APM Business Workflow KPIs” from the template dropdown. Click Create to save the new service.

  5. Entity Assignment:

    • The page will load and display the new Service and you will be on the Entities page. This demo defaults to selecting the paymentservice:grpc.hipstershop.PaymentService/Charge entity. In a real world situation you would need to match the workflow to the entity name manually.
    • Direct Entity Selection (If Available): Search for the entity using sf_workflow="paymentservice:grpc.hipstershop.PaymentService/Charge" and select it.
  6. Save Service (PaymentService2): Click “Save” to create “PaymentService2”.

  7. Settings: Click the “Settings” tab, enable Backfill and keep that standard 7 days. Enable the Service, and click “Save”

Setting PaymentService2’s Service Health as a Dependency for Online-Boutique-US

  1. Locate Online-Boutique-US: Find the “Online-Boutique-US” service in the service list.

  2. Edit Online-Boutique-US: Click “Edit”.

  3. Service Dependencies: Look for the “Service Dependencies” section.

  4. Add Dependency: There should be an option to add a dependent service. Search for “PaymentService2”.

  5. Select KPI: Check the box next to ServiceHealthScore for PaymentService2.

  6. Save Changes: Save the changes to the “Online-Boutique-US” service.

Verification

  • Click on “Service Analyzer” and select the “Default Analyzer”
  • Filter the service to just “Buttercup Business Health”
  • Verify that PaymentService2 is now present below Online-Boutique-US and should be in a grey status.

show-entry show-entry

Last Modified Jul 23, 2025

Creating an AppD Based Service

Starting with an AppDynamics Based Service

  1. Access Services: In ITSI click “Configuration”, click on “Services”.

  2. Create Service: AD-Ecommerce2: Click “Create Service -> Create Service”.

  3. Service Details (AD-Ecommerce2):

    • Title: “AD-Ecommerce2”
    • Description (Optional): e.g., “Ecommerce Service - version 2”
  4. Select Template: Choose “Link service to a service template” and search for “AppDynamics App Performance Monitoring” from the template dropdown. Click Create to save the new service.

  5. Entity Assignment:

    • The page will load and display the new Service and you will be on the Entities page. This demo defaults to selecting the AD-Ecommerce:18112:demo1.saas.appdynamics.com entity. In a real world situation you would need to match the entity_name to the entity name manually.
    • Direct Entity Selection (If Available): Search for the entity using entity_name="AD-Ecommerce:18112:demo1.saas.appdynamics.com" and select it.
  6. Settings: Click the “Settings” tab, enable Backfill and keep that standard 7 days. Enable the Service, and click “Save”

Setting AD-Ecommerce2’s Service Health as a Dependency for AD.Ecommerce

  1. Navigate back to Services page: Click “Configuration -> Services”

  2. Locate AD.Ecommerce: Find the “AD.Ecommerce” service in the service list.

  3. Edit AD.Ecommerce: Click “Edit”.

  4. Service Dependencies: Look for the “Service Dependencies” section.

  5. Add Dependency: There should be an option to add a dependent service. Search for “AD-Ecommerce2”.

  6. Select KPI: Check the box next to ServiceHealthScore for AD-Ecommerce2.

  7. Save Changes: Save the changes to the “AD.Ecommerce” service.

Verification

  • Click on “Service Analyzer” and select the “Default Analyzer”
  • Filter the service to just “Buttercup Business Health”
  • Verify that AD-Ecommerce2 is now present below AD.Ecommerce and should be in a grey status.

show-entry show-entry