Create Browser Application
2 minutesIn this exercise you will complete the following tasks:
- Access your AppDynamics Controller from your web browser.
- Create the Browser Application in the Controller.
- Configure the Browser Application.
Login to the Controller
Log into the AppDynamics SE Lab Controller using your Cisco credentials.
Create the Browser Application in the Controller
Use the following steps to create your new browser application.
Note
It is very important that you create a unique name for your browser application in Step 5 below.
- Click the User Experience tab on the top menu.
- Click the Browser Apps option under User Experience.
- Click Add App.
- Choose the option Create an Application manually.
- Type in a unique name for your browser application in the format Supercar-Trader-Web-<your_initials_or_name>-<four_random_numbers>
- Example 1: Supercar-Trader-Web-JFK-3179
- Example 2: Supercar-Trader-Web-JohnSmith-0953
- Click OK.

You should now see the Browser App Dashboard for the Supercar-Trader-Web-##-#### application.
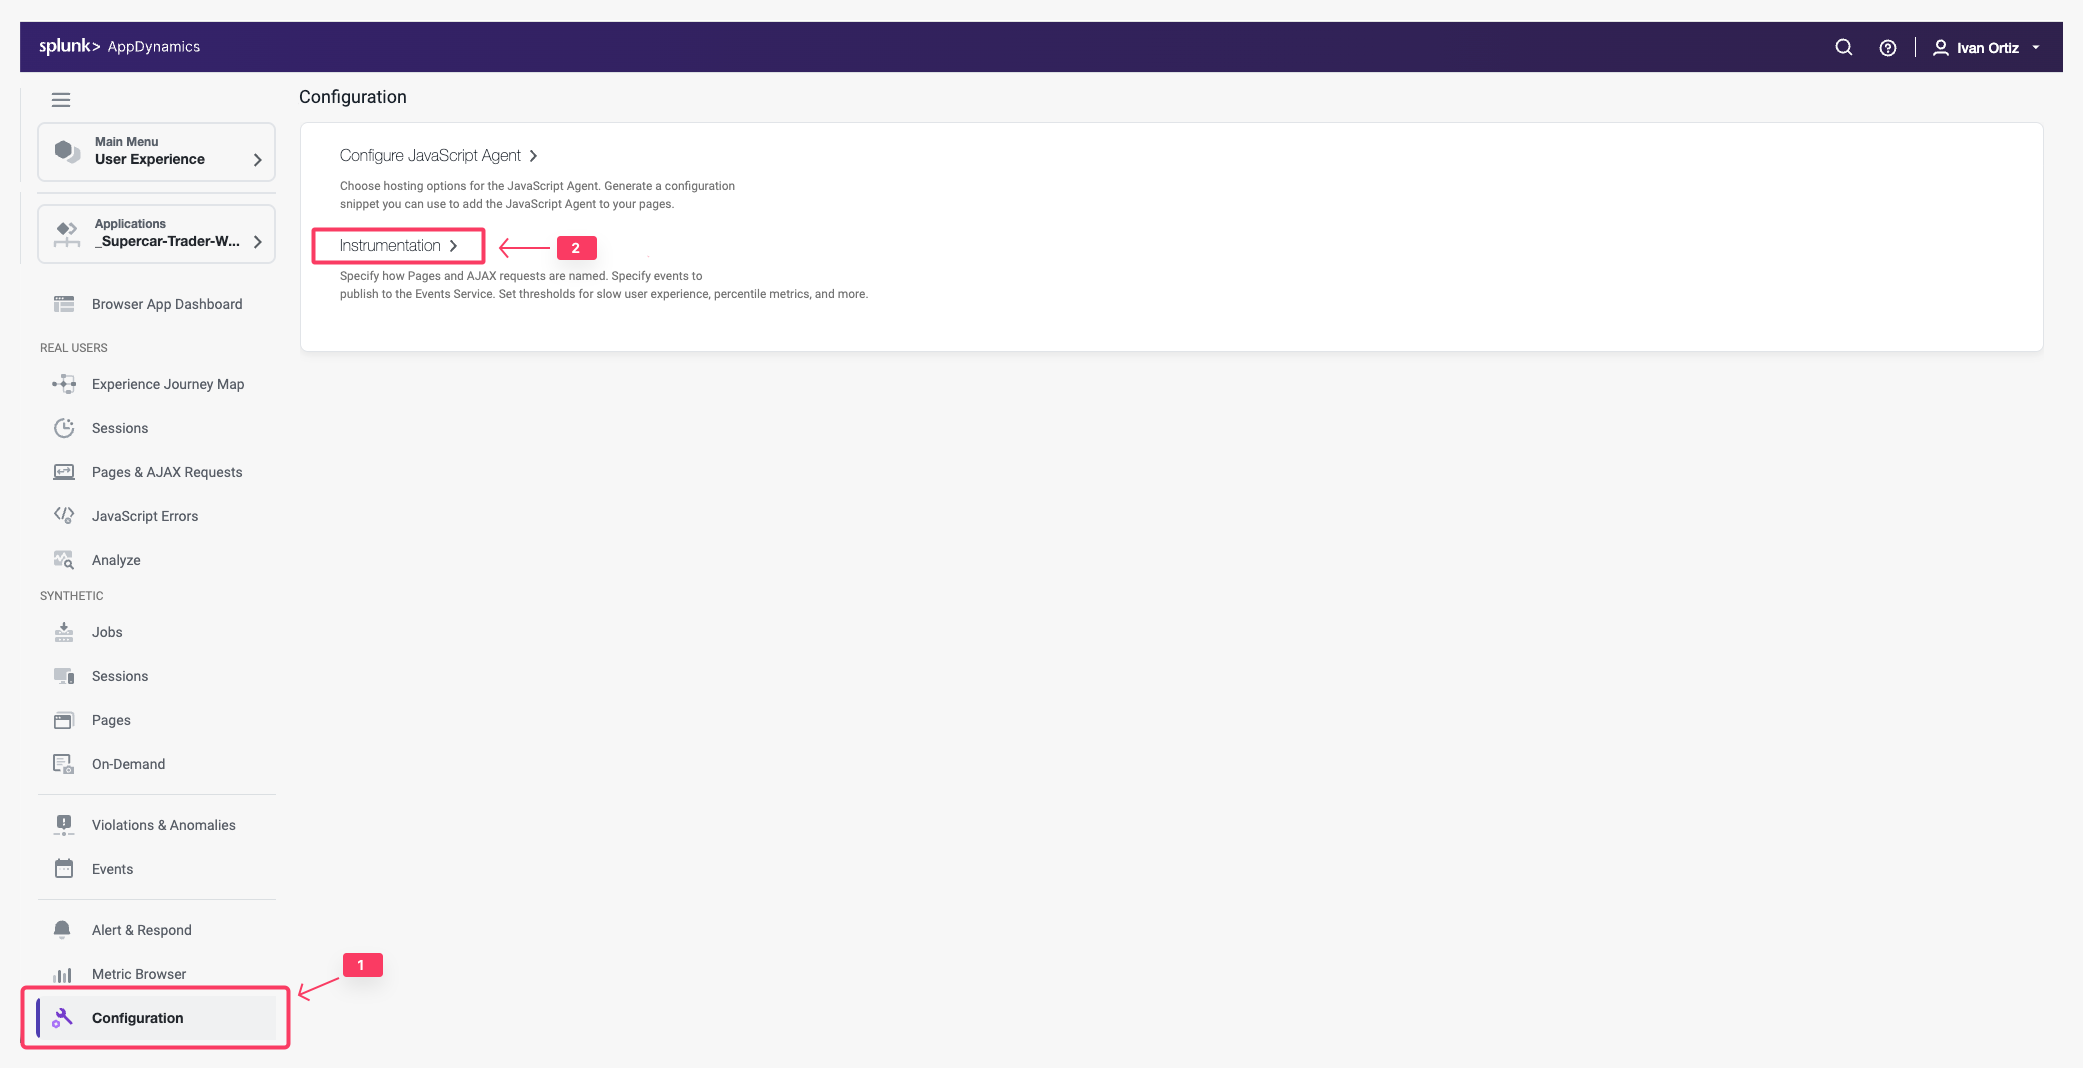
- Click the Configuration tab on the left menu.
- Click the Instrumentation option.
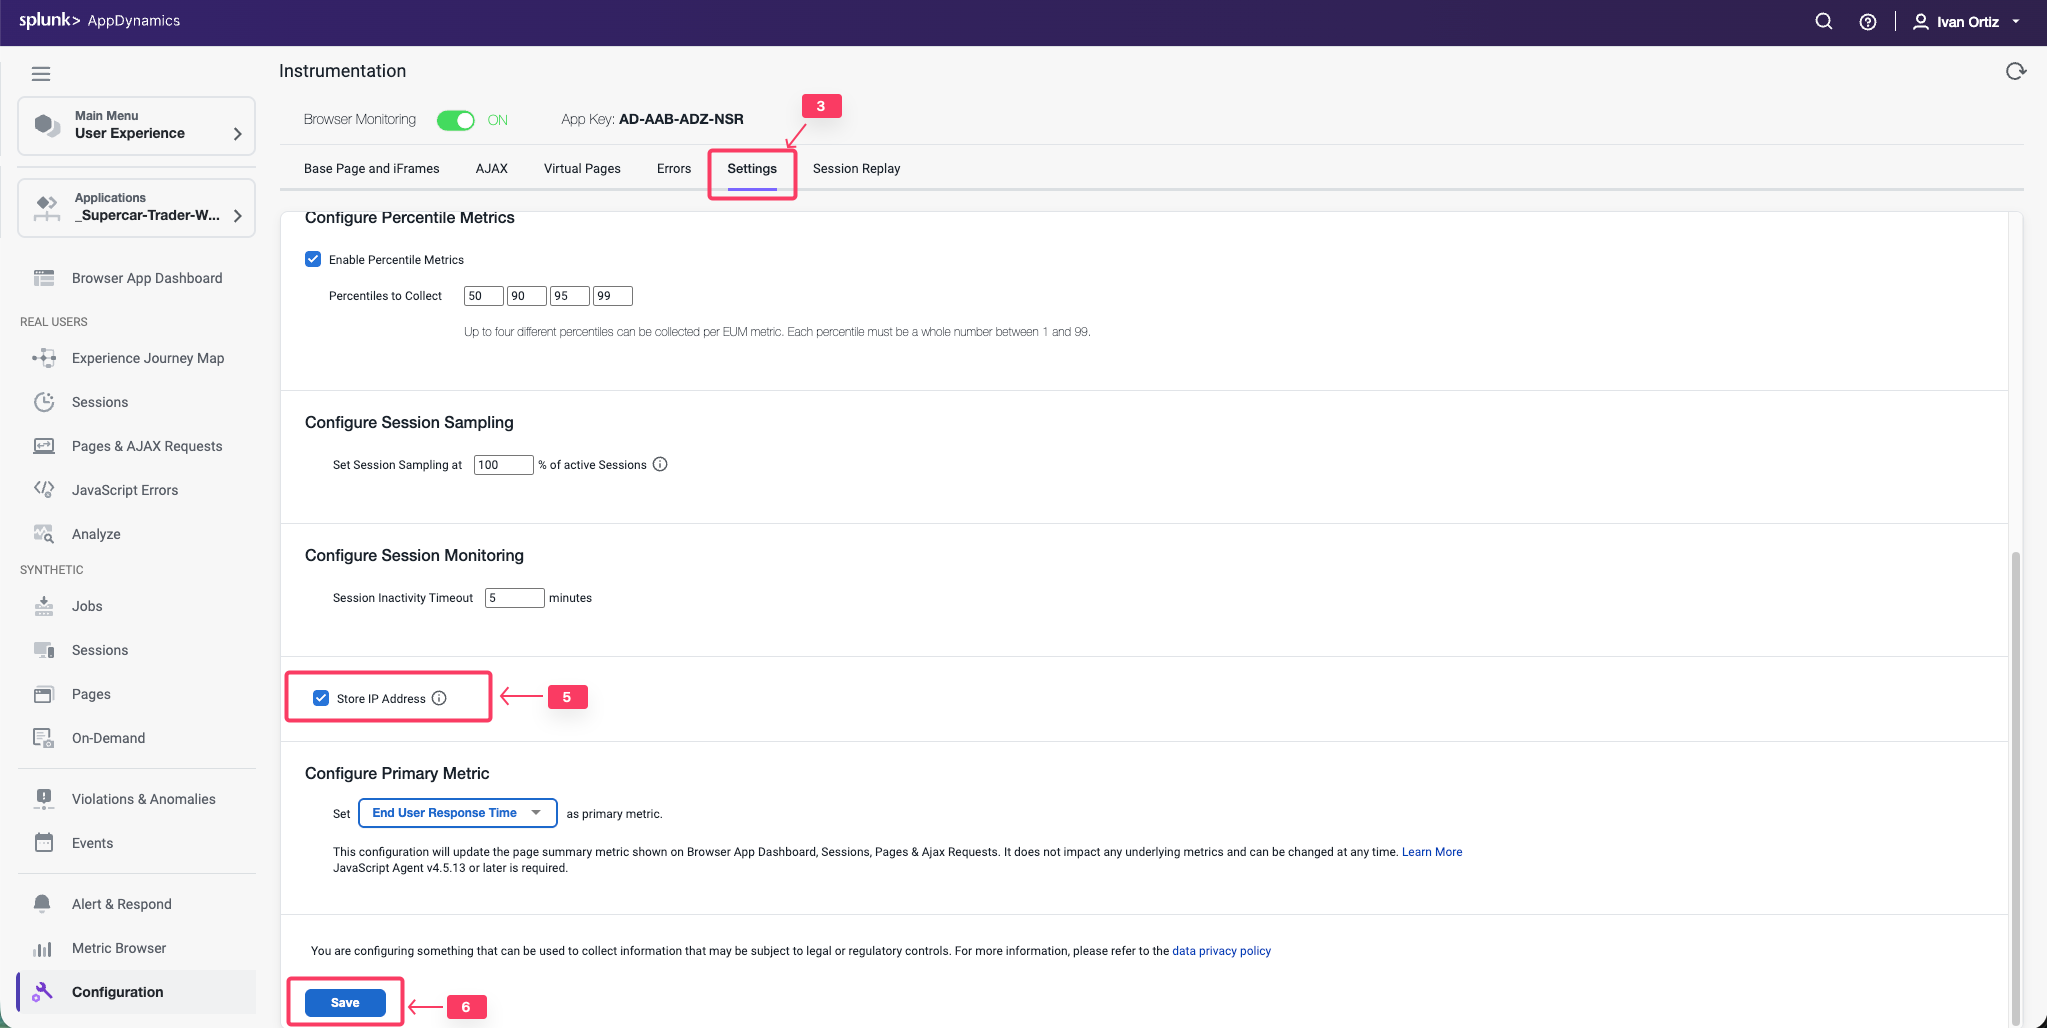
Change the default configuration to have the IP Address stored along with the data captured by the browser monitoring agent by following these steps.
- Click the Settings tab.
- Use the scroll bar on the right to scroll to the bottom of the screen.
- Check the Store IP Address check box.
- Click Save.
You can read more about configuring the Controller UI for Browser RUM here.