Configure Agent Injection
3 minutesIn this exercise you will complete the following tasks:
- Enable JavaScript Agent injection.
- Select Business Transactions for injection.
Enable JavaScript Agent injection
While AppDynamics supports various methods for injecting the JavaScript Agent, you will be using the Auto-Injection method in this lab. Follow these steps to enable the Auto-Injection of the JavaScipt Agent.
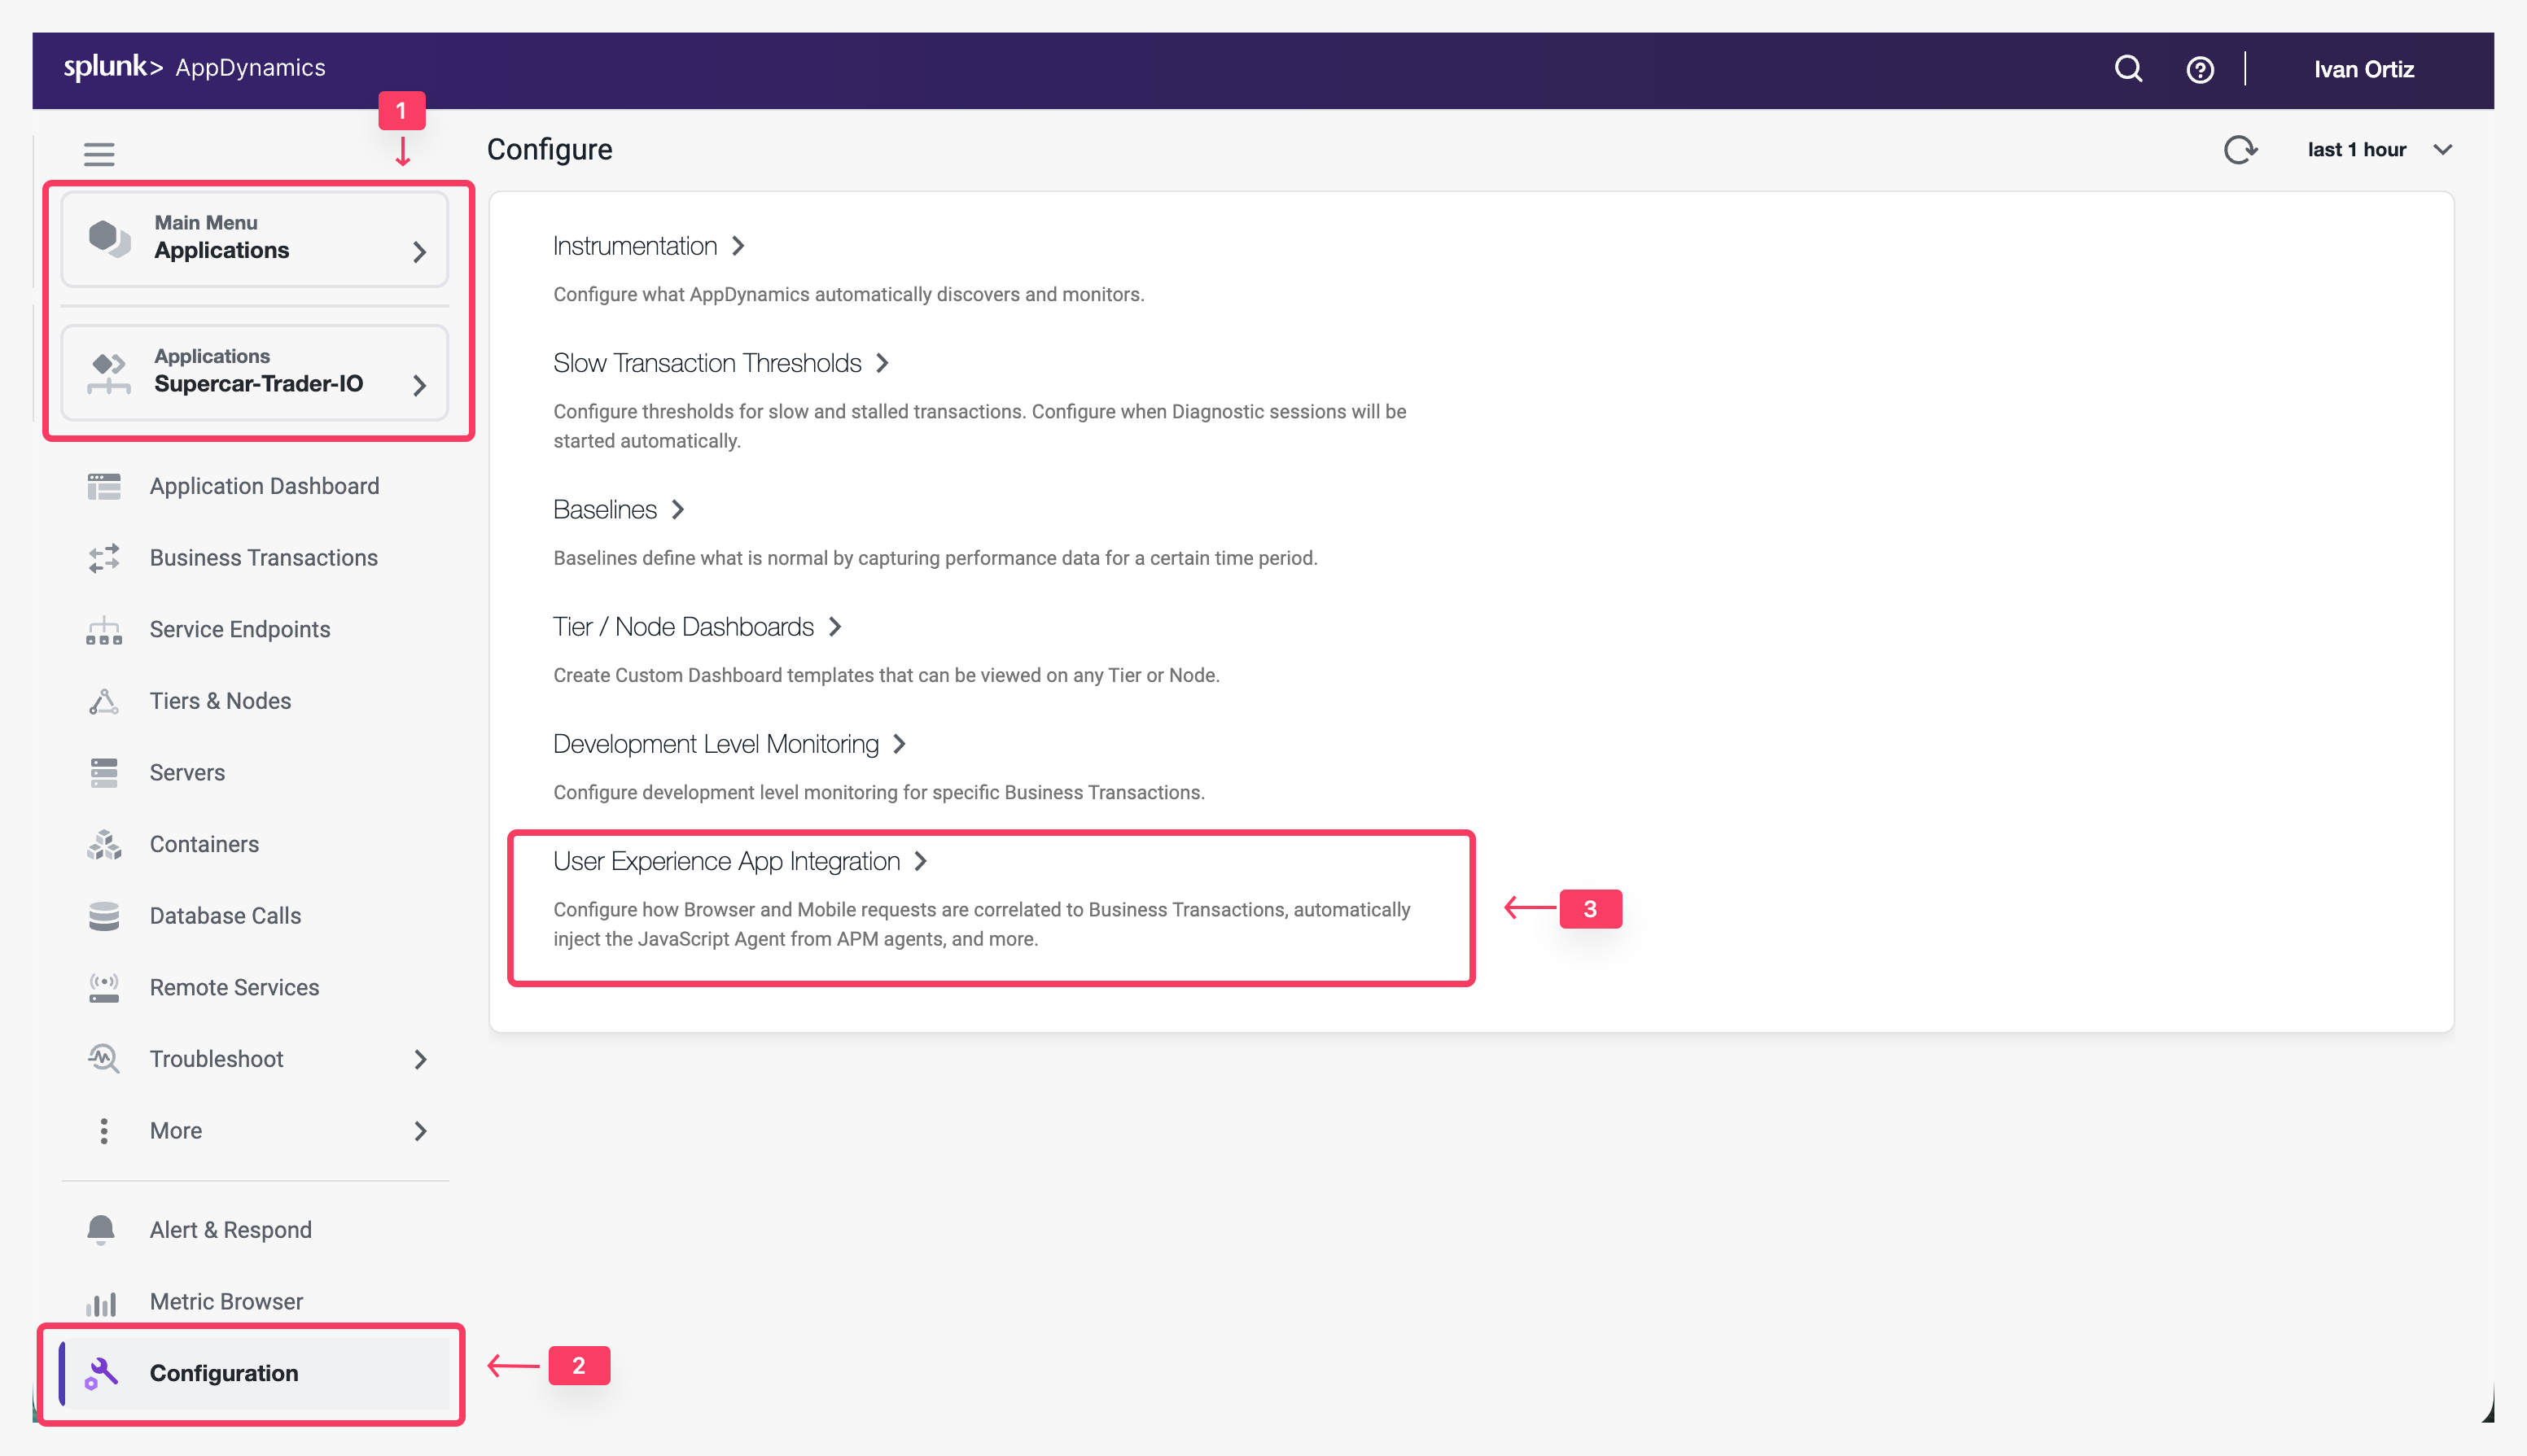
- Click the Applications tab on the left menu and drill into your Supercar-Trader-## application.
- Click the Configuration tab on the left menu at the bottom.
- Click the User Experience App Integration option.
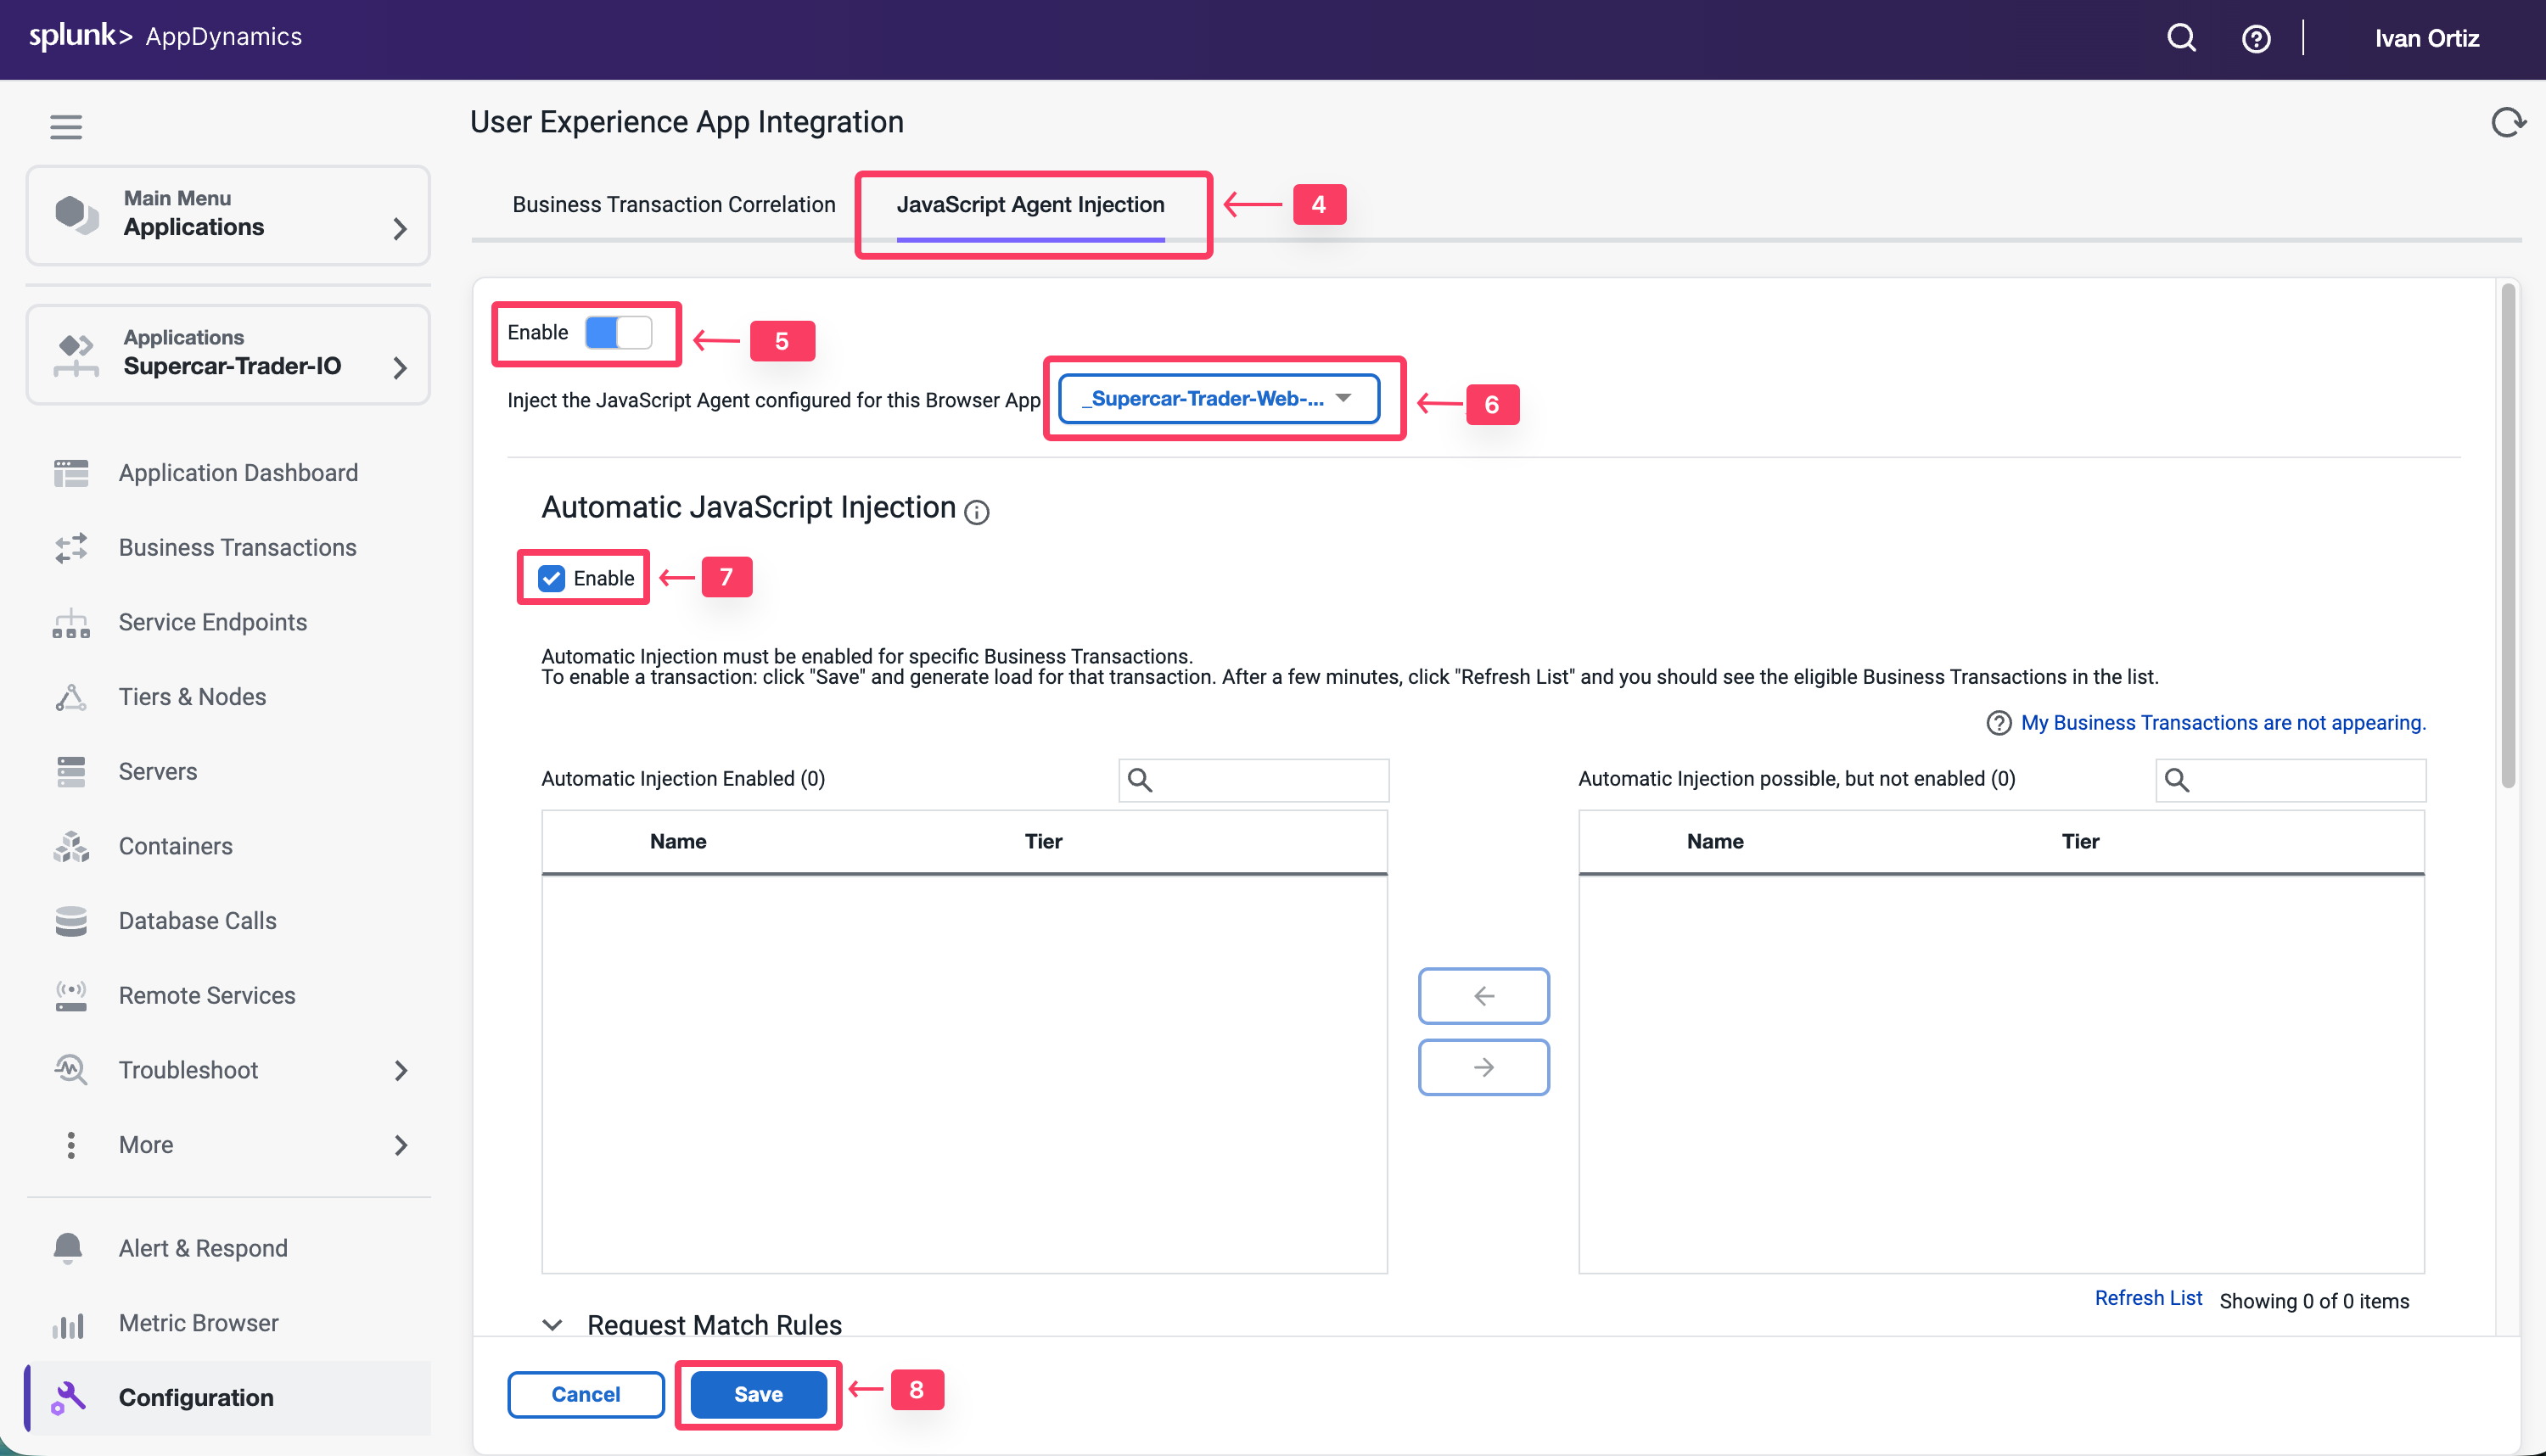
- Click the JavaScript Agent Injection tab.
- Click Enable so that it turns blue.
- Ensure that Supercar-Trader-Web-##-#### is the selected browser app. Choose the application that you created in the previous section
- Check the Enable check box under Enable JavaScript Injection
- Click Save.
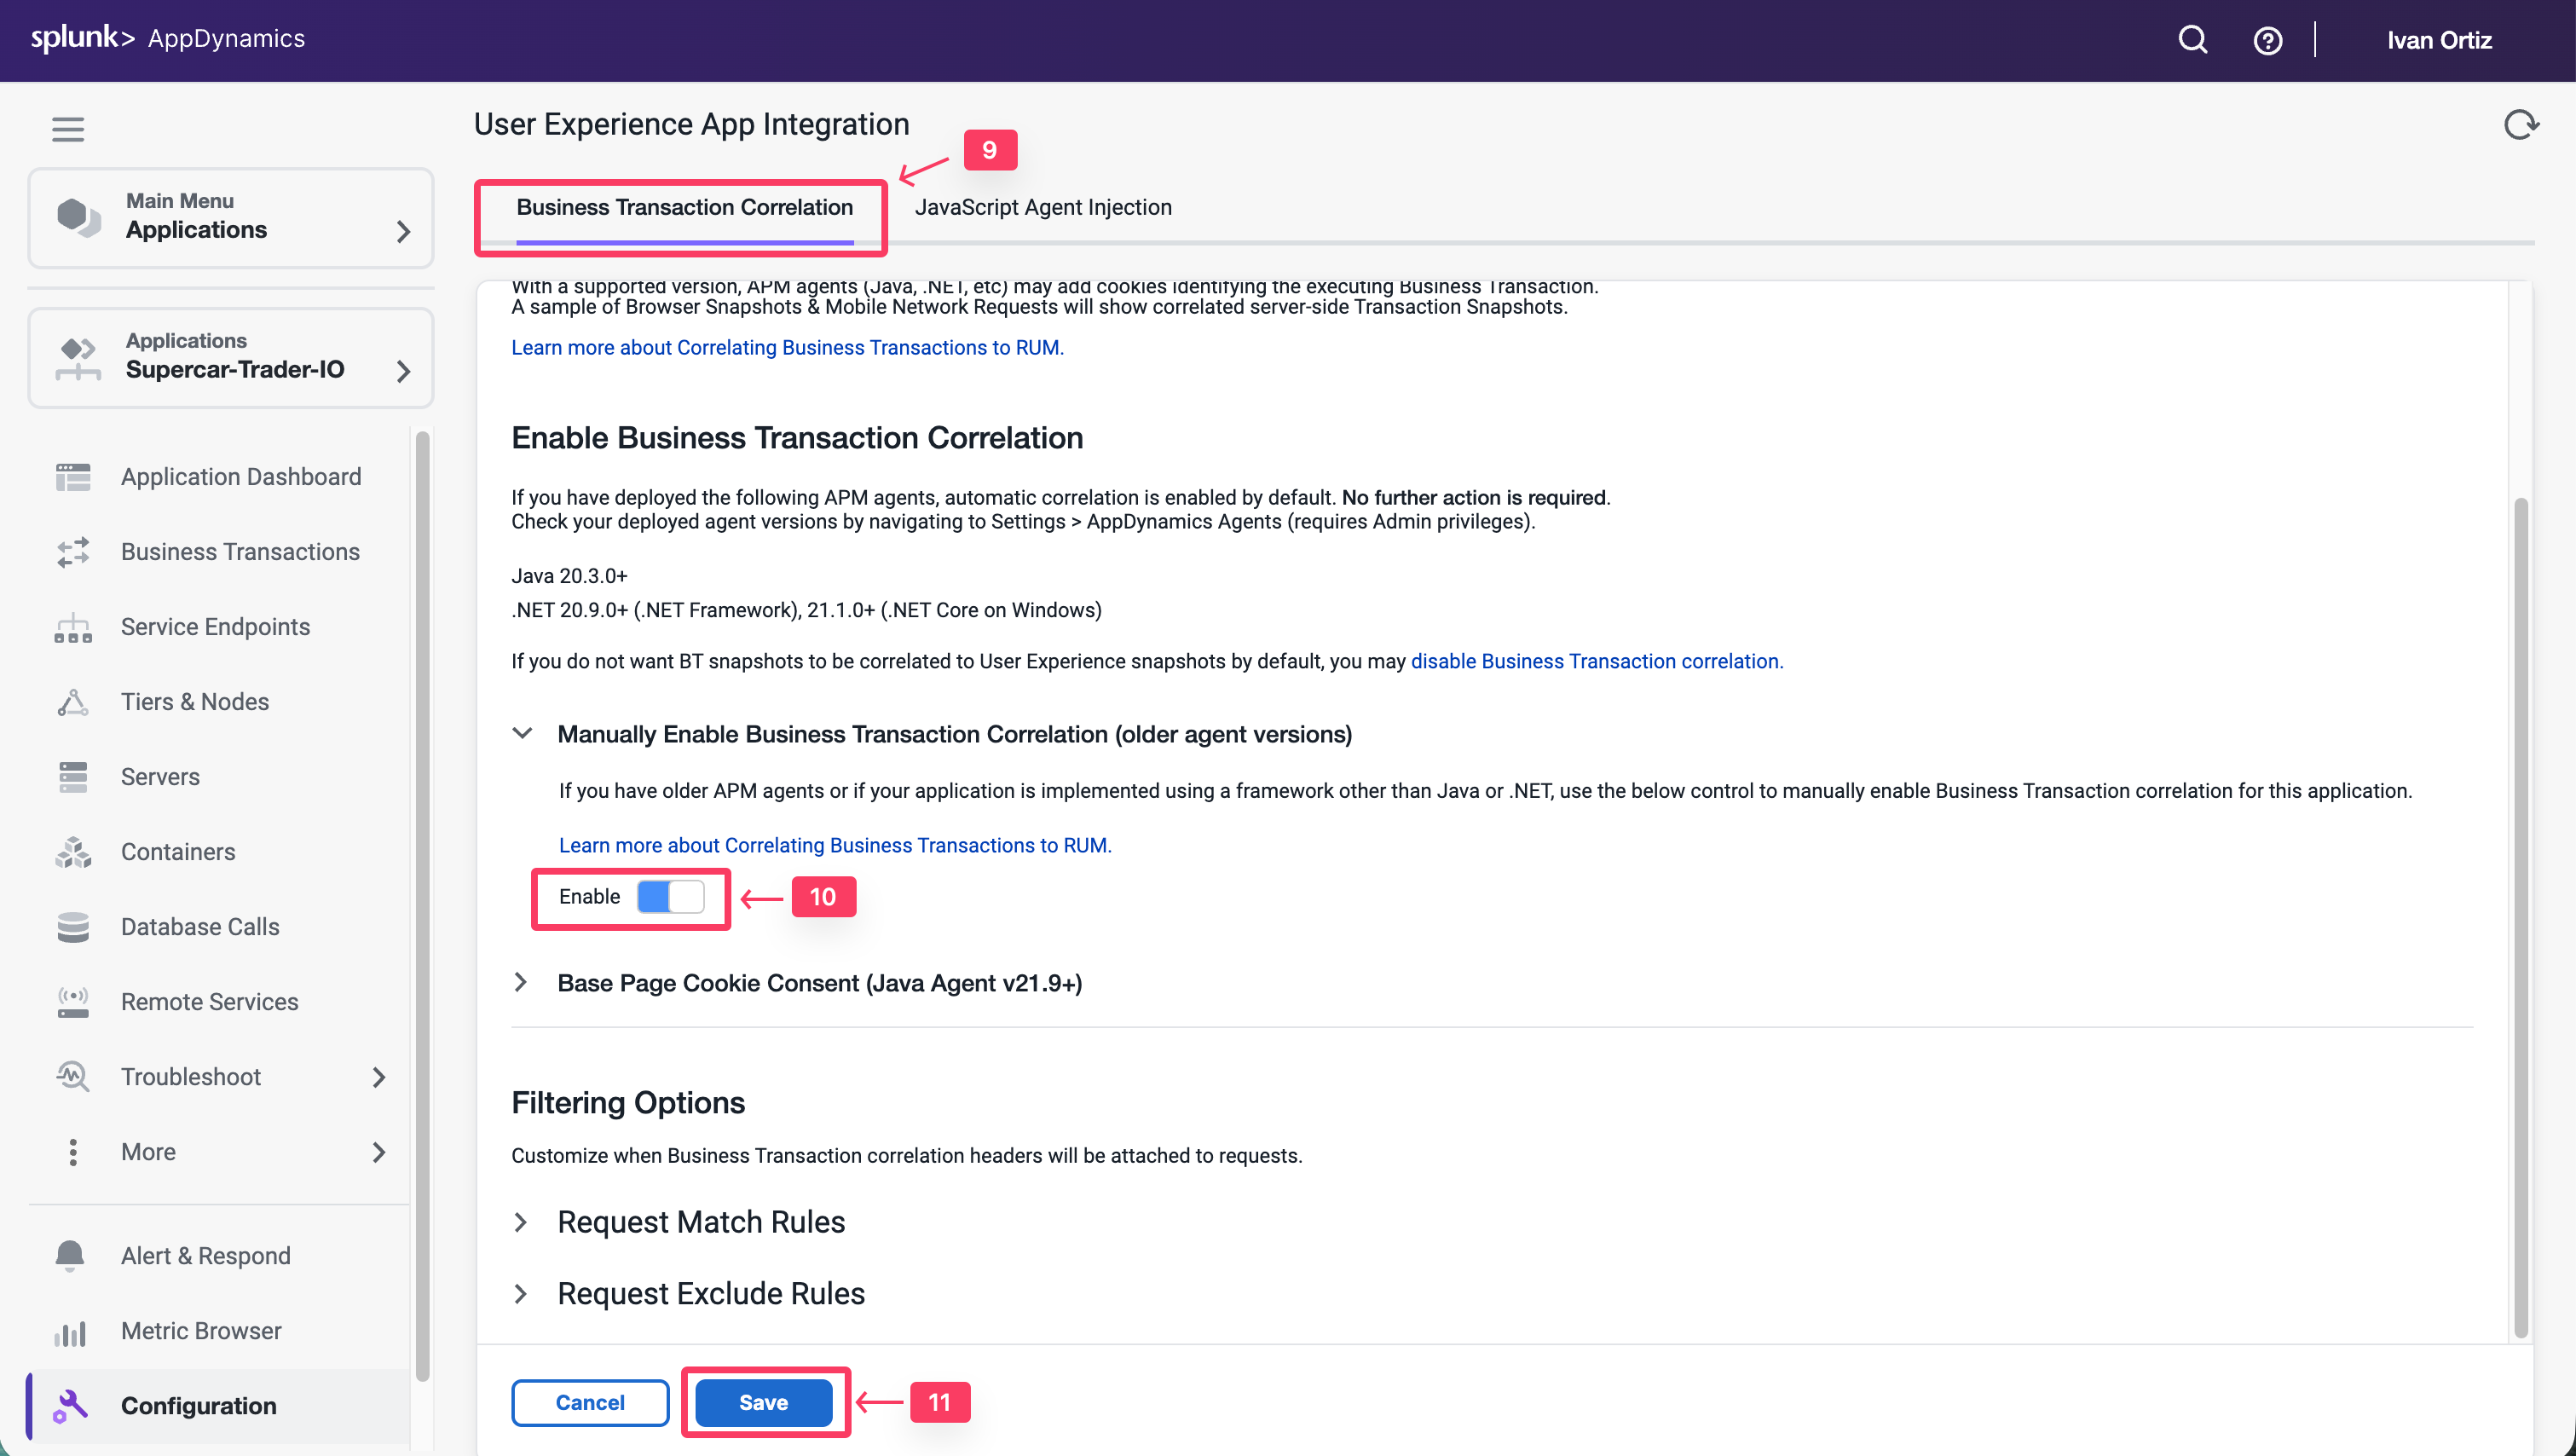
It takes a few minutes for the Auto-Injection to discover potential Business Transactions. While this is happening, use these steps to enable the Business Transaction Correlation. For newer APM agents this is done automatically
- Click the Business Transaction Correlation tab.
- Click the Enable button under the Manually Enable Business Transactions section.
- Click Save.
Select Business Transactions for injection
Use the following steps to select the Business Transactions for Auto-Injection.
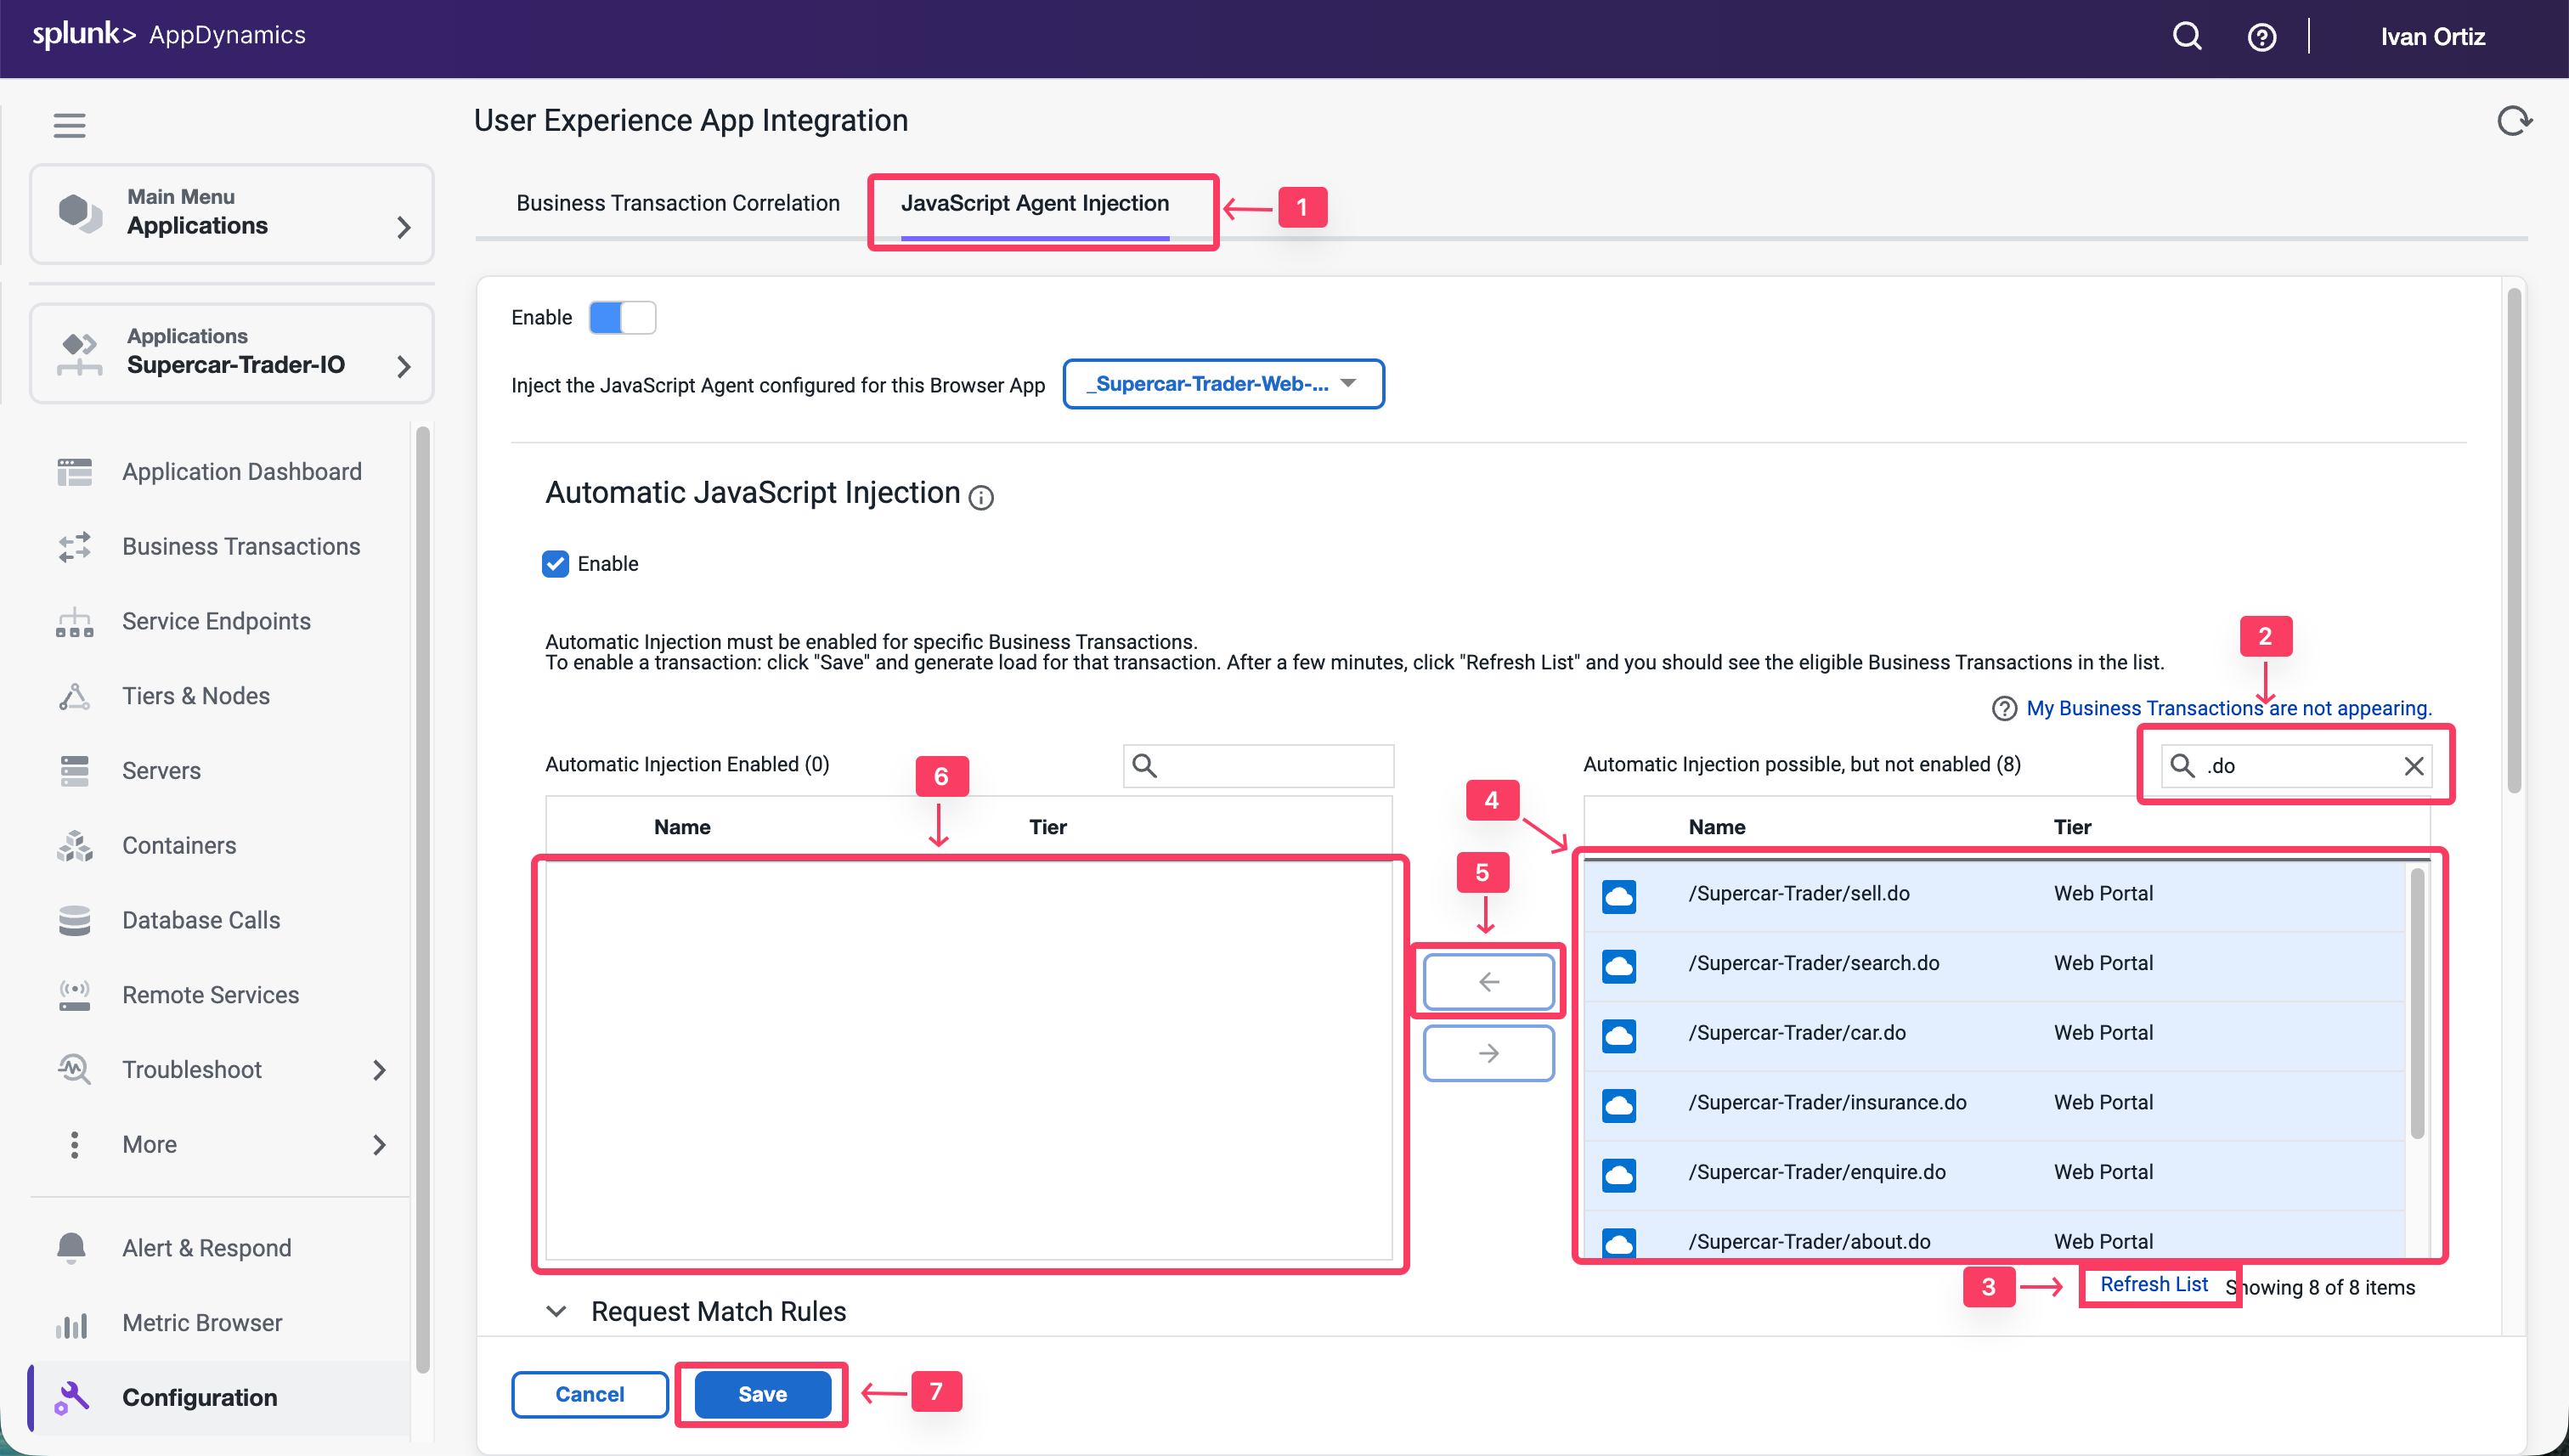
- Click the JavaScript Agent Injection tab.
- Type .do in the search box.
- Click the Refresh List link for the Business Transactions until all 9 BTs show up.
- Select all Business Transactions from the right list box.
- Click the arrow button to move them to the left list box.
- Ensure that all Business Transactions are moved into the left list box.
- Click Save.
You can read more about configuring Automatic Injection of the JavaScript Agent here.
Wait a few minutes for load to start showing up in your Browser Application.