Monitoring Agentic AI Applications
Add AI Defense Instrumentation
Note
This section of the workshop requires changes to multiple files.
If you’re not sure where to make the changes, or your application is no
longer working, please refer to the expected solution for this section
which is in the ~/workshop/agentic-ai/app-with-ai-defense folder.
Splunk Observability Cloud integrates with Cisco AI Defense to provide a consolidated view of security and privacy risks detected at runtime for your AI agents, allowing you to monitor performance and risks in one place.
This is referred to as Splunk AI Security Monitoring, which helps you to:
- Identify which agents, interactions, and services involve detected or blocked security and privacy risks, such as prompt injection and PII leakage
- Track risk trends alongside latency, errors, and other performance metrics over time
- Investigate risky interactions in trace context, down to specific prompts and responses
In this section, we’ll add the AI Defense integration to our Agentic AI application and review the resulting data in Splunk Observability Cloud.
How It Works #
Splunk AI Security Monitoring provides an instrumentation library,
opentelemetry-instrumentation-aidefense
,
to automate security and privacy risk tracing for Python-based AI agents.
This library captures and attaches security telemetry to calls that your
AI agents make to LLMs (such as OpenAI) and orchestration frameworks
(such as LangChain) to ensure that every prompt and response can be
audited against security guardrails and recorded within a unified
OpenTelemetry trace. It does this by adding the
gen_ai.security.event_id attribute to LLM or workflow spans.
SDK vs. Gateway Mode #
The opentelemetry-instrumentation-aidefense library can operate in either SDK mode or gateway mode:
- With the SDK mode, the developer adds explicit security checks using
inspect_prompt(). This option is best for developers that want full control how security checks are implemented and how issues are addressed. - With Gateway mode, LLM calls proxied through Cisco AI Defense Gateway so application code changes are not required. This mode is supported for popular commercial LLMs such as OpenAI, Anthropic, etc.
This workshop utilizes SDK mode with Azure OpenAI.
Setup the Cisco AI Defense Integration #
The first step is to Set up an integration with Cisco AI Defense .
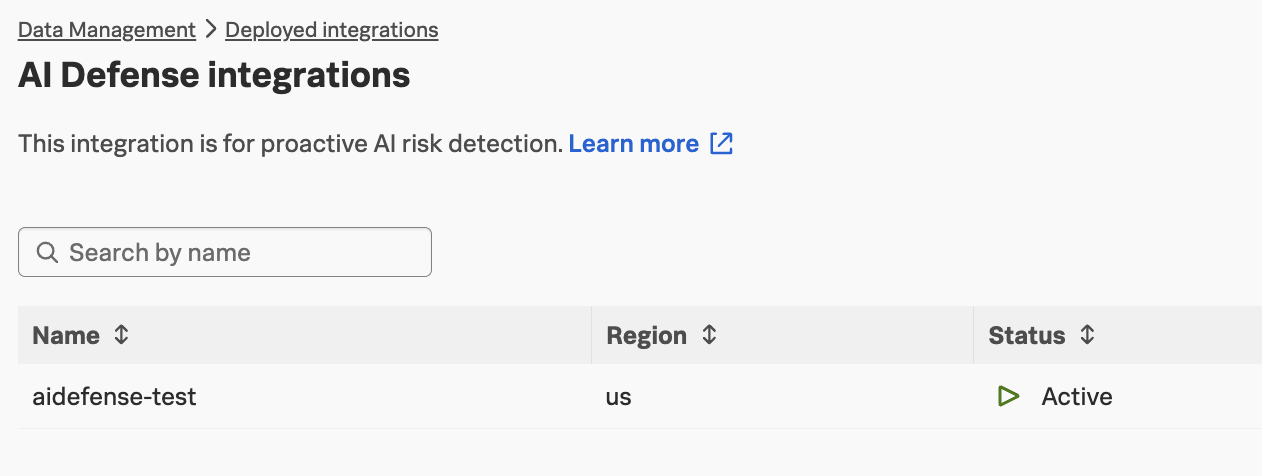
If you navigate to Data Management -> Deployed integrations and search for AI Defense,
you’ll see that this integration has already been configured:
Note
The aiDefenseIntegration feature flag must be enabled to see this integration
Add Instrumentation Packages #
Next, we need to install several instrumentation packages. We can achieve this by
opening the ~/workshop/agentic-ai/base-app/requirements.txt for editing and adding
the following packages:
# AI Defense instrumentation (Gateway Mode support in v0.2.0+)
splunk-otel-instrumentation-aidefense>=0.2.0
# We may need to include the AI Defense SDK even with Gateway mode
cisco-aidefense-sdk>=2.0.0
# HTTP client (httpx is required for Gateway Mode to work)
httpx>=0.24.0
Check your work before proceeding
Run the following command to compare your changes with the expected solution:
diff ~/workshop/agentic-ai/base-app/requirements.txt ~/workshop/agentic-ai/app-with-ai-defense/requirements.txtImport the AI Defense SDK #
Let’s modify the application to add Cisco AI Defense protection to our agents.
Open the ~/workshop/agentic-ai/base-app/main.py file for editing.
Import and activate AI Defense protection between the lines that
say Begin: Initialize AI Defense and End: Initialize AI Defense:
# Begin: Initialize AI Defense

from aidefense.runtime import agentsec
agentsec.protect(
    api_mode={
        "llm": {
            "mode": "monitor",    # "enforce" to block violations, "monitor" to log only
            "endpoint": os.environ["AI_DEFENSE_API_MODE_LLM_ENDPOINT"],
            "api_key": os.environ["AI_DEFENSE_API_MODE_LLM_API_KEY"],
        }
    }
)

# End: Initialize AI Defense
Info
Importing and activating protection needs to be done BEFORE importing LLM client packages such as langchain_openai
Check your work before proceeding
Run the following command to compare your changes with the expected solution:
diff ~/workshop/agentic-ai/base-app/main.py ~/workshop/agentic-ai/app-with-ai-defense/main.pyBuild an Updated Docker Image #
Build an updated Docker image with a new tag:
cd ~/workshop/agentic-ai/base-app
docker build --platform linux/amd64 -t localhost:9999/agentic-ai-app:app-with-ai-defense .
docker push localhost:9999/agentic-ai-app:app-with-ai-defense
Tip
If the image is taking too long to build, consider using the pre-built
image instead. To do so, update the image name in
the ~/workshop/agentic-ai/base-app/k8s.yaml file to ghcr.io/splunk/agentic-ai-app:app-with-ai-defense
instead of localhost:9999/agentic-ai-app:app-with-ai-defense.
Create a Secret for AI Defense #
Run the following command to create a secret to store the the Cisco AI Defense inspection API key and endpoint:
kubectl create secret generic ai-defense-secret -n travel-agent --from-literal=ai-defense-inspection-api-key="$AI_DEFENSE_INSPECTION_API_KEY" --from-literal=ai-defense-inspection-api-endpoint="$AI_DEFENSE_INSPECTION_API_ENDPOINT"Update the Kubernetes Manifest #
Open the ~/workshop/agentic-ai/base-app/k8s.yaml file for update the image
to ensure we’re using the one with AI Defense:
image: localhost:9999/agentic-ai-app:app-with-ai-defenseAdd the following environment variables to the end of the environment variable section:
            - name: AI_DEFENSE_API_MODE_LLM_API_KEY
              valueFrom:
                secretKeyRef:
                  name: ai-defense-secret
                  key: ai-defense-inspection-api-key
            - name: AI_DEFENSE_API_MODE_LLM_ENDPOINT
              valueFrom:
                secretKeyRef:
                  name: ai-defense-secret
                  key: ai-defense-inspection-api-endpoint
Check your work before proceeding
Run the following command to compare your changes with the expected solution:
diff ~/workshop/agentic-ai/base-app/k8s.yaml ~/workshop/agentic-ai/app-with-ai-defense/k8s.yamlDeploy the Updated Application #
We can deploy the updated application using the manifest file as follows:
kubectl apply -f ~/workshop/agentic-ai/base-app/k8s.yamlTest the Application in Kubernetes #
Ensure the new application pod has started successfully and the old pod is no longer present:
kubectl get pods -n travel-agentNAME READY STATUS RESTARTS AGE
travel-planner-langchain-68977dc5c4-4w7p9 1/1 Running 0 41sThen, run the following command to test the application:
curl http://travel-planner.localhost/travel/plan \
  -H "Content-Type: application/json" \
  -d '{
    "origin": "Seattle",
    "destination": "Tokyo",
    "user_request": "We are planning a week-long trip to Seattle from Tokyo. Looking for boutique hotel, business-class flights and unique experiences.",
    "travelers": 2
  }'
For now, just ensure that the application is still working. In the next section, we’ll add a security risk and then show how it can be detected.