

Configure Catalyst Center Notifications
Setup Cisco Catalyst Inbound Notifications
ITSI 4.21 includes native data integrations for Cisco Meraki and Catalyst Center alerts. The recommended method is to activate the default connections, which are pre-configured with the required settings to normalize alerts. The default configuration can be customized to meet your customers specific use cases.
In this section you’ll customize the alert so that you can correlate events across locations as well as update the status mapping so that episodes can automatically resolve when the service health returns to normal.
Exercise: Configure Alert Integrations
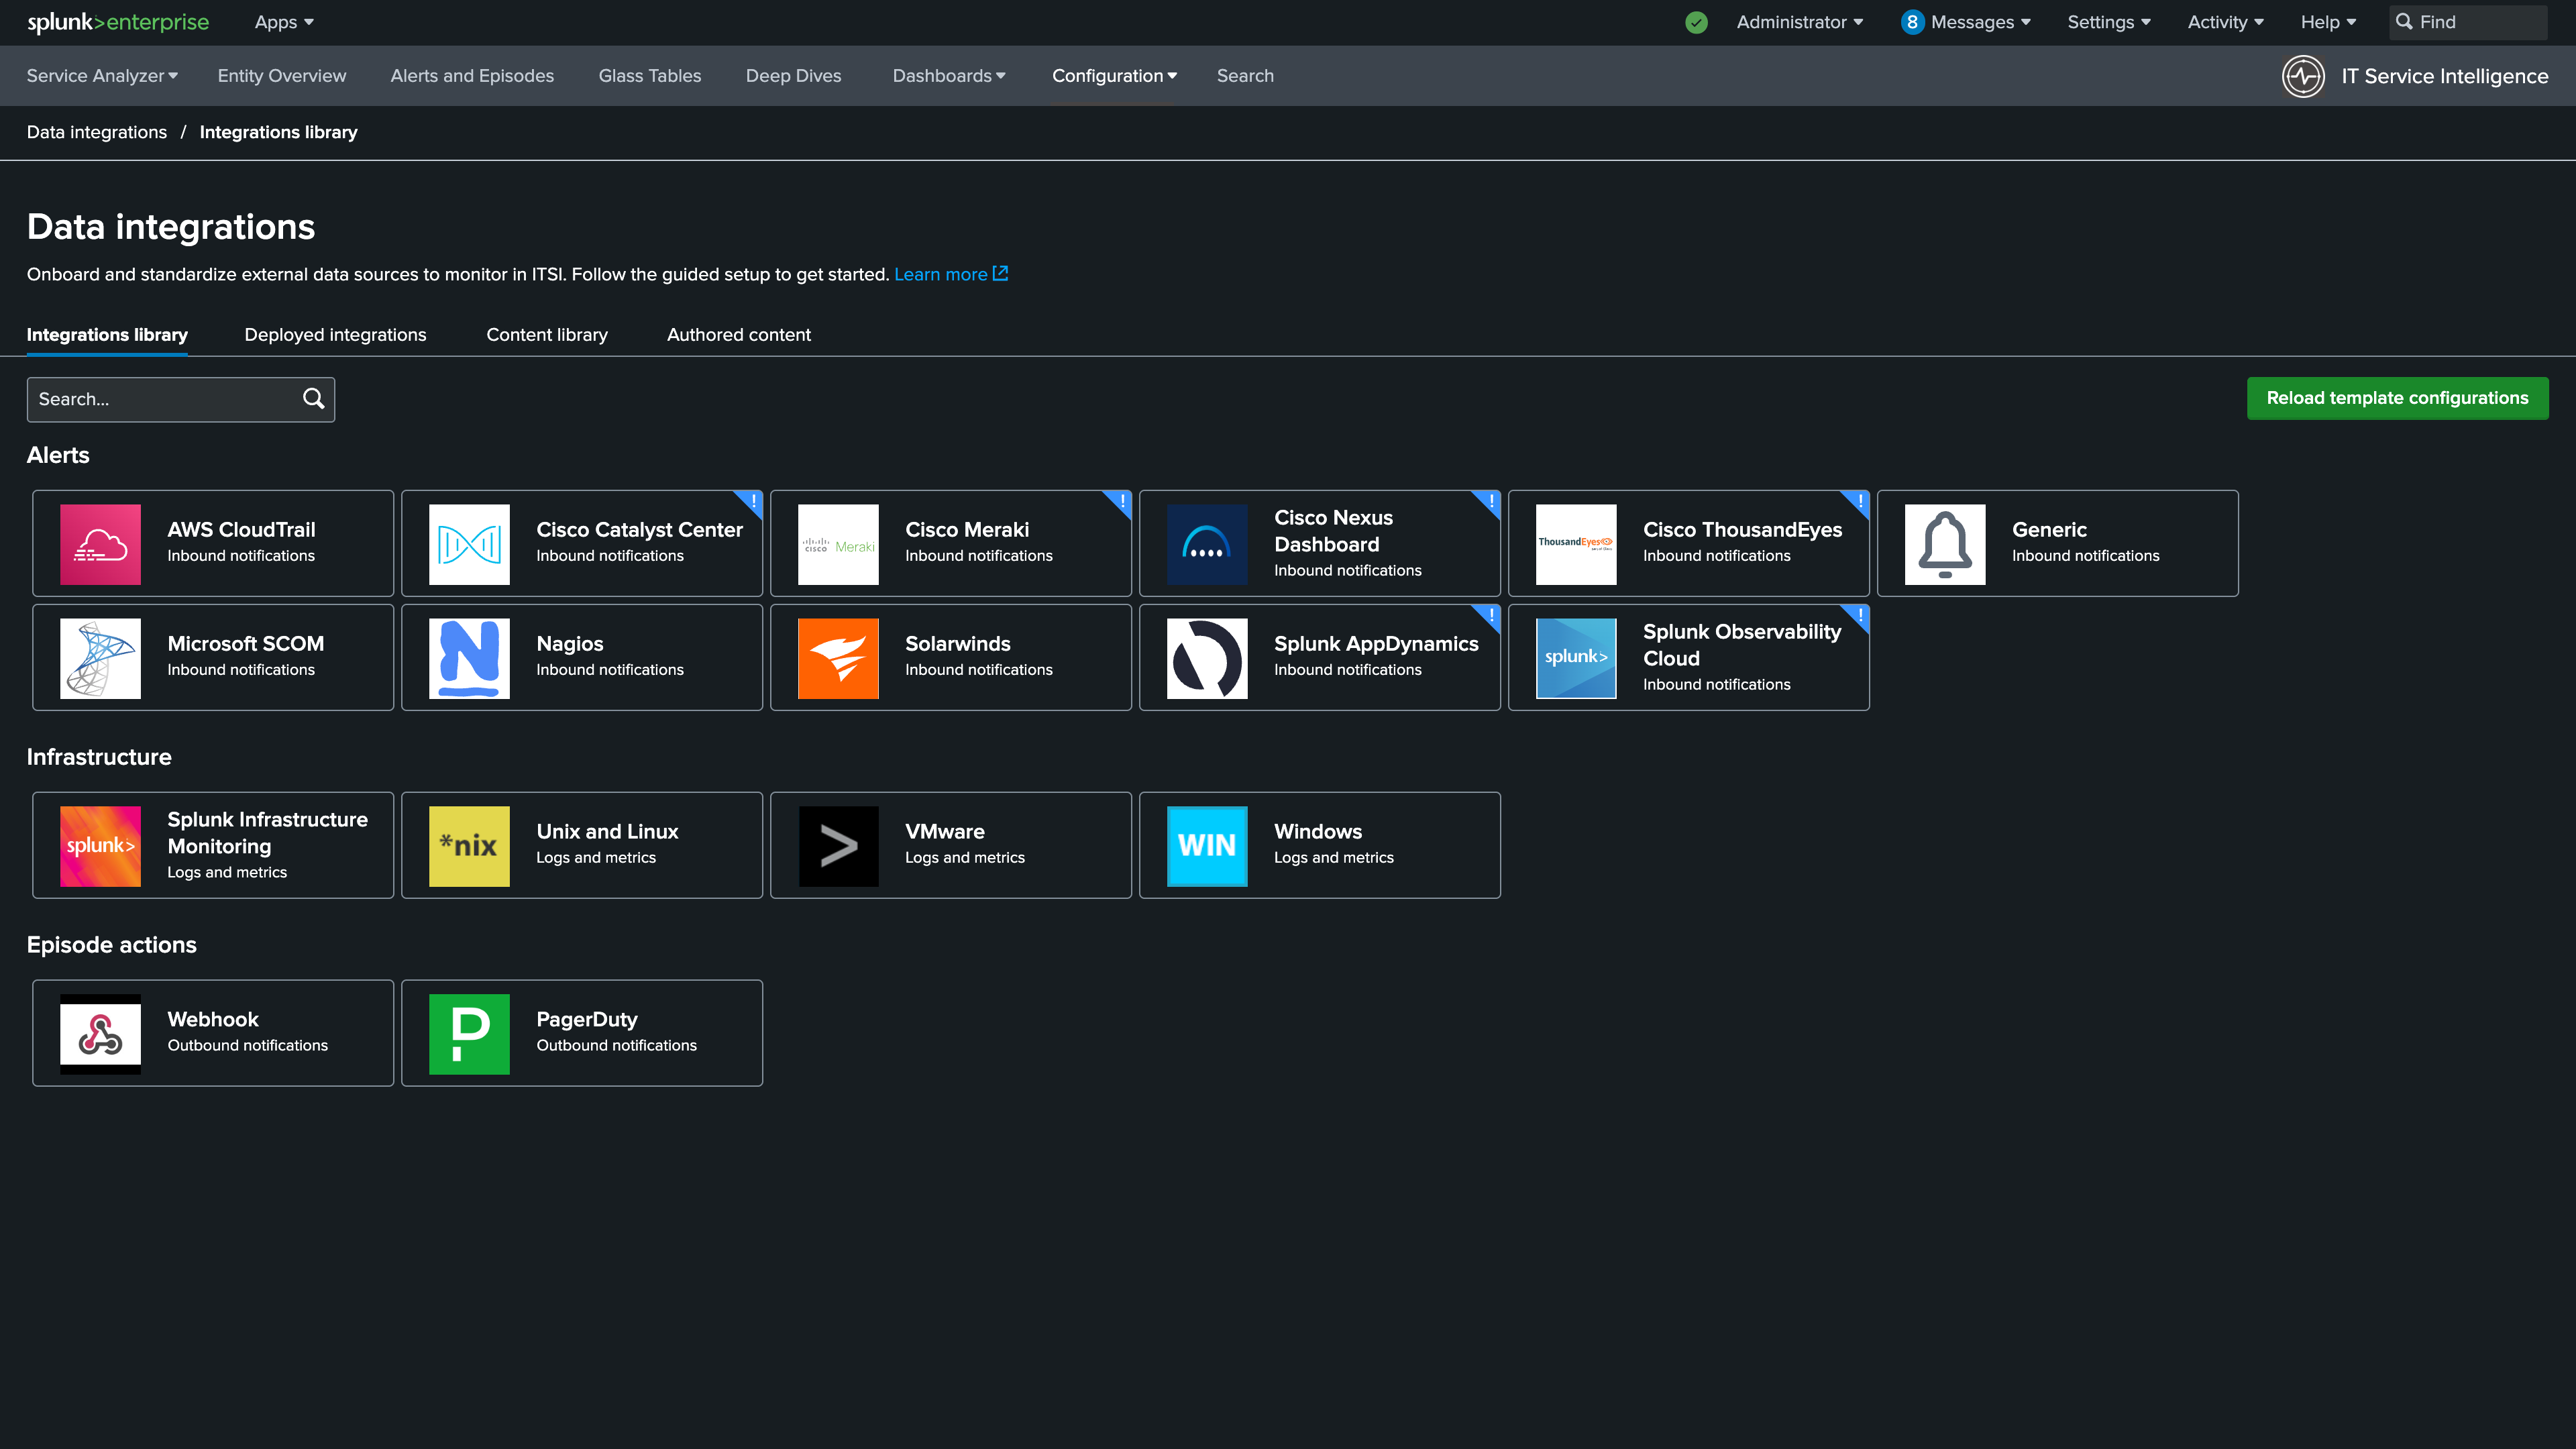
1. In ITSI, navigate to Configuration > Data Integrations.
2. Under the Alerts section of the Integrations library, select Cisco Catalyst Center.
Info
The Alerts section of the Data Integrations library contains the pre-built connections for Catalyst Center and Meraki
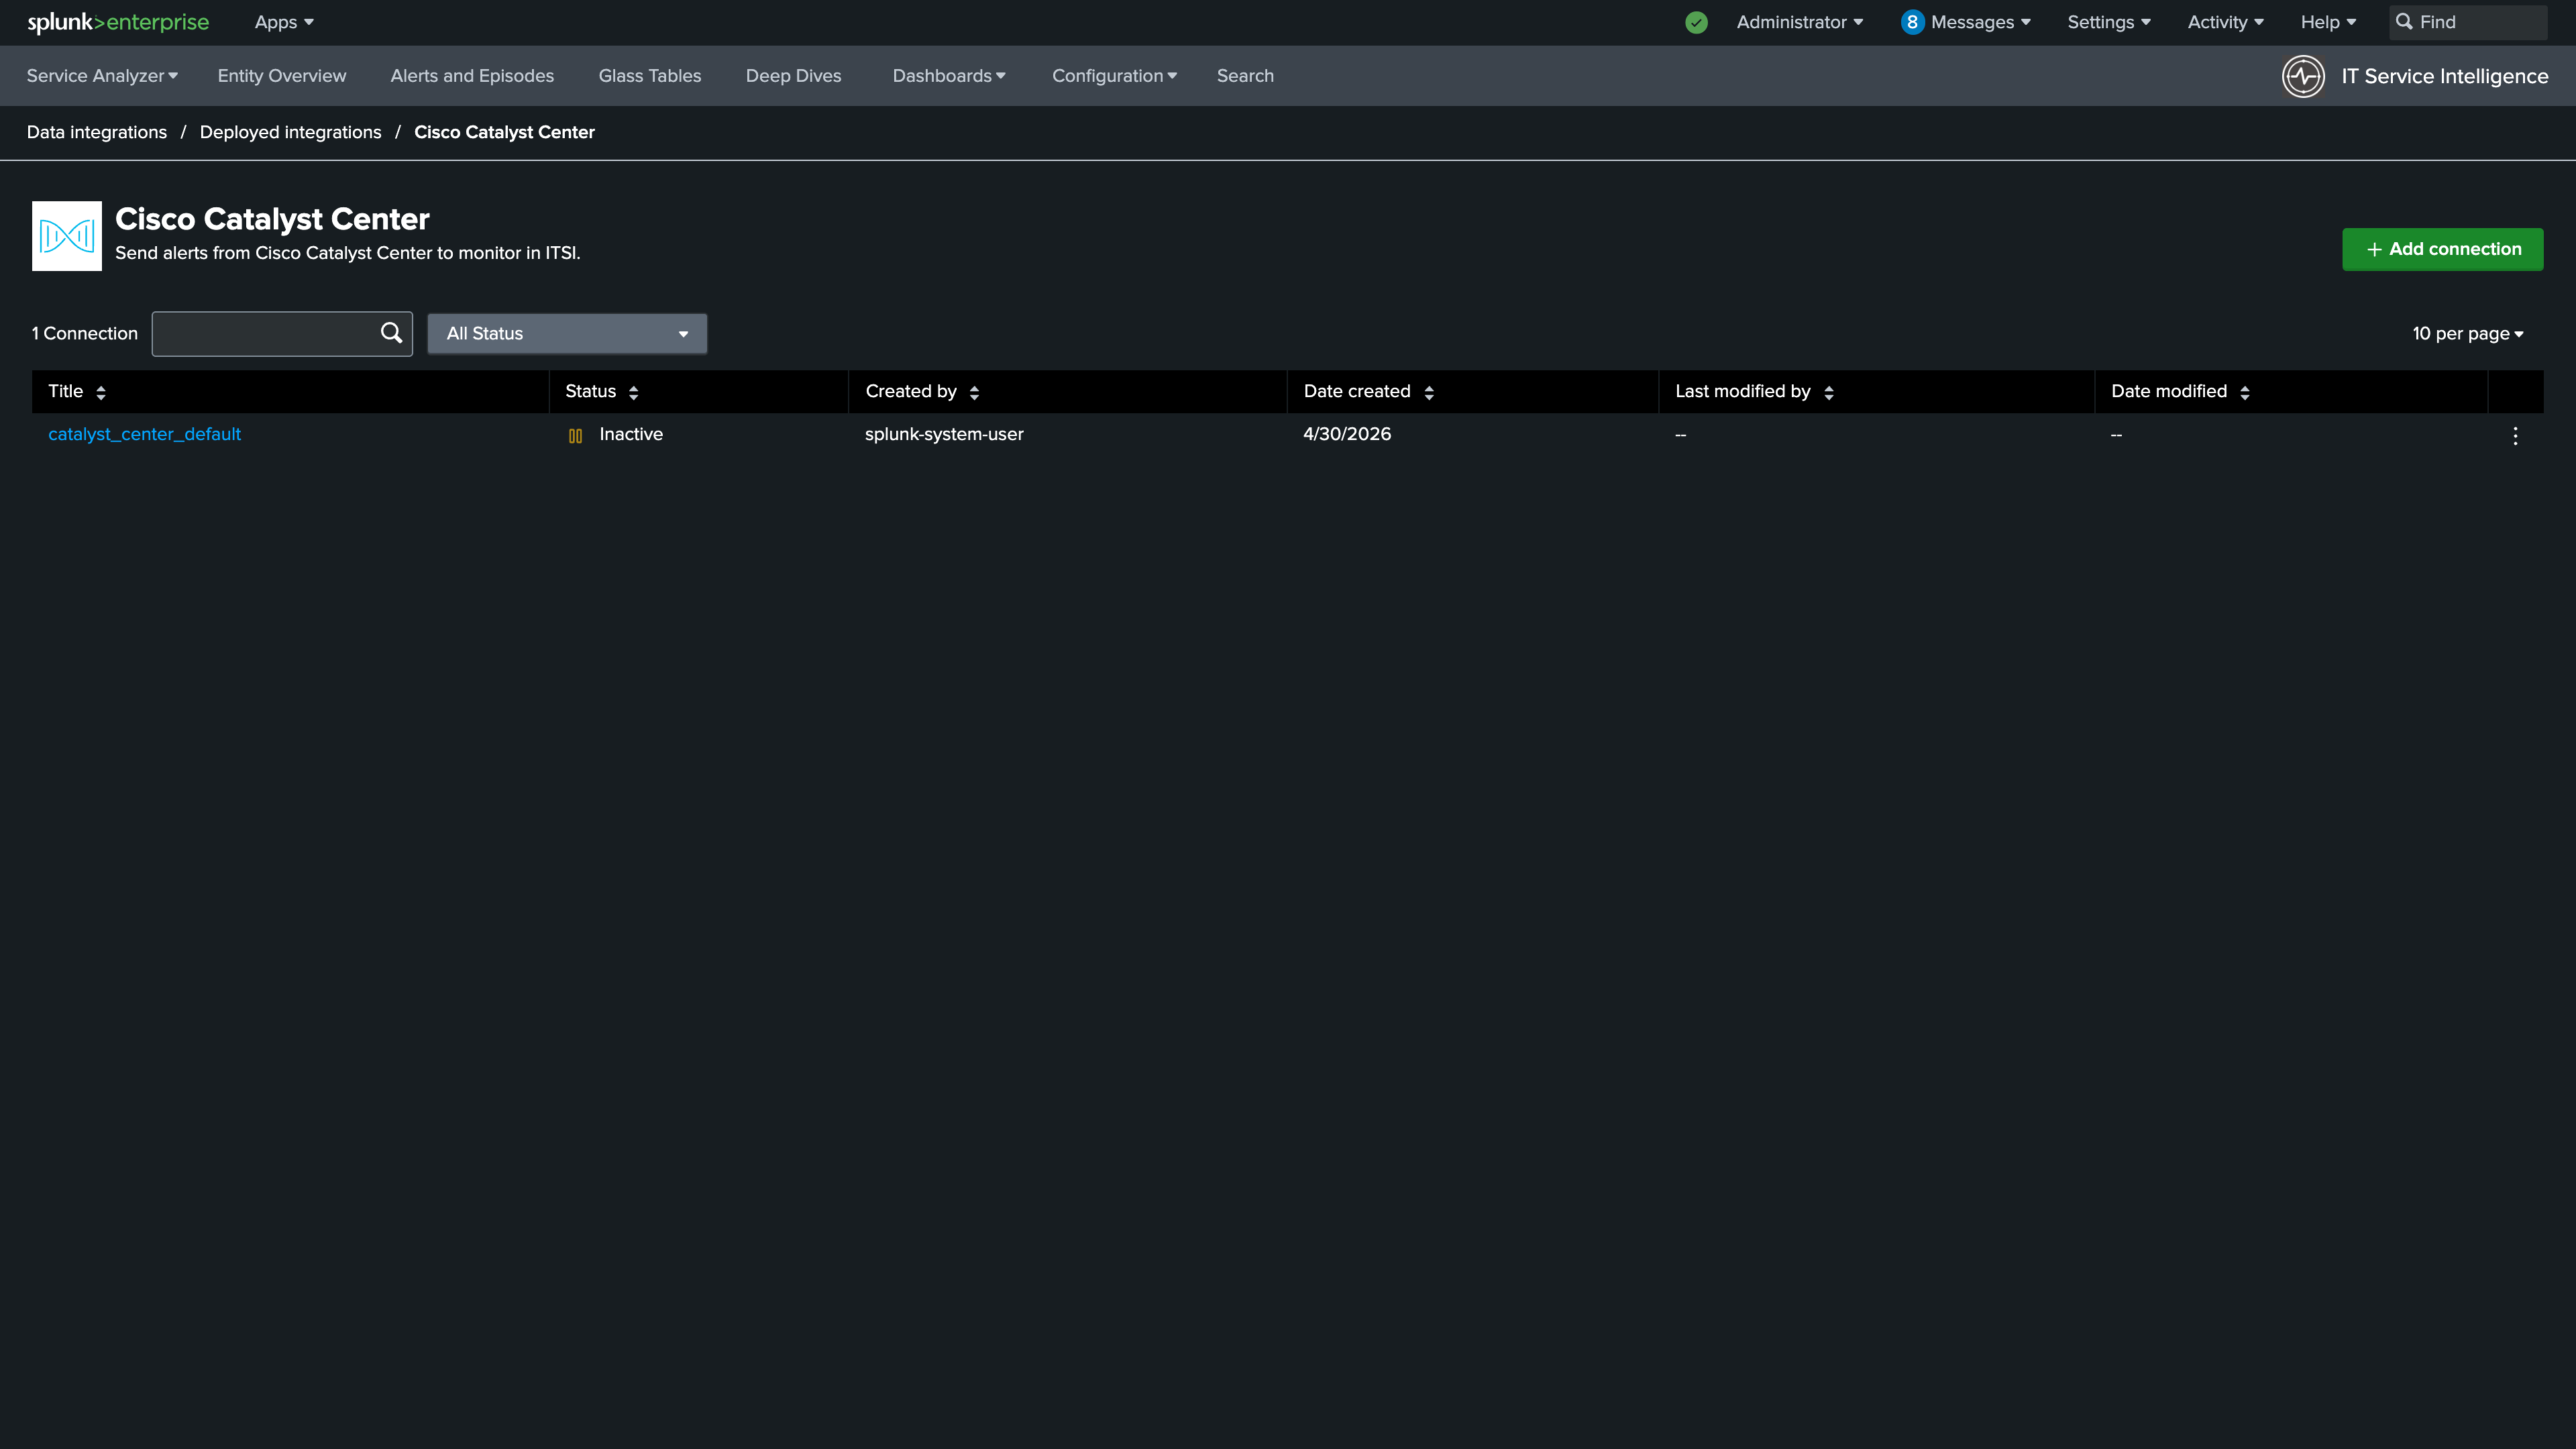
3. Click + Add Connection.
Info
Adding a custom connection lets you control the search, field mappings, and throttling behavior independently from the default
4. Enter Catalyst Center Alerts for the name. Use the following search:
index=netops sourcetype="cisco:dnac:issue"
| eval itsi_site = case( isnotnull(SiteNameHierarchy) AND SiteNameHierarchy!="", mvindex(split(SiteNameHierarchy, "/"), 3), isnotnull(DeviceName) AND DeviceName!="", "Store-" . mvindex(split(DeviceName, "-"), 0) )
5. Click Validate
6. Set the Lookback period to 5 minutes
Info
Validation confirms the search returns events and that the field mappings are correct before saving
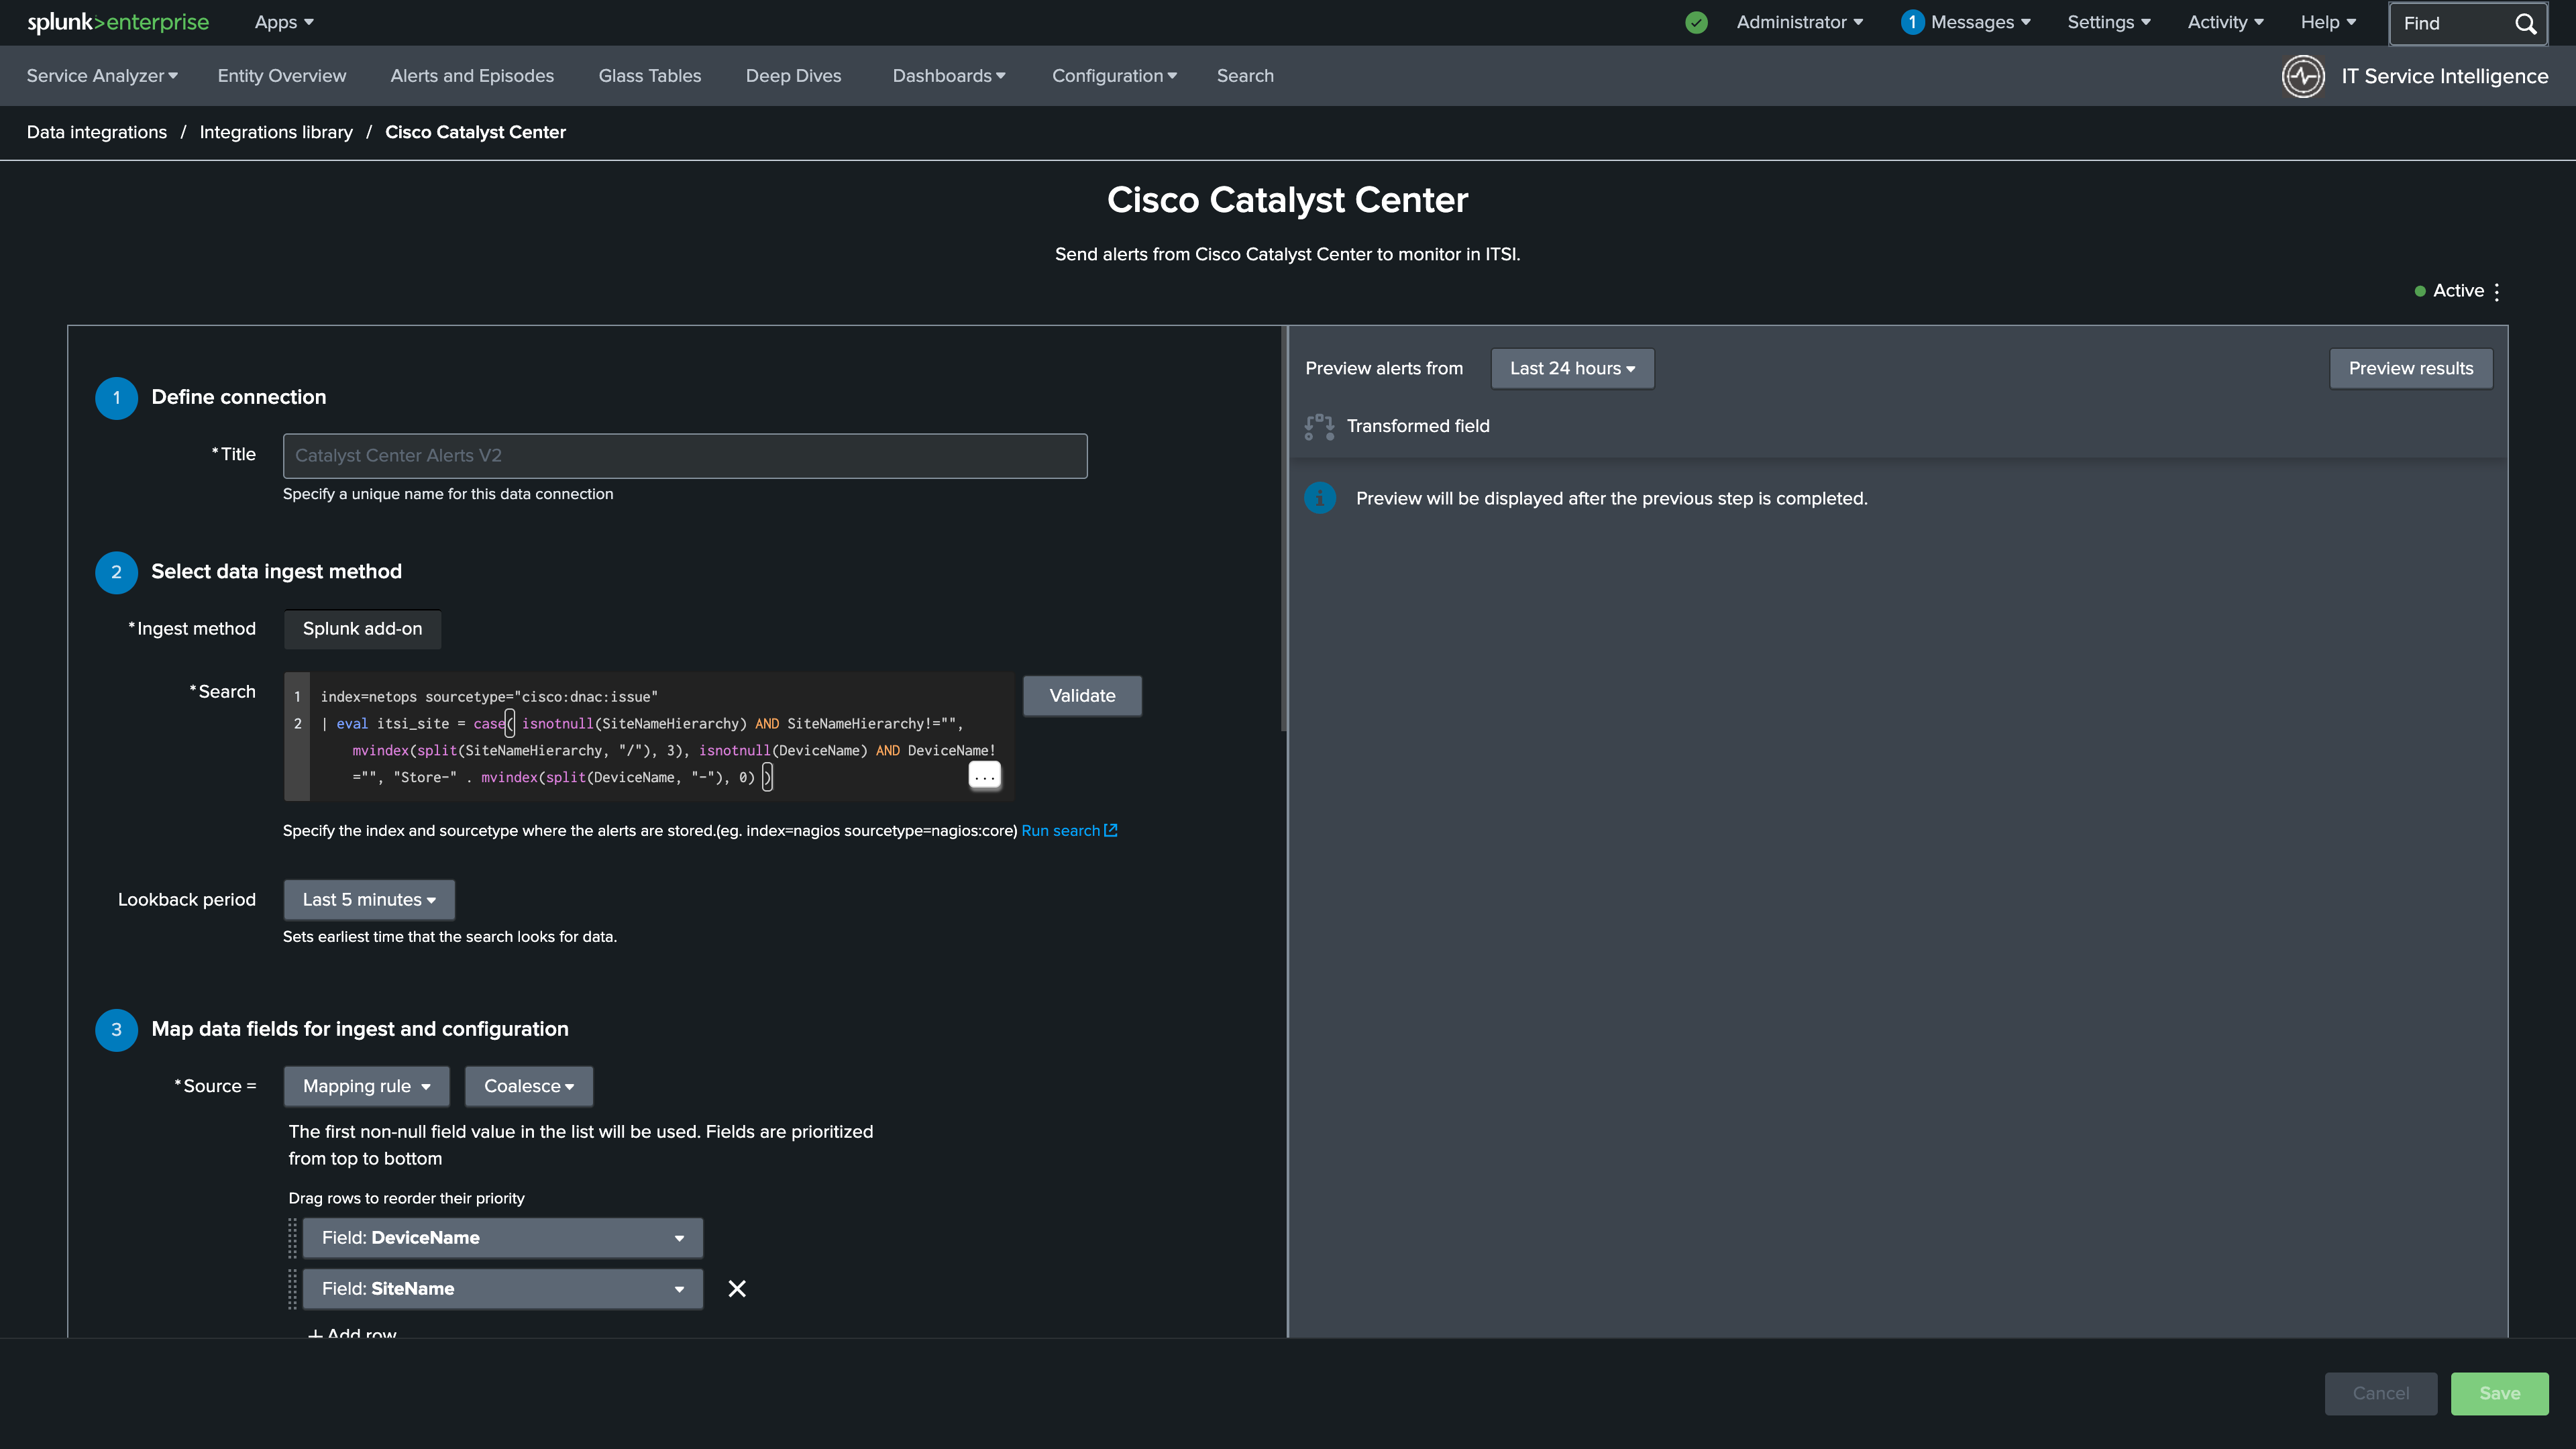
7. Update the Source to a Mapping rule using Coalesce for the type
8. Select DeviceName as the first field and SiteName as the second
9. Enter IssueSpecificEntityValue as the else use the default value field
Info
The Source field is used to identify the origin of the alert within ITSI episodes
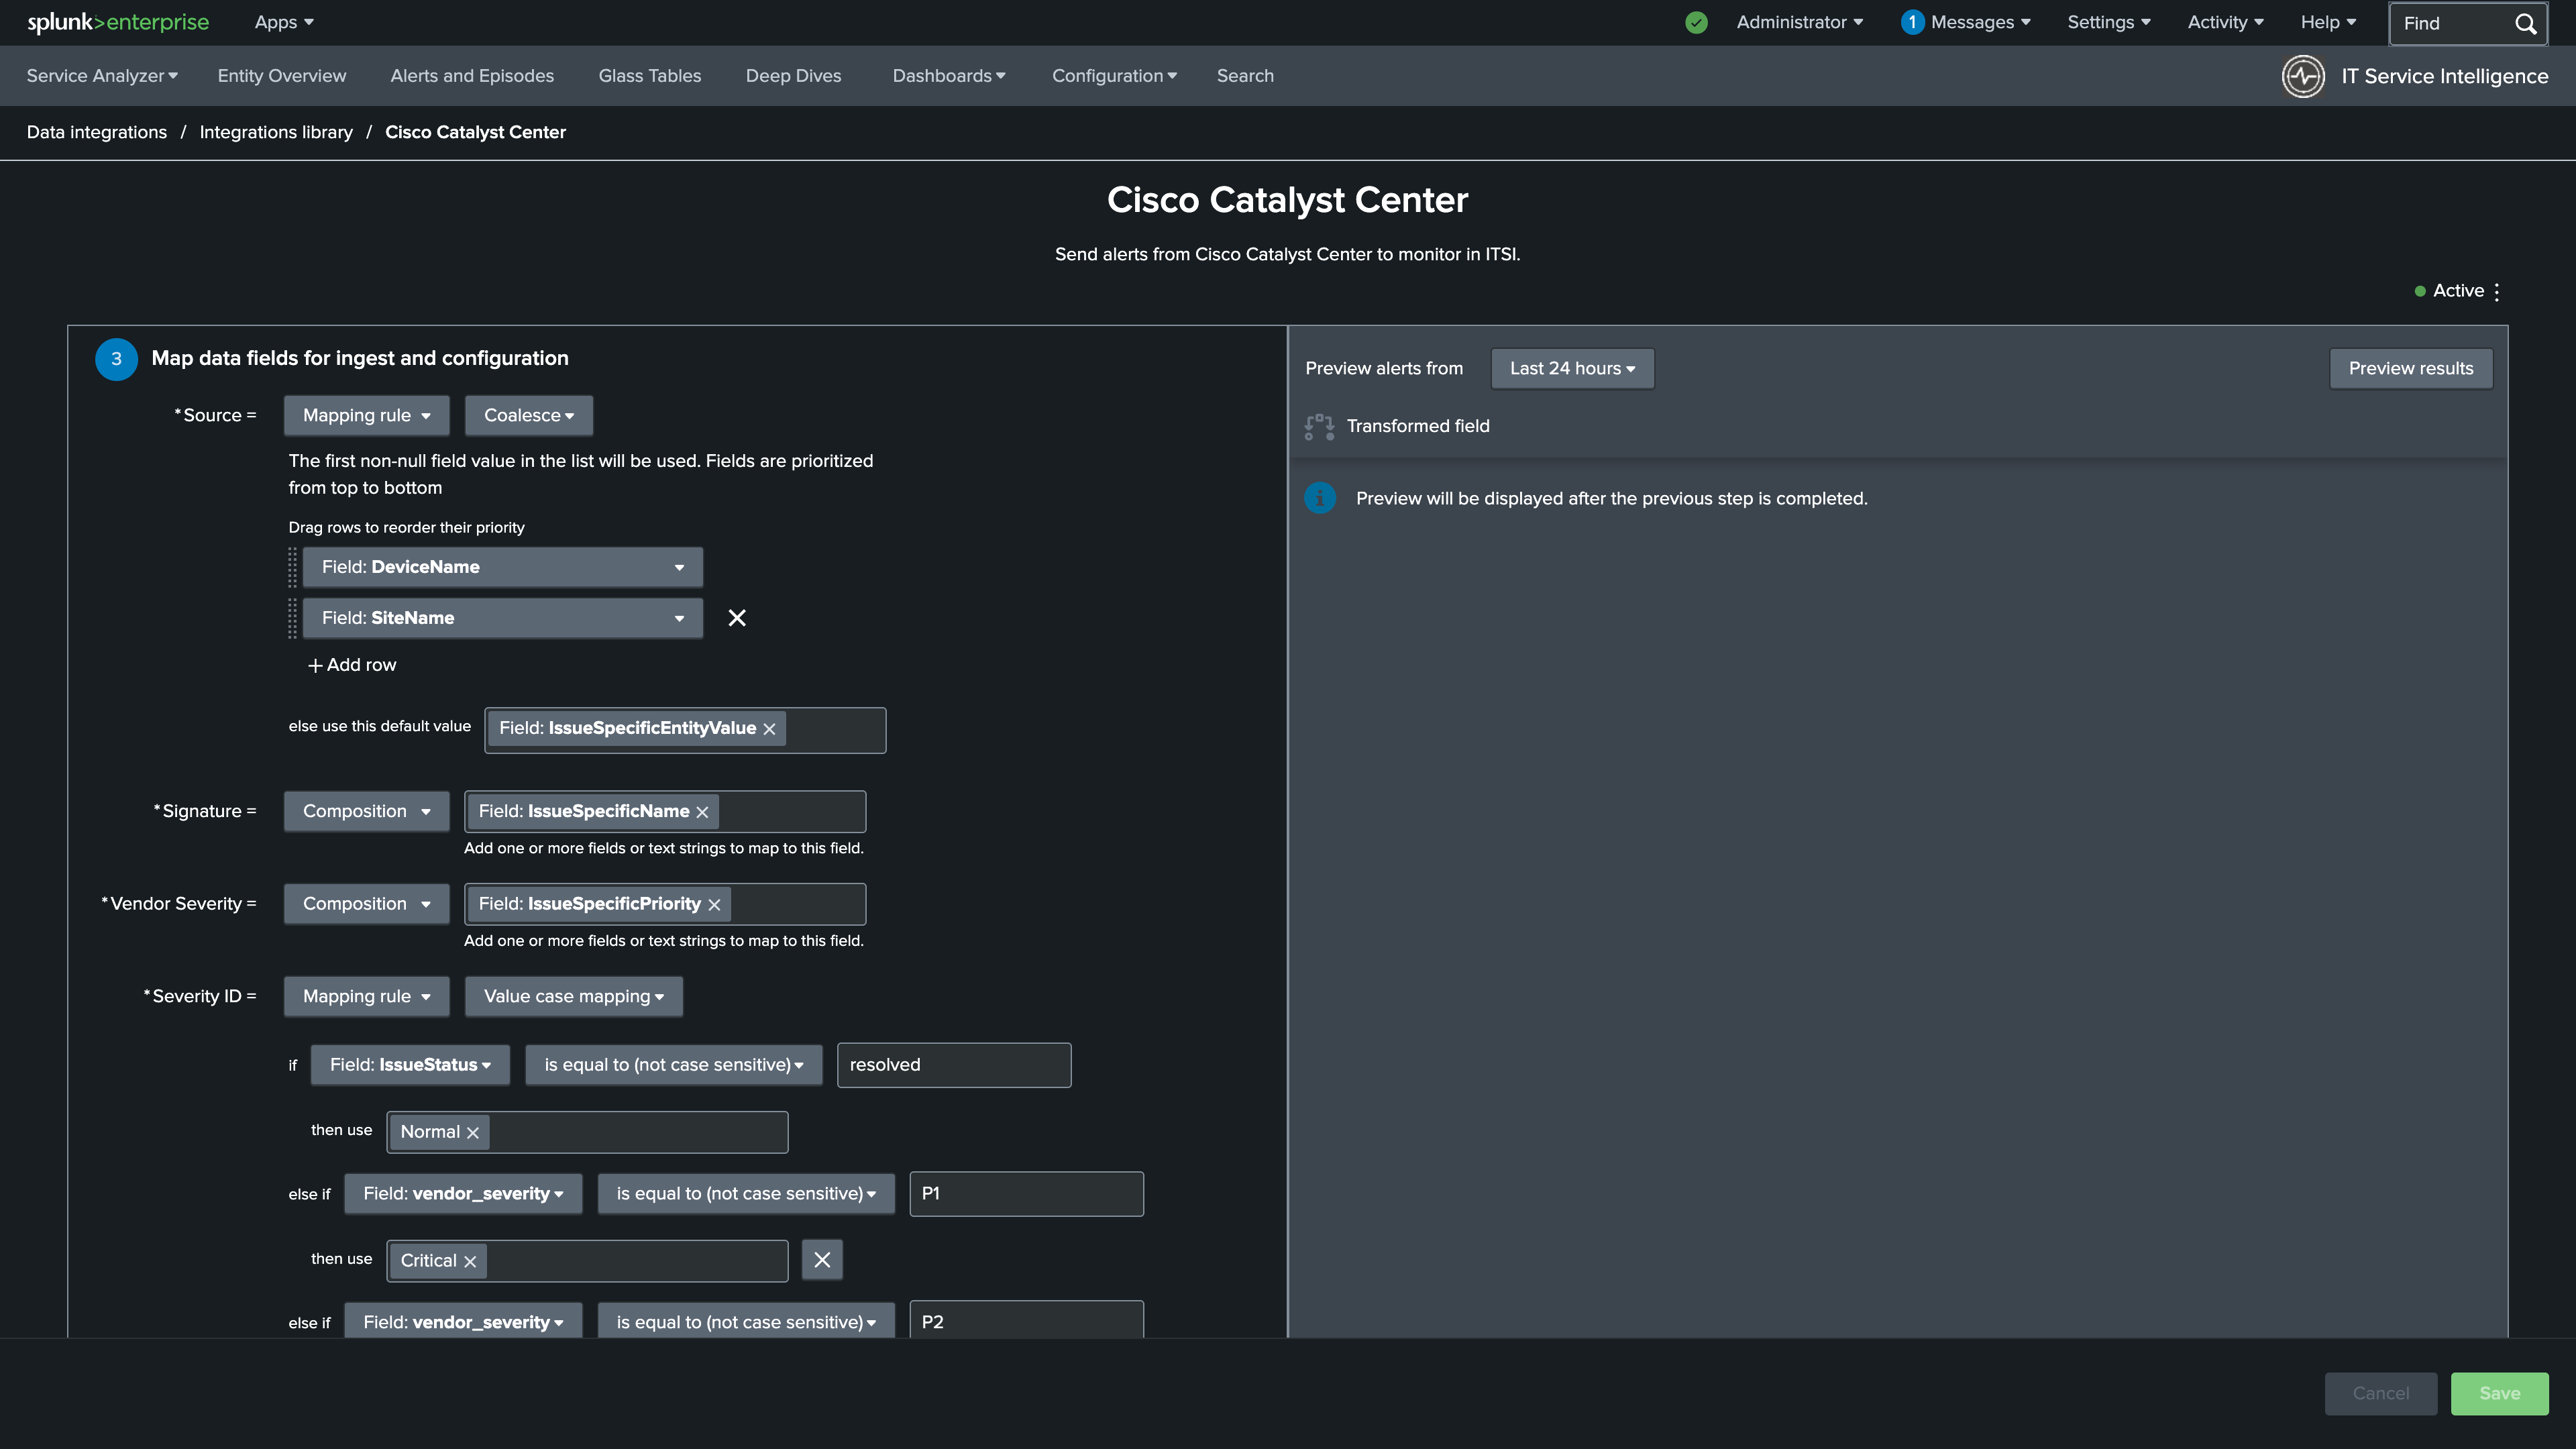
10. Update the Severity ID mapping to a Mapping rule using Value case mapping as the type
11. Set IssueStatus is equal to (not case sensitive) to resolved and then use to Normal
12. Map the following values for the remainder of the if statement:
vendor_severity is equal to (not case sensitive) to P1 and then use to Critical
vendor_severity is equal to (not case sensitive) to P2 and then use to High
vendor_severity is equal to (not case sensitive) to P3 and then use to Medium
vendor_severity is equal to (not case sensitive) to P4 and then use to Low
And finally, set else use this default value to Info
Info
Map Catalyst Center severity values to the ITSI severity scale so episodes display the correct priority
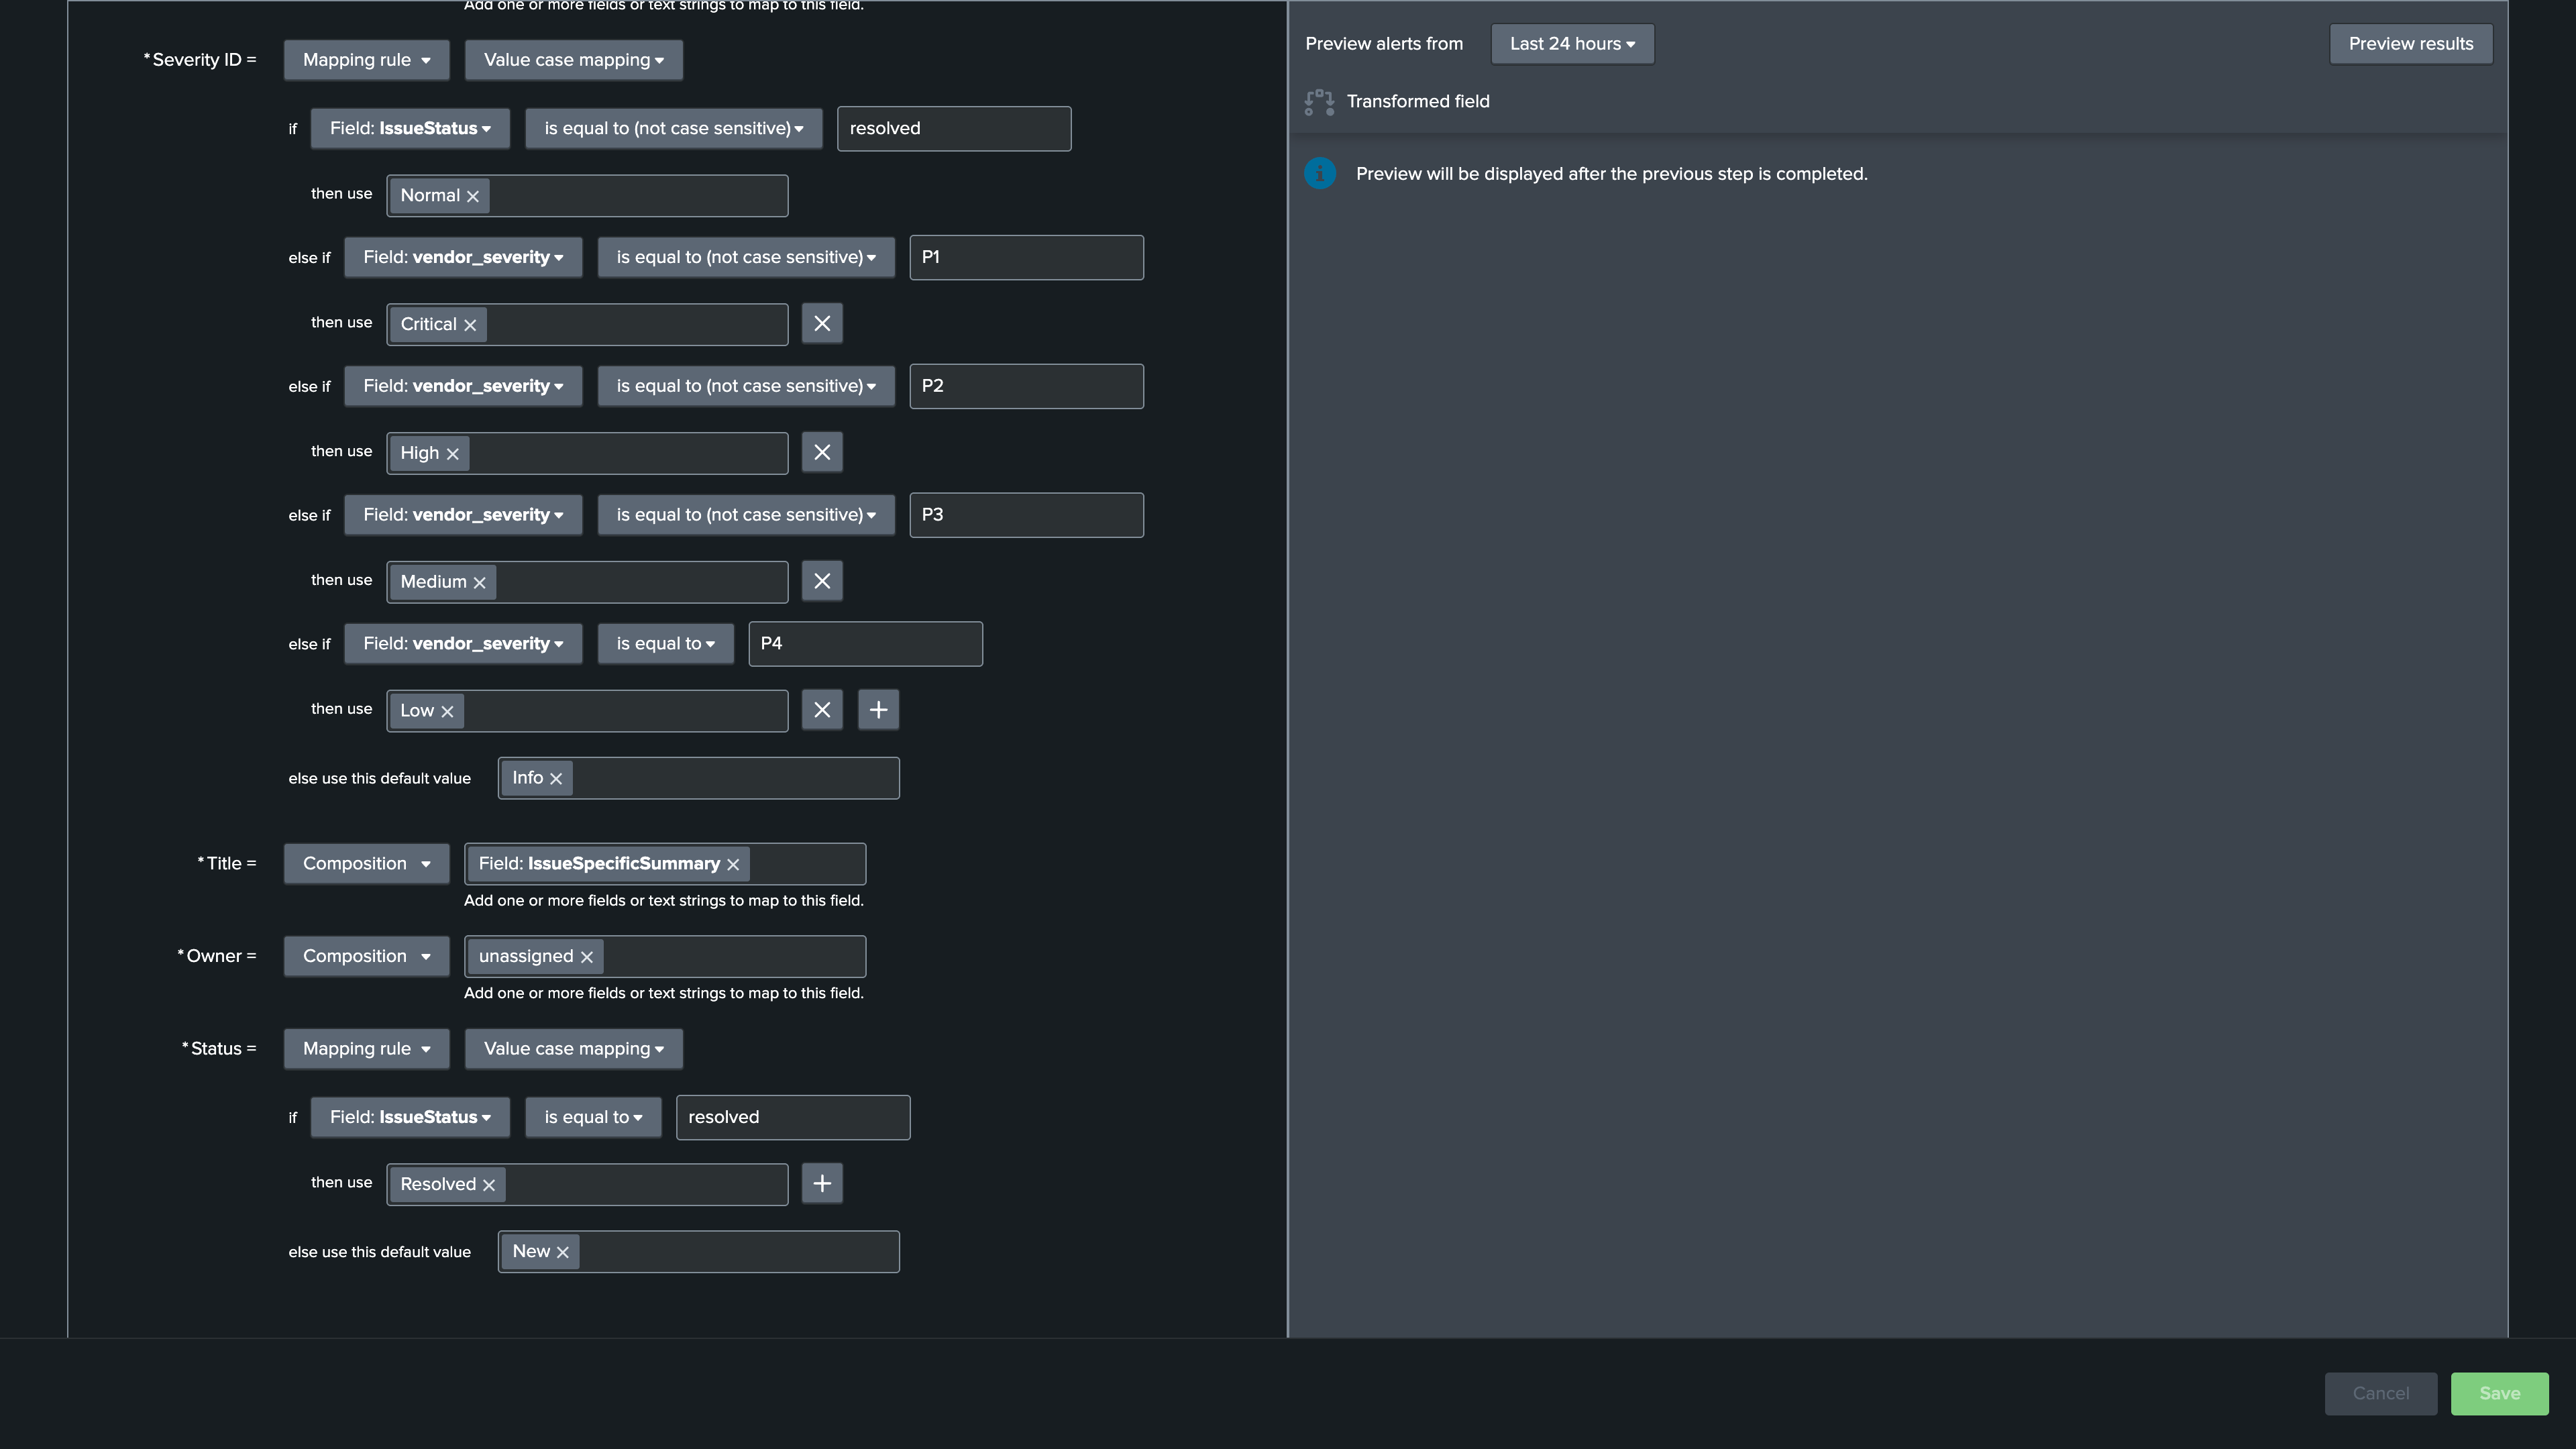
13. Change the Title field to IssueSpecificSummary
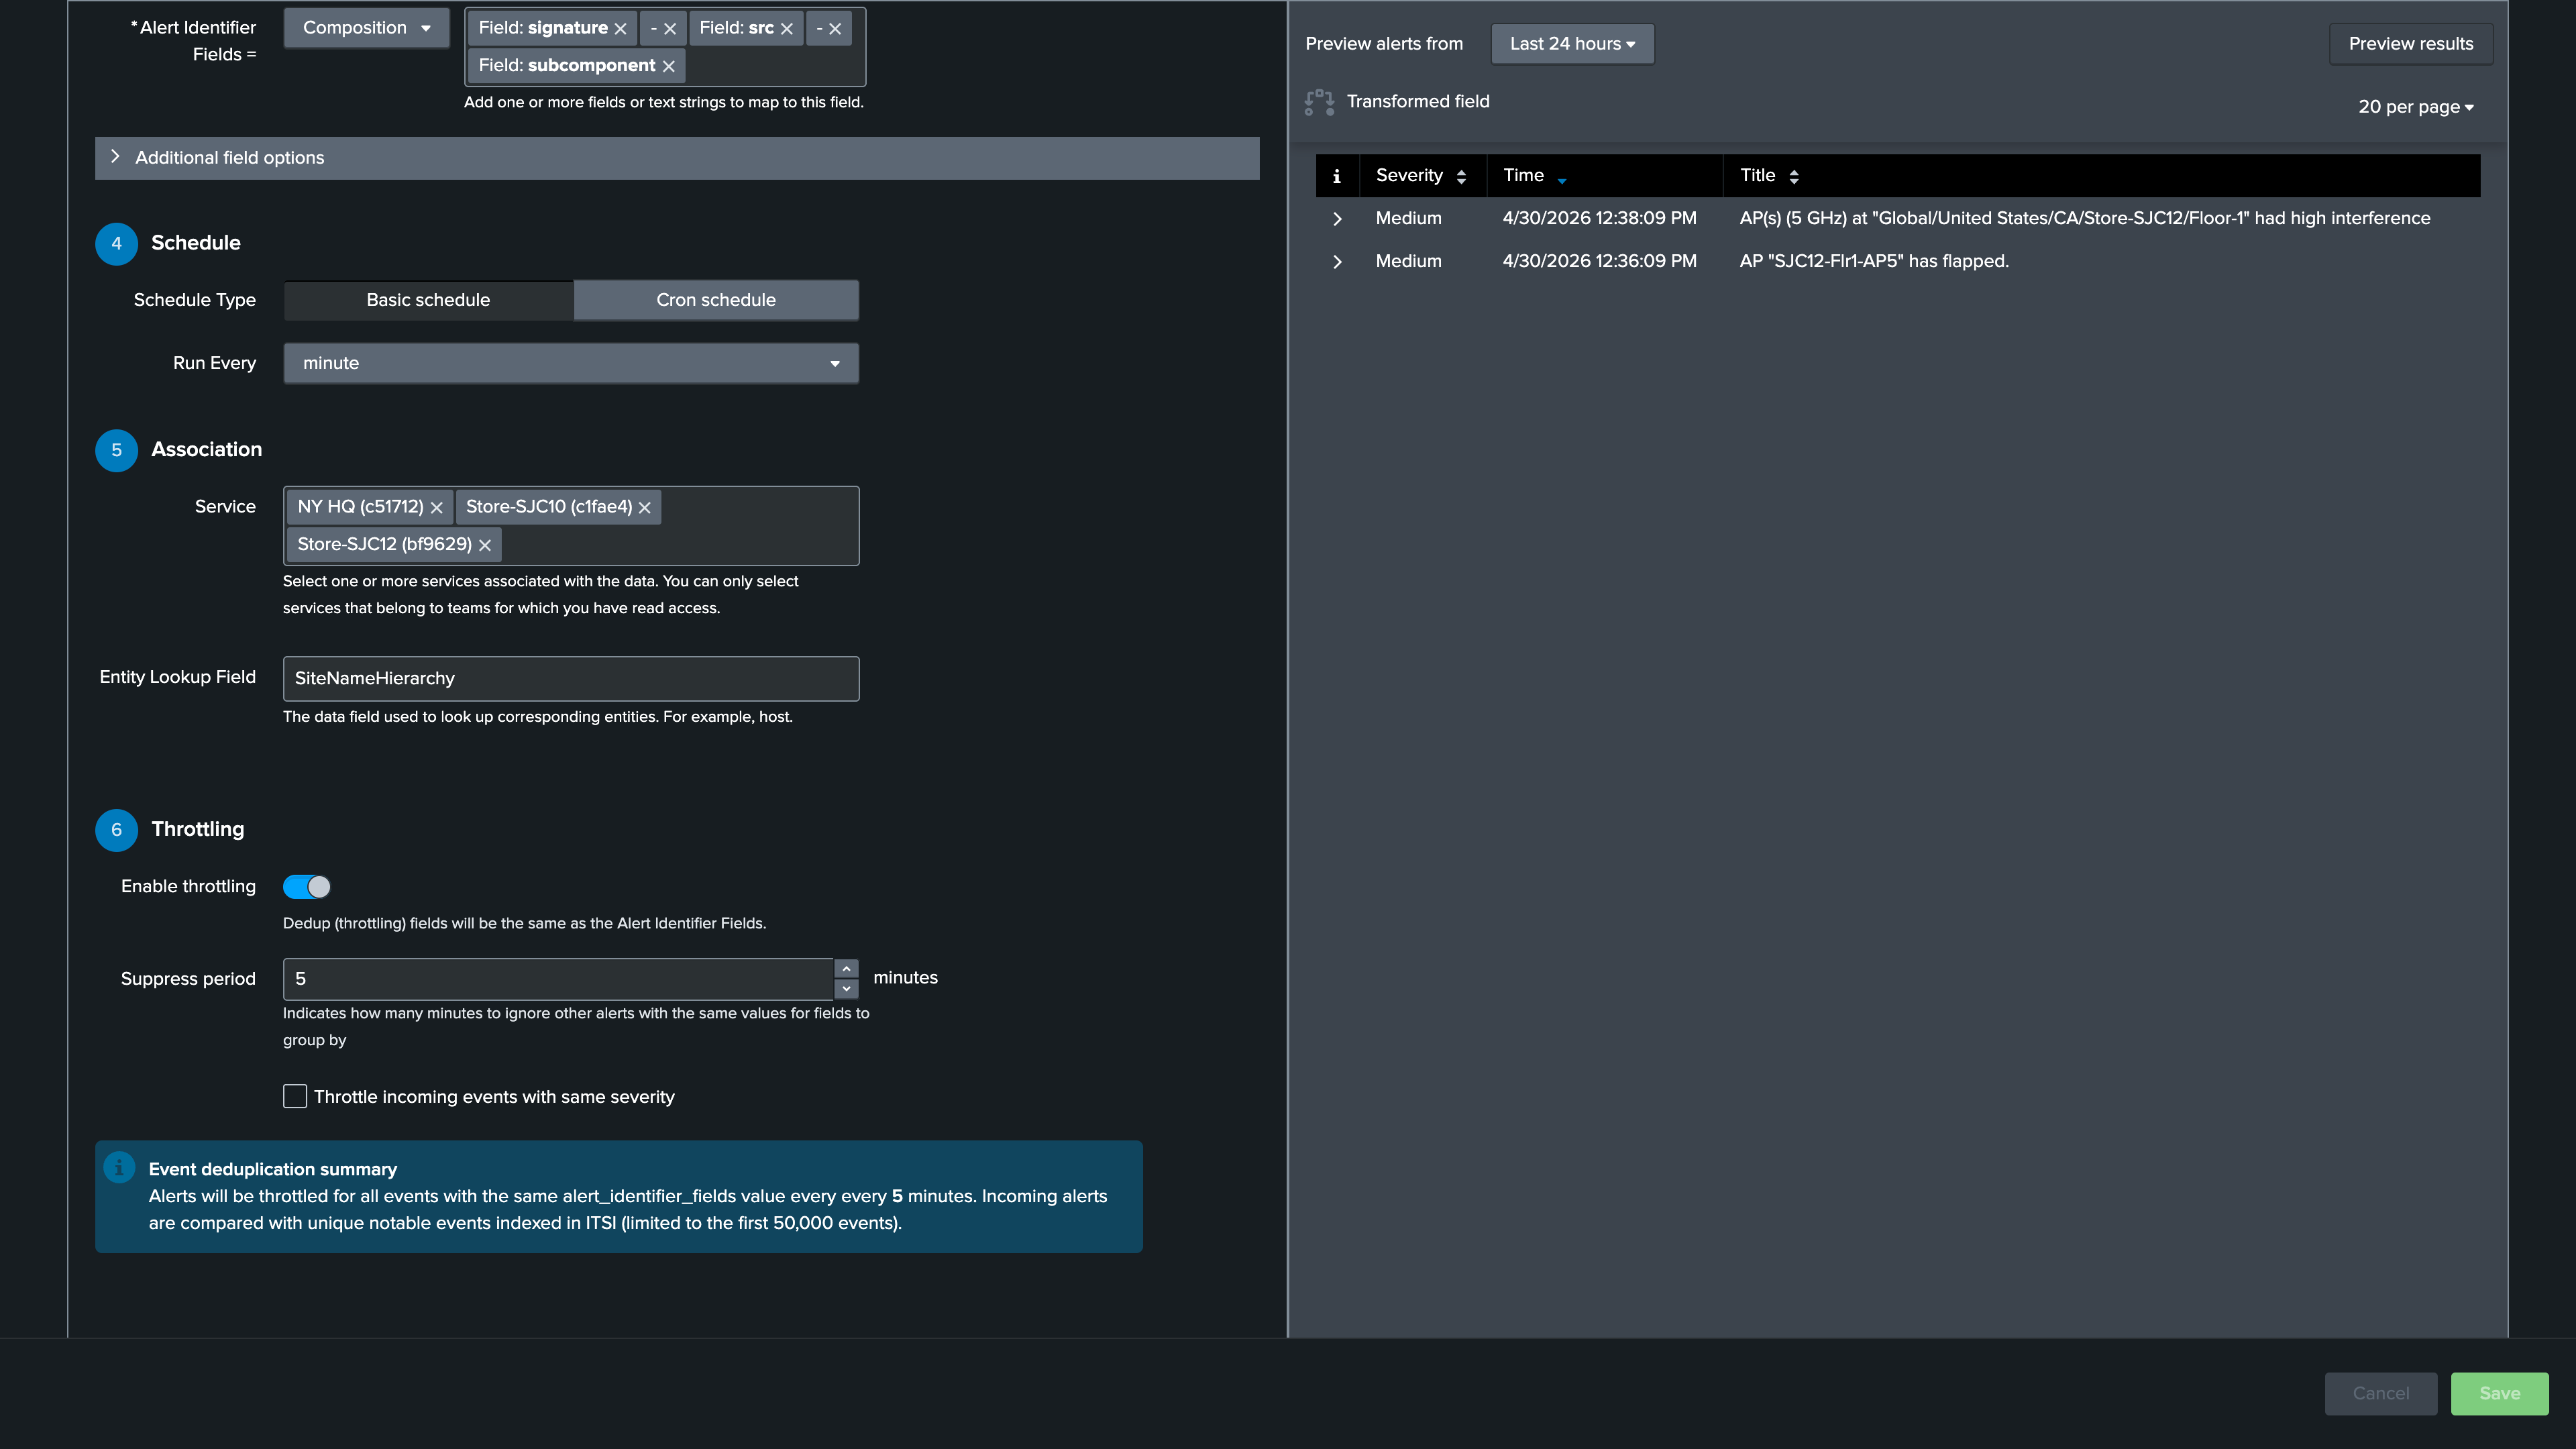
14. Update the subcomponent to itsi_site
15. Change Run every to 1 minute
16. Add NY HQ, Store-SJC10, and Store-SJC12 to the Service Association section
17. Use SiteNameHierarchy for the Entity Lookup Field
18. Turn on the Enable throttling toggle
19. Set the Suppress period to every 5 minutes
20. Click Preview Results in the upper right (Note: You may not get results in the preview. We will review the events during the Create a custom NEAP section)
21. Click Save and Activate
Info
The subcomponent field is what links each alert to its corresponding Catalyst Center site service in ITSI
Nice Job!
Catalyst Center alerts are now flowing into ITSI as normalized notable events linked to their site service.
In the next section you’ll add SolarWinds as a second alert source so ITSI can correlate events from both vendors.