

Deployment
ThousandEyes Agent
Deploy the ThousandEyes Enterprise Agent in Kubernetes and verify that it registers correctly with ThousandEyes Cloud.
This section guides you through deploying the ThousandEyes Enterprise Agent in your Kubernetes cluster.
Installation Steps #
Step 1: Create the ThousandEyes Token #
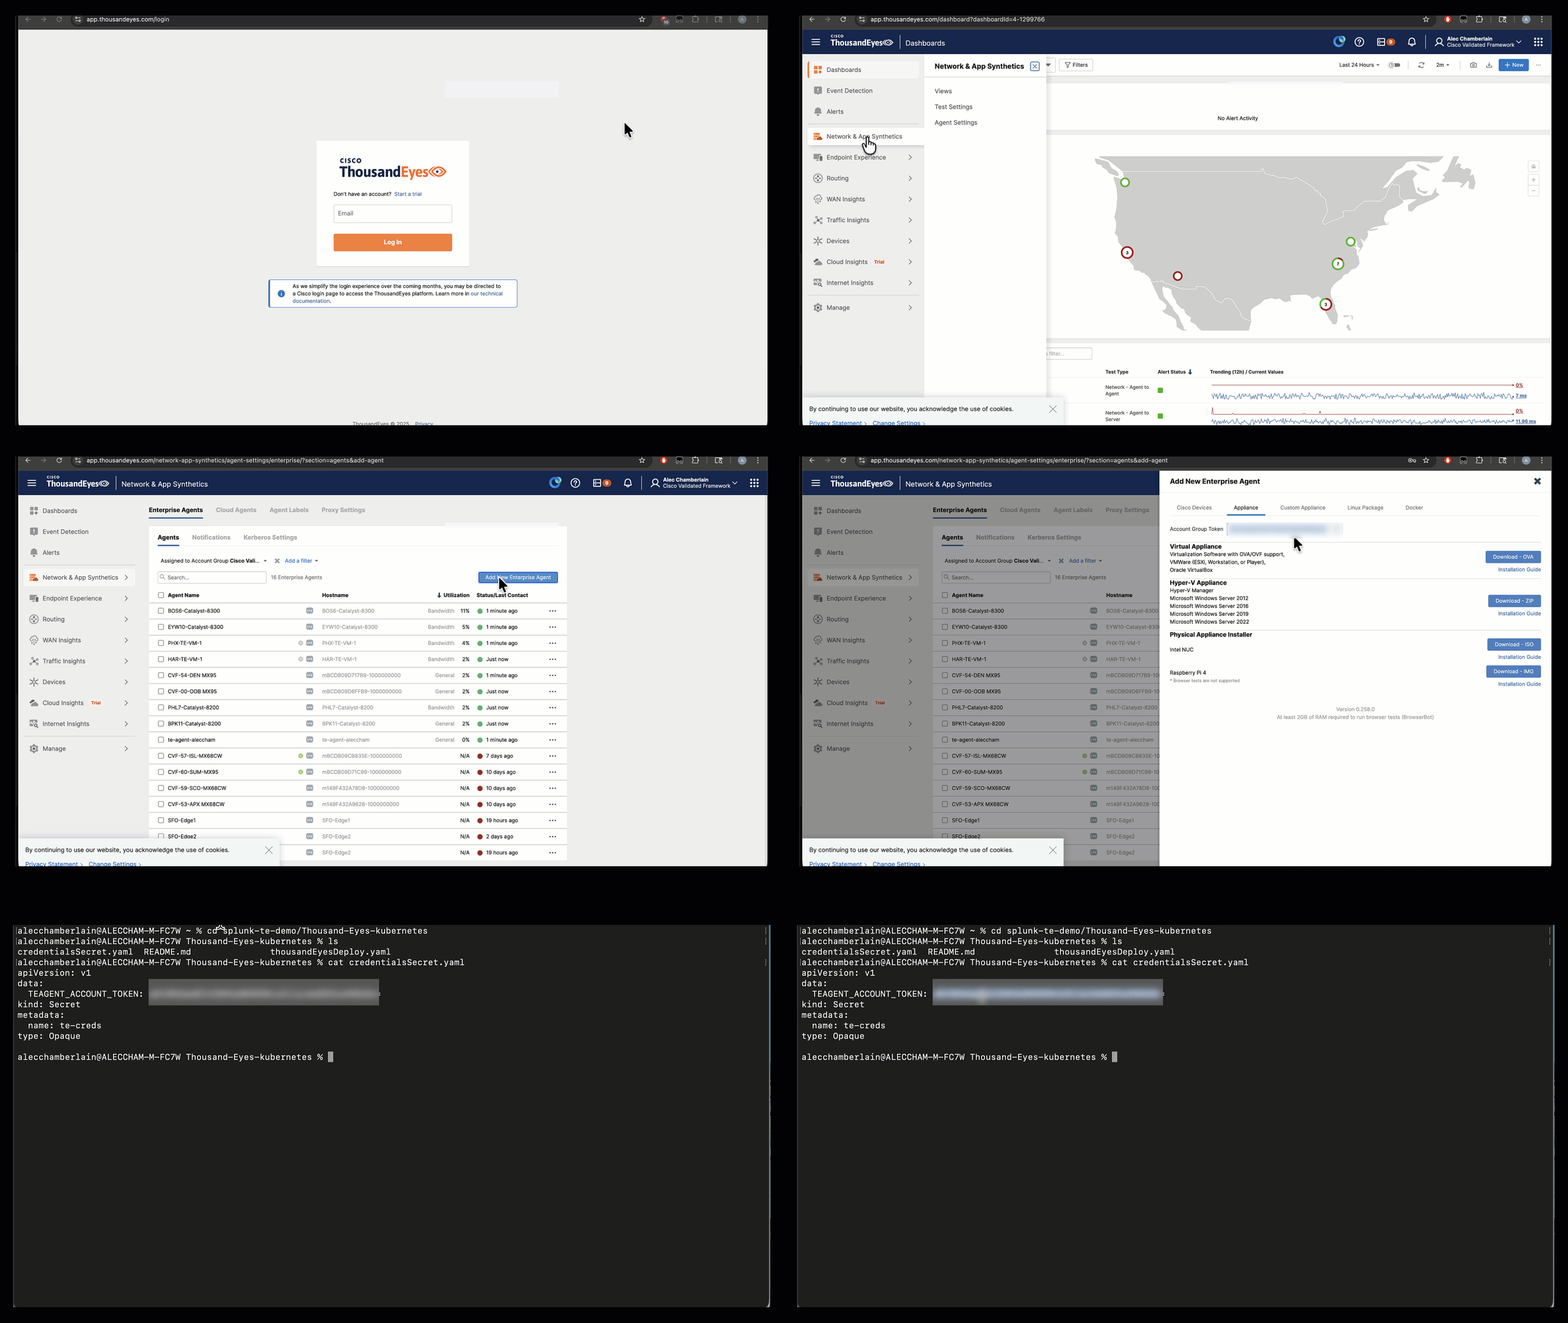
Log in to the ThousandEyes platform at app.thousandeyes.com/login
Navigate to Network & App Synthetics > Agent Settings > Enterprise Agents > Add New Enterprise Agent
Click the Appliance tab
Copy your Account Group Token
Base64 encode the token:
```bash
echo -n 'your-token-here' | base64
```
```text dXabsfuenBabjeTZ3anVvxgyYds0cas= ```Save the base64-encoded output for the next step
Step 2: Create the Secret #
Create a file named credentialsSecret.yaml with your base64-encoded token:
apiVersion: v1
kind: Secret
metadata:
  name: te-creds
type: Opaque
data:
  TEAGENT_ACCOUNT_TOKEN: <your-base64-encoded-token-here>
Apply the secret:
kubectl apply -f credentialsSecret.yamlsecret/te-creds createdStep 3: Create the Deployment #
Create a file named thousandEyesDeploy.yaml with the deployment manifest shown below (customize the hostname with your username, like tihard):
apiVersion: apps/v1
kind: Deployment
metadata:
  name: thousandeyes
  labels:
    app: thousandeyes
spec:
  replicas: 1
  selector:
    matchLabels:
      app: thousandeyes
  template:
    metadata:
      labels:
        app: thousandeyes
    spec:
      hostname: te-agent-USERNAME
      containers:
      - name: thousandeyes
        image: 'thousandeyes/enterprise-agent:latest'
        imagePullPolicy: Always
        command:
          - /sbin/my_init
        securityContext:
          capabilities:
            add:
              - NET_ADMIN
              - SYS_ADMIN
        env:
          - name: TEAGENT_ACCOUNT_TOKEN
            valueFrom:
              secretKeyRef:
                name: te-creds
                key: TEAGENT_ACCOUNT_TOKEN
          - name: TEAGENT_INET
            value: "4"
        resources:
          limits:
            memory: 3584Mi
          requests:
            memory: 2000Mi
Explanation of settings
- The agent requires elevated privileges (
NET_ADMIN,SYS_ADMIN) to perform network tests - The
TEAGENT_INET: "4"environment variable forces IPv4-only mode (required for some network configurations) - The
/sbin/my_initcommand is required for proper agent initialization and service management - The
imagePullPolicy: Alwaysensures you always pull the latest image version - Adjust the
hostnamefield to uniquely identify your agent in the ThousandEyes dashboard - The ThousandEyes Enterprise Agent has relatively high hardware requirements; you may need to adjust these depending on your environment
Apply the deployment:
kubectl apply -f thousandEyesDeploy.yamldeployment.apps/thousandeyes createdStep 5: Verify the Deployment #
Verify the agent is running:
kubectl get podsExpected output, it may take a few tries to come up:
NAME                            READY   STATUS    RESTARTS   AGE
thousandeyes-xxxxxxxxxx-xxxxx   1/1     Running   0          2m
Tip
You can use:
watch -n 1 kubectl get podsto monitor until the pod is running. Use this tip any time we’re waiting for something to start.
Check the logs to ensure the agent is connecting. It may take a little bit to get similar output to what is below.
kubectl logs -l app=thousandeyesINFO: execution time 20 seconds.
INFO: rootfs setup successfully
********************************* setup_rootfs.sh end *******************************
Starting browserbot in installation mode
Getting image source signatures
Copying blob sha256:dee215ffc666313e1381d3e6e4299a4455503735b8df31c3fa161d2df50860a8
Copying config sha256:ed210e3e4a5bae1237f1bb44d72a05a2f1e5c6bfe7a7e73da179e2534269c459
Writing manifest to image destination
time="2026-05-12T22:08:37Z" level=warning msg="specgen \"cni_networks\" option is deprecated use the \"networks\" map instead"
Starting browserbot in daemon modeStep 6: Verify in ThousandEyes Dashboard #
Verify in the ThousandEyes dashboard that the agent has registered successfully:
Navigate to Network & App Synthetics > Agent Settings to see your newly registered agent.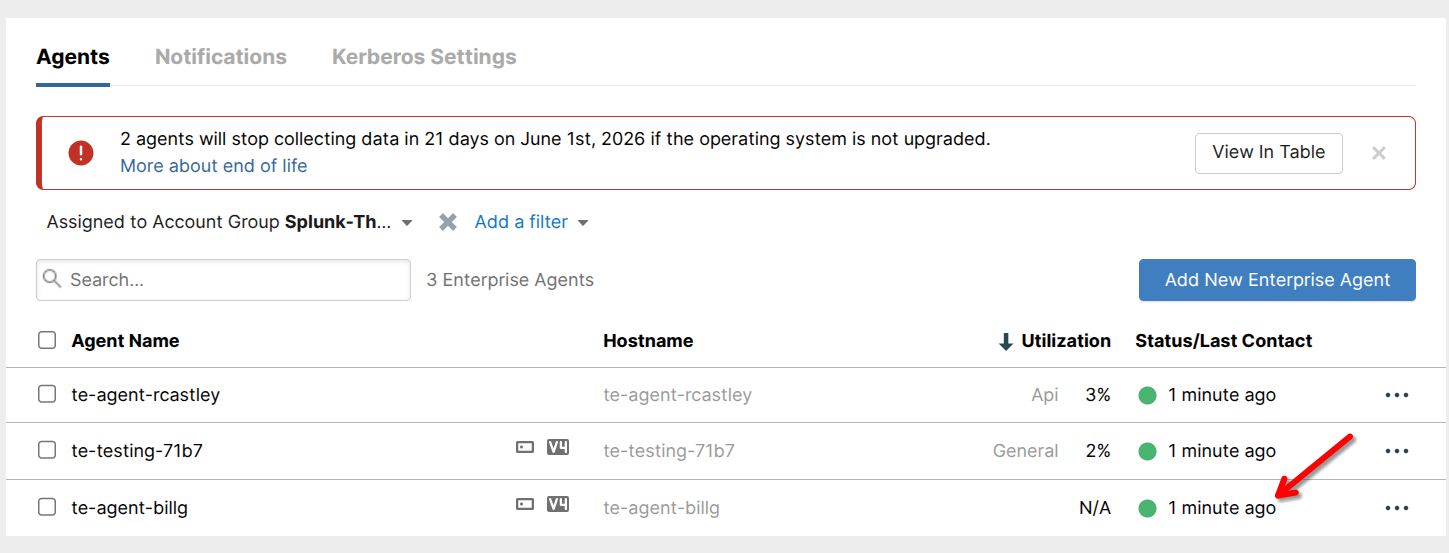
Success
Troubleshooting Guidance
Background #
ThousandEyes does not provide official Kubernetes deployment documentation. Their standard deployment method uses docker run commands, which makes it challenging to translate into reusable Kubernetes manifests. This guide bridges that gap by providing production-ready Kubernetes configurations.