Distributed Tracing and Bi-Directional Drilldowns
Create Tests
Create Tests
Summary #
Now we will create tests to demonstrate this integration.
We will create three tests:
- A test from the ThousandEyes agent (inside the cluster); this would be useful if your application was not acceesible from the public internet
- A more interesting trace (inside the cluster)
- A test from the public internet, using the public URL and with a ThousandEyes Cloud Agent
Step 1: HTTP Test (In Kubernetes Cluster) #
In ThousandEyes, go to Network & App Synthetics > Test Settings.
Click Add New Test and choose HTTP Server.
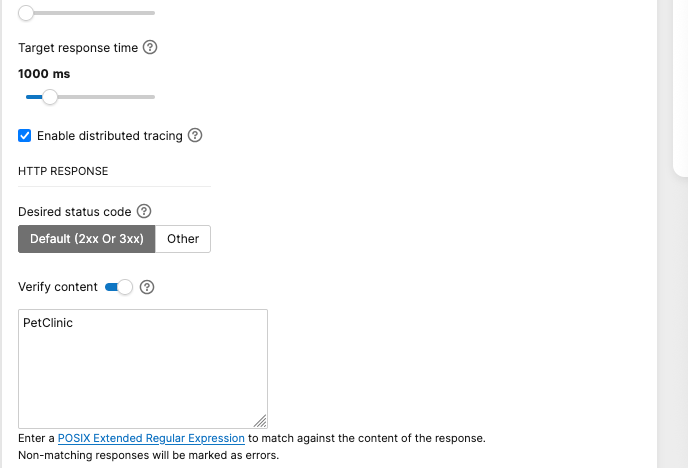
Configure the test:
- URL:
http://api-gateway.default.svc.cluster.local:82/ - Test Name:
[Name] Frontend Available (In Cluster) - How often test runs: 10 minutes
- Agents: Select the
Enterprise Agentstab and select the agent you deployed earlier in this guide - Enable distributed tracing: Enable
- Verify Content: Optional, use
PetClinicif you want to validate the returned page content.
- URL:
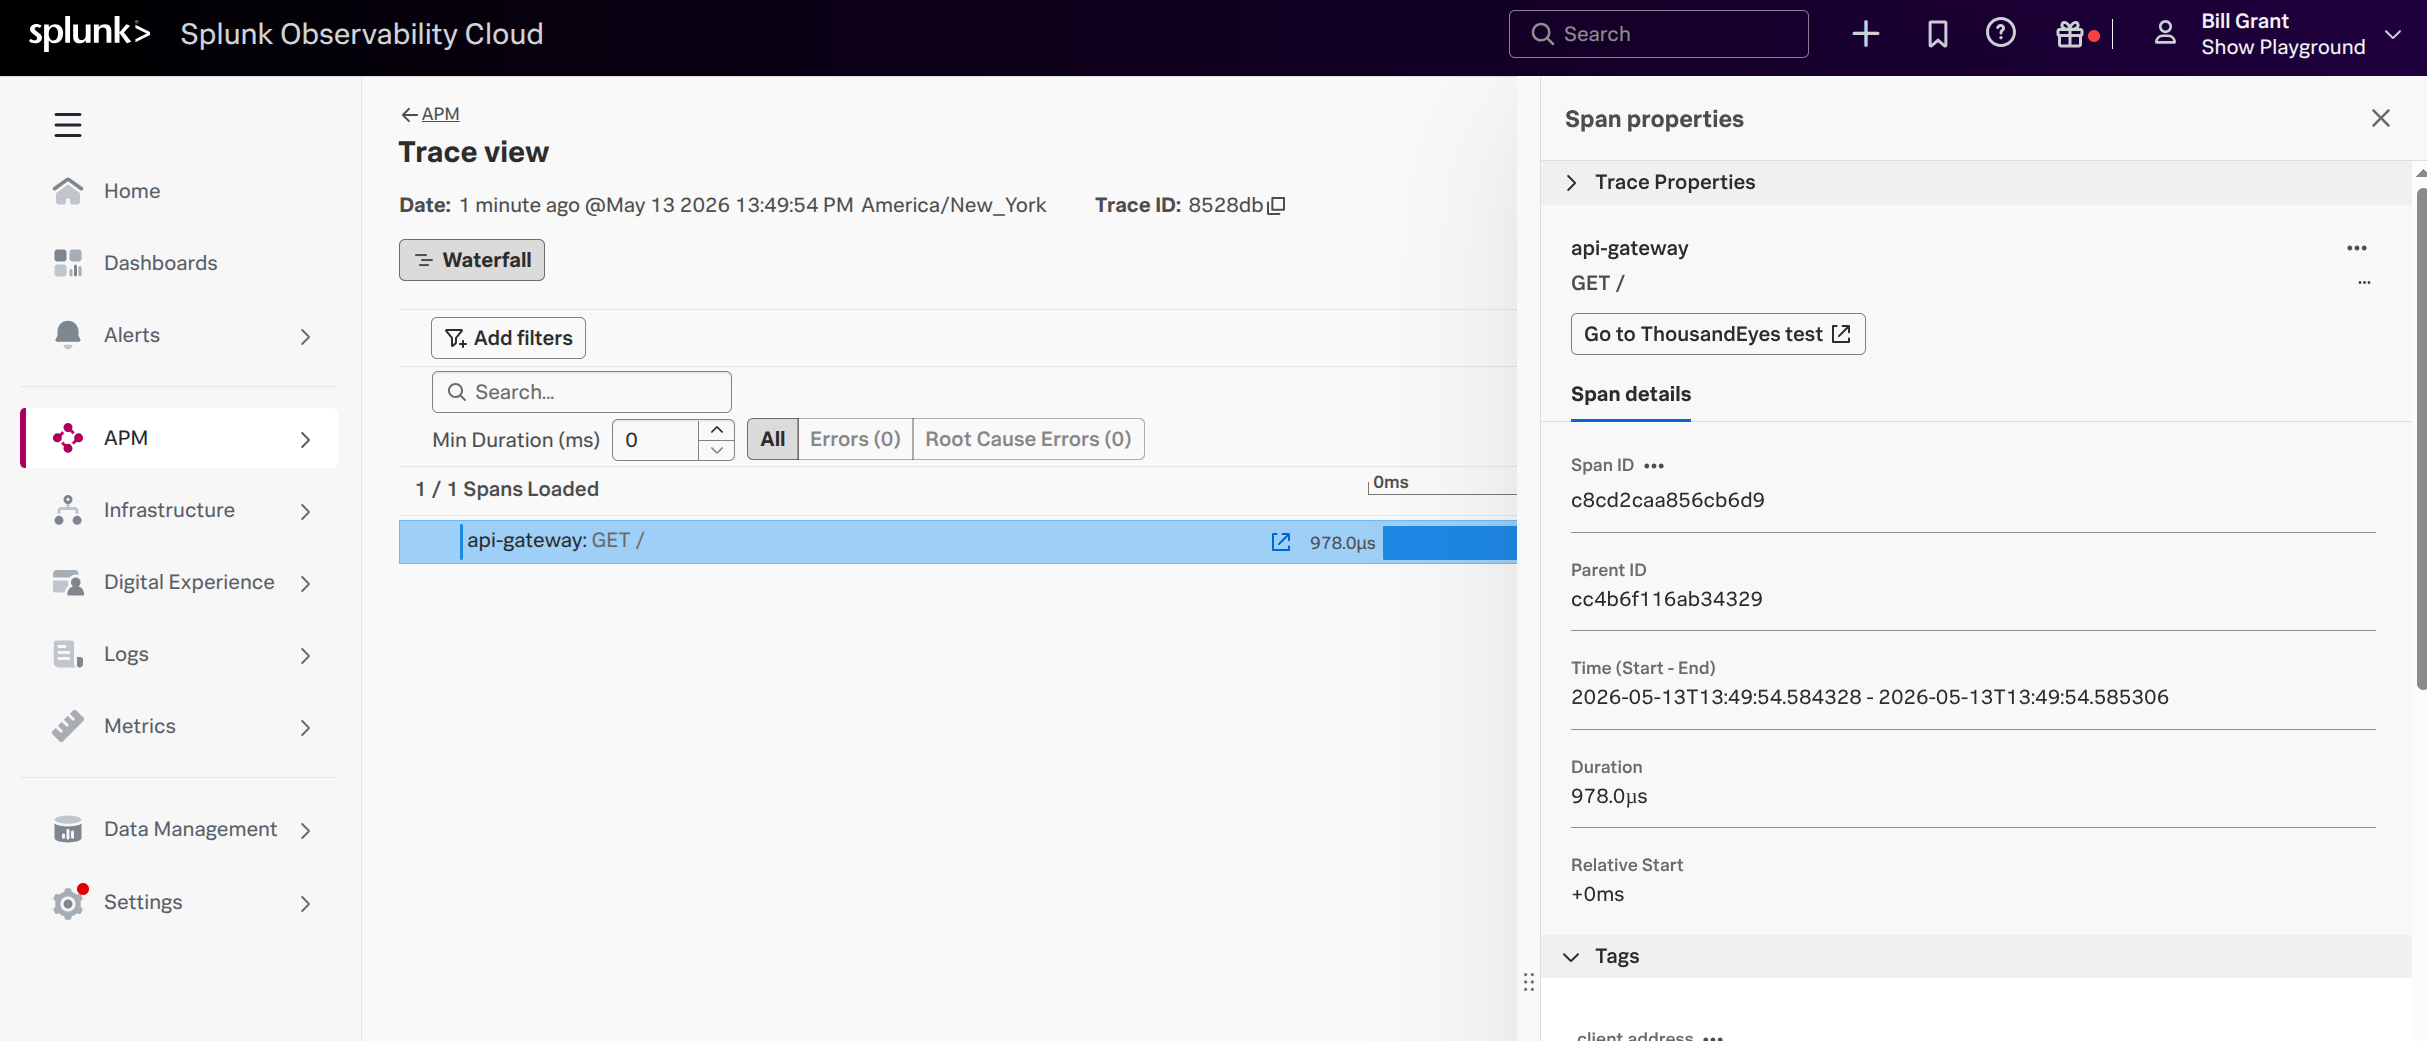
Click Instant Test
Instant Test
This will open a new tab and not save your test, so be aware of this.- Switch to the Service Map tab
It may take a little time for the service map view to show up in ThousandEyes, but you should be able to find the trace in Splunk Observability Cloud
- Copy the trace
- In Splunk Observability Cloud, navigate to APM > Trace Analyzer, paste in the trace, and Go
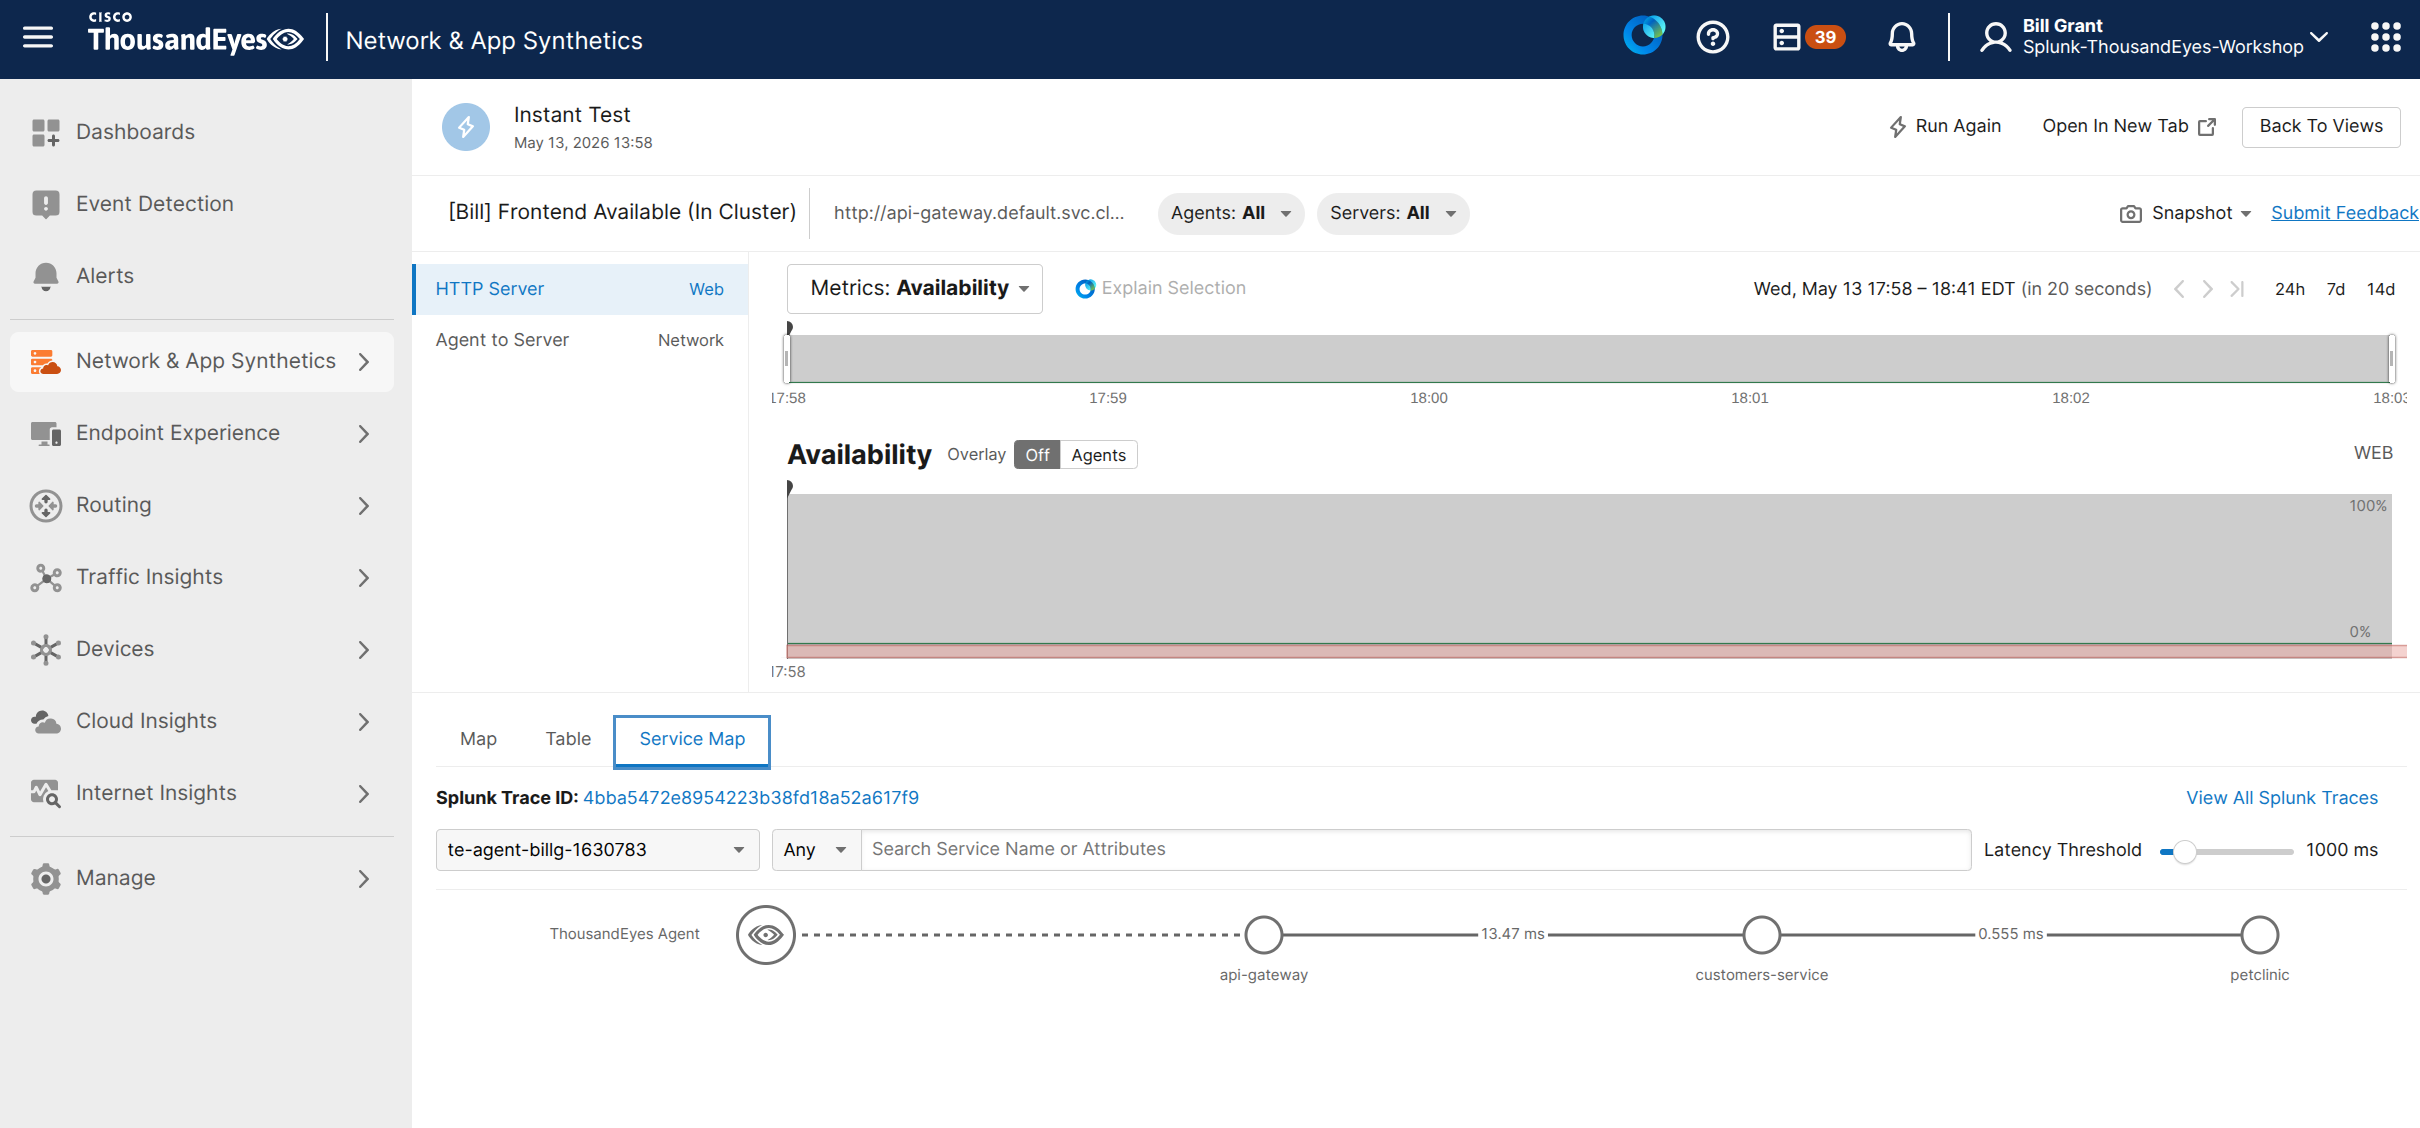
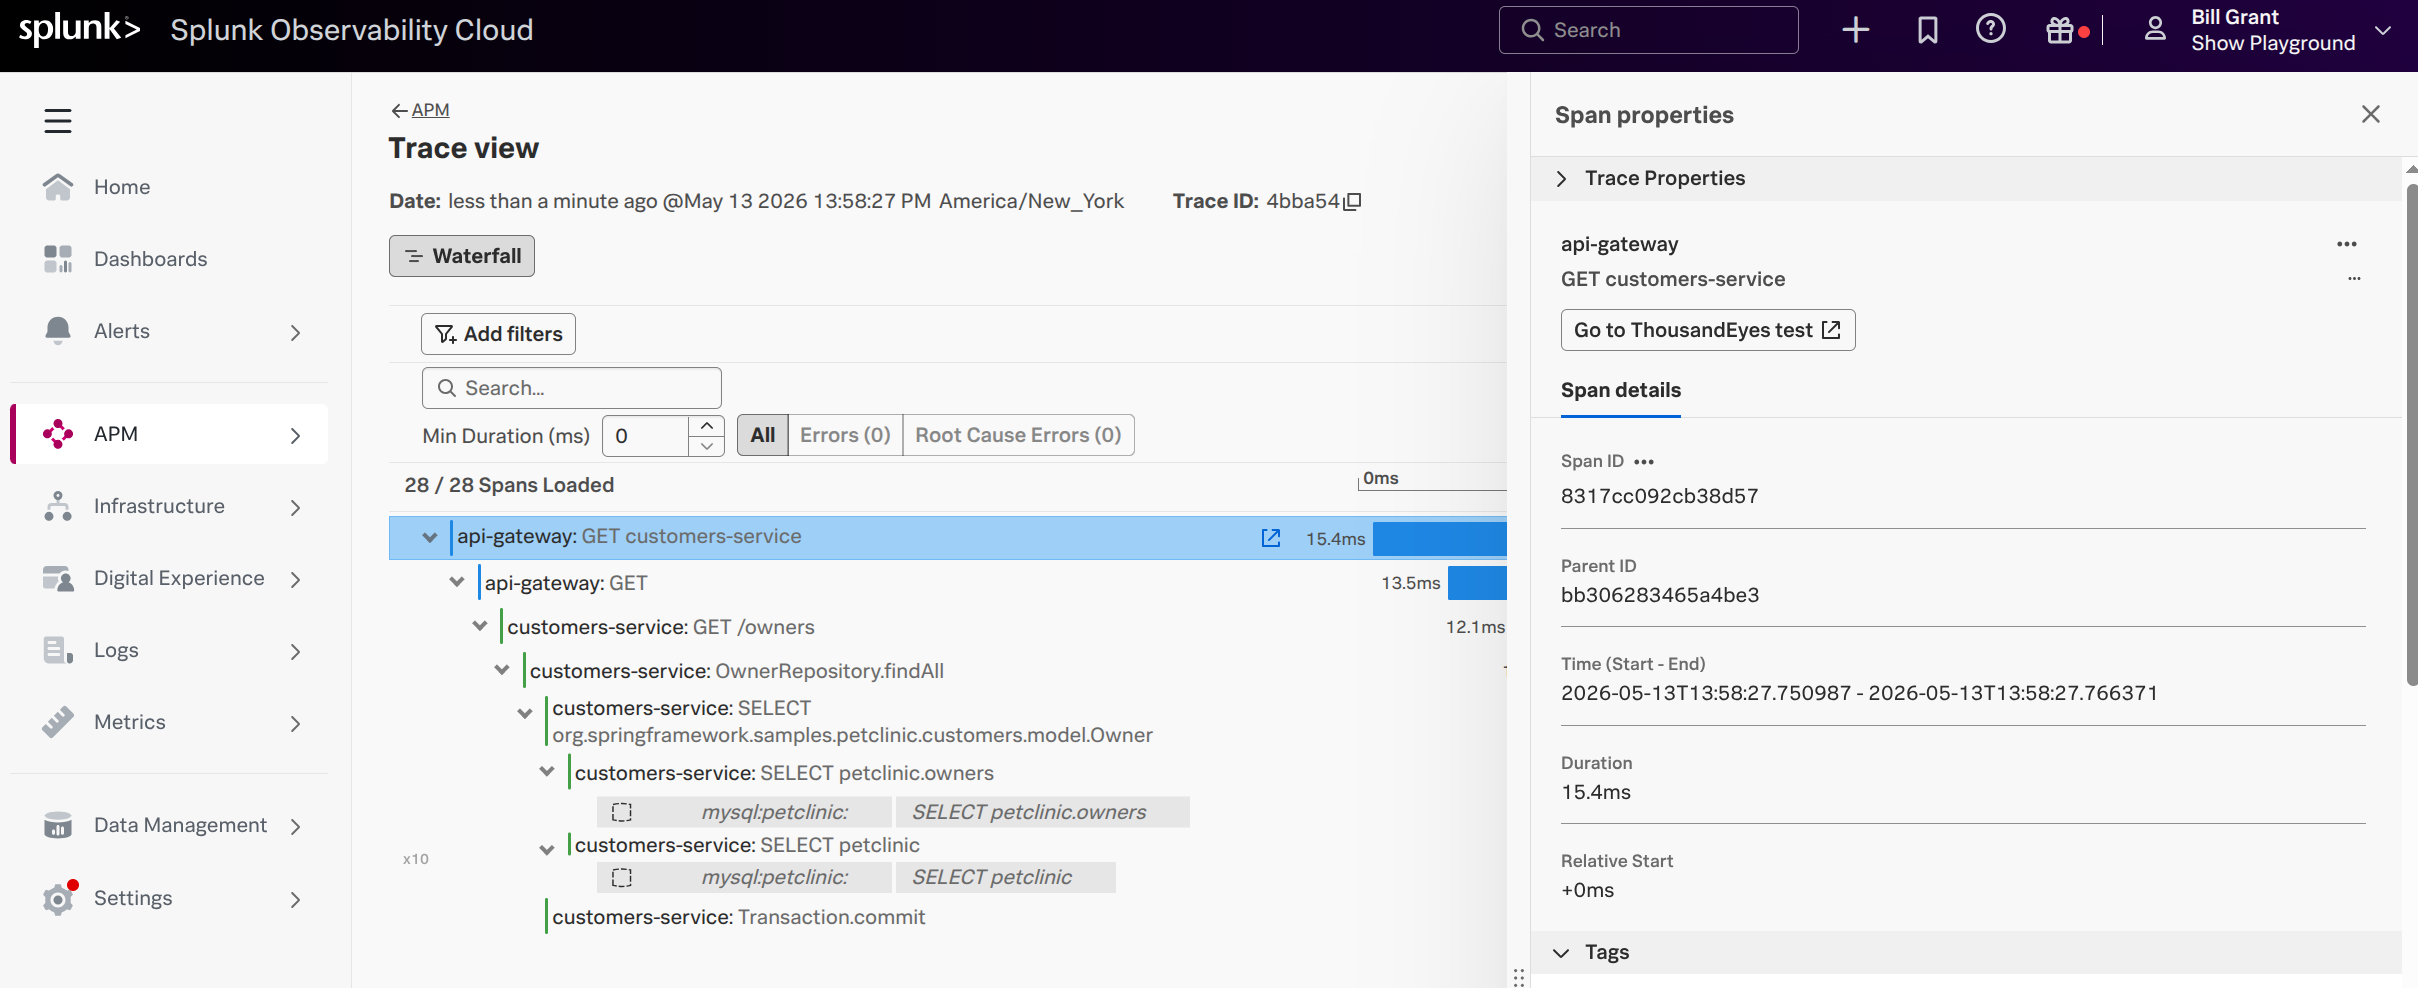
Ultimately you should see something like the following:

Step 2: HTTP Test (In Kubernetes Cluster) - More interesting trace
Now let’s repeat step 1, but using the url:
http://api-gateway.default.svc.cluster.local:82/api/customer/owners(Owners List).You can edit the same test you made, and run an instant test.
You should get more interesting maps.
ThousandEyes Failure
Notice my test in ThousandEyes failed? That’s because I didn’t change the Verify Content based on the Owners List.