Configure Escalation Policies
Aim
Escalation policies determine who is actually on-call for a given team and are the link to utilizing any rotations that have been created.
The aim of this module is for you to create three different Escalation Policies to demonstrate a number of different features and operating models.
The instructor will start by explaining the concepts before you proceed with the configuration.
Navigate to the Escalation Polices tab on the Teams sub menu, you should have no existing Polices so we need to create some.
We are going to create the following Polices to cover off three typical use cases.
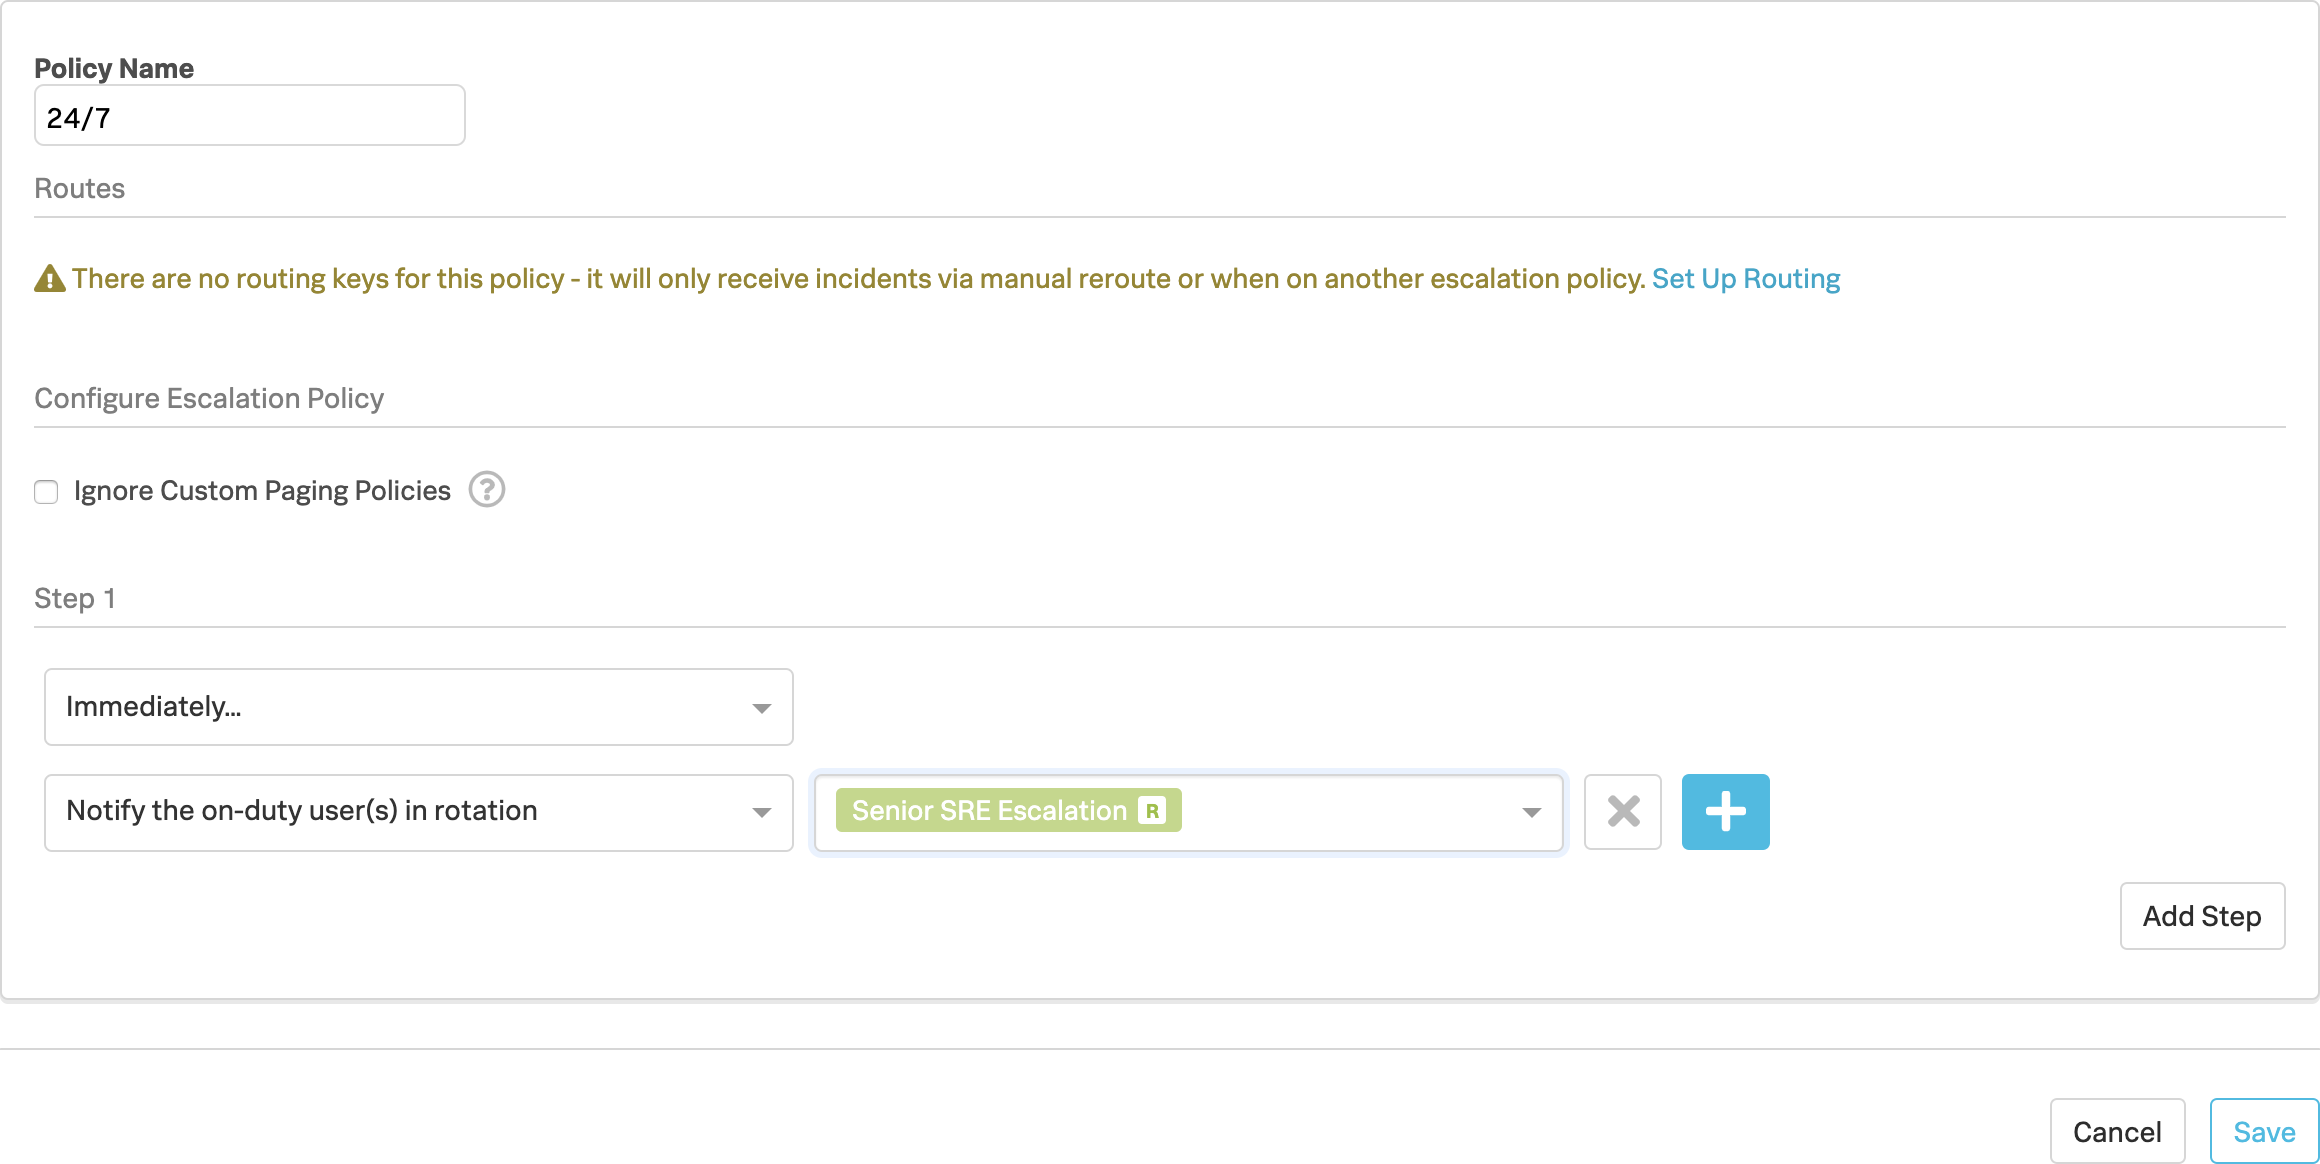
1. 24/7 Policy
Click Add Escalation Policy
- Policy Name: 24/7
- Step 1
- Immediately
- Notify the on-duty user(s) in rotation → Senior SRE Escalation
- Click Save
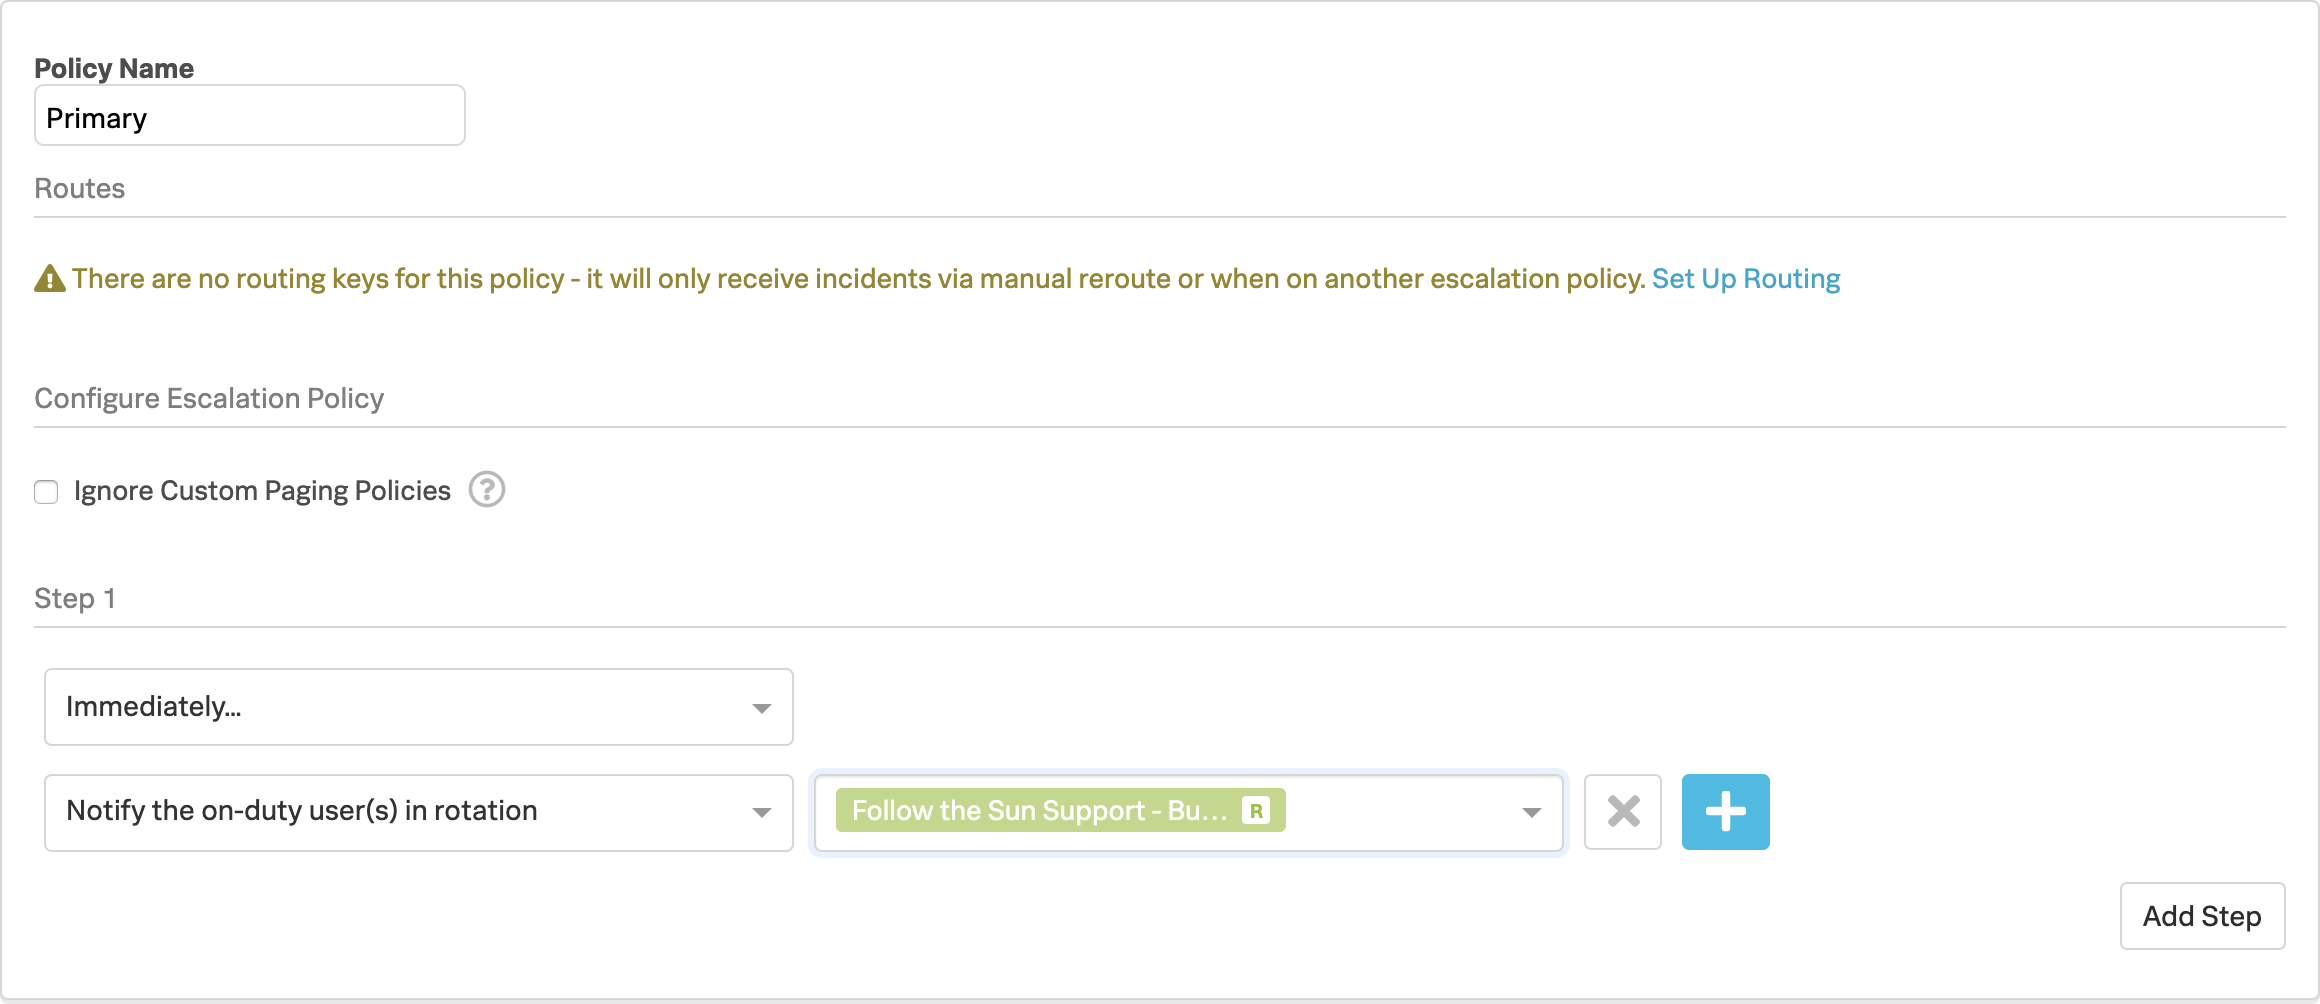
2. Primary Policy
Click Add Escalation Policy
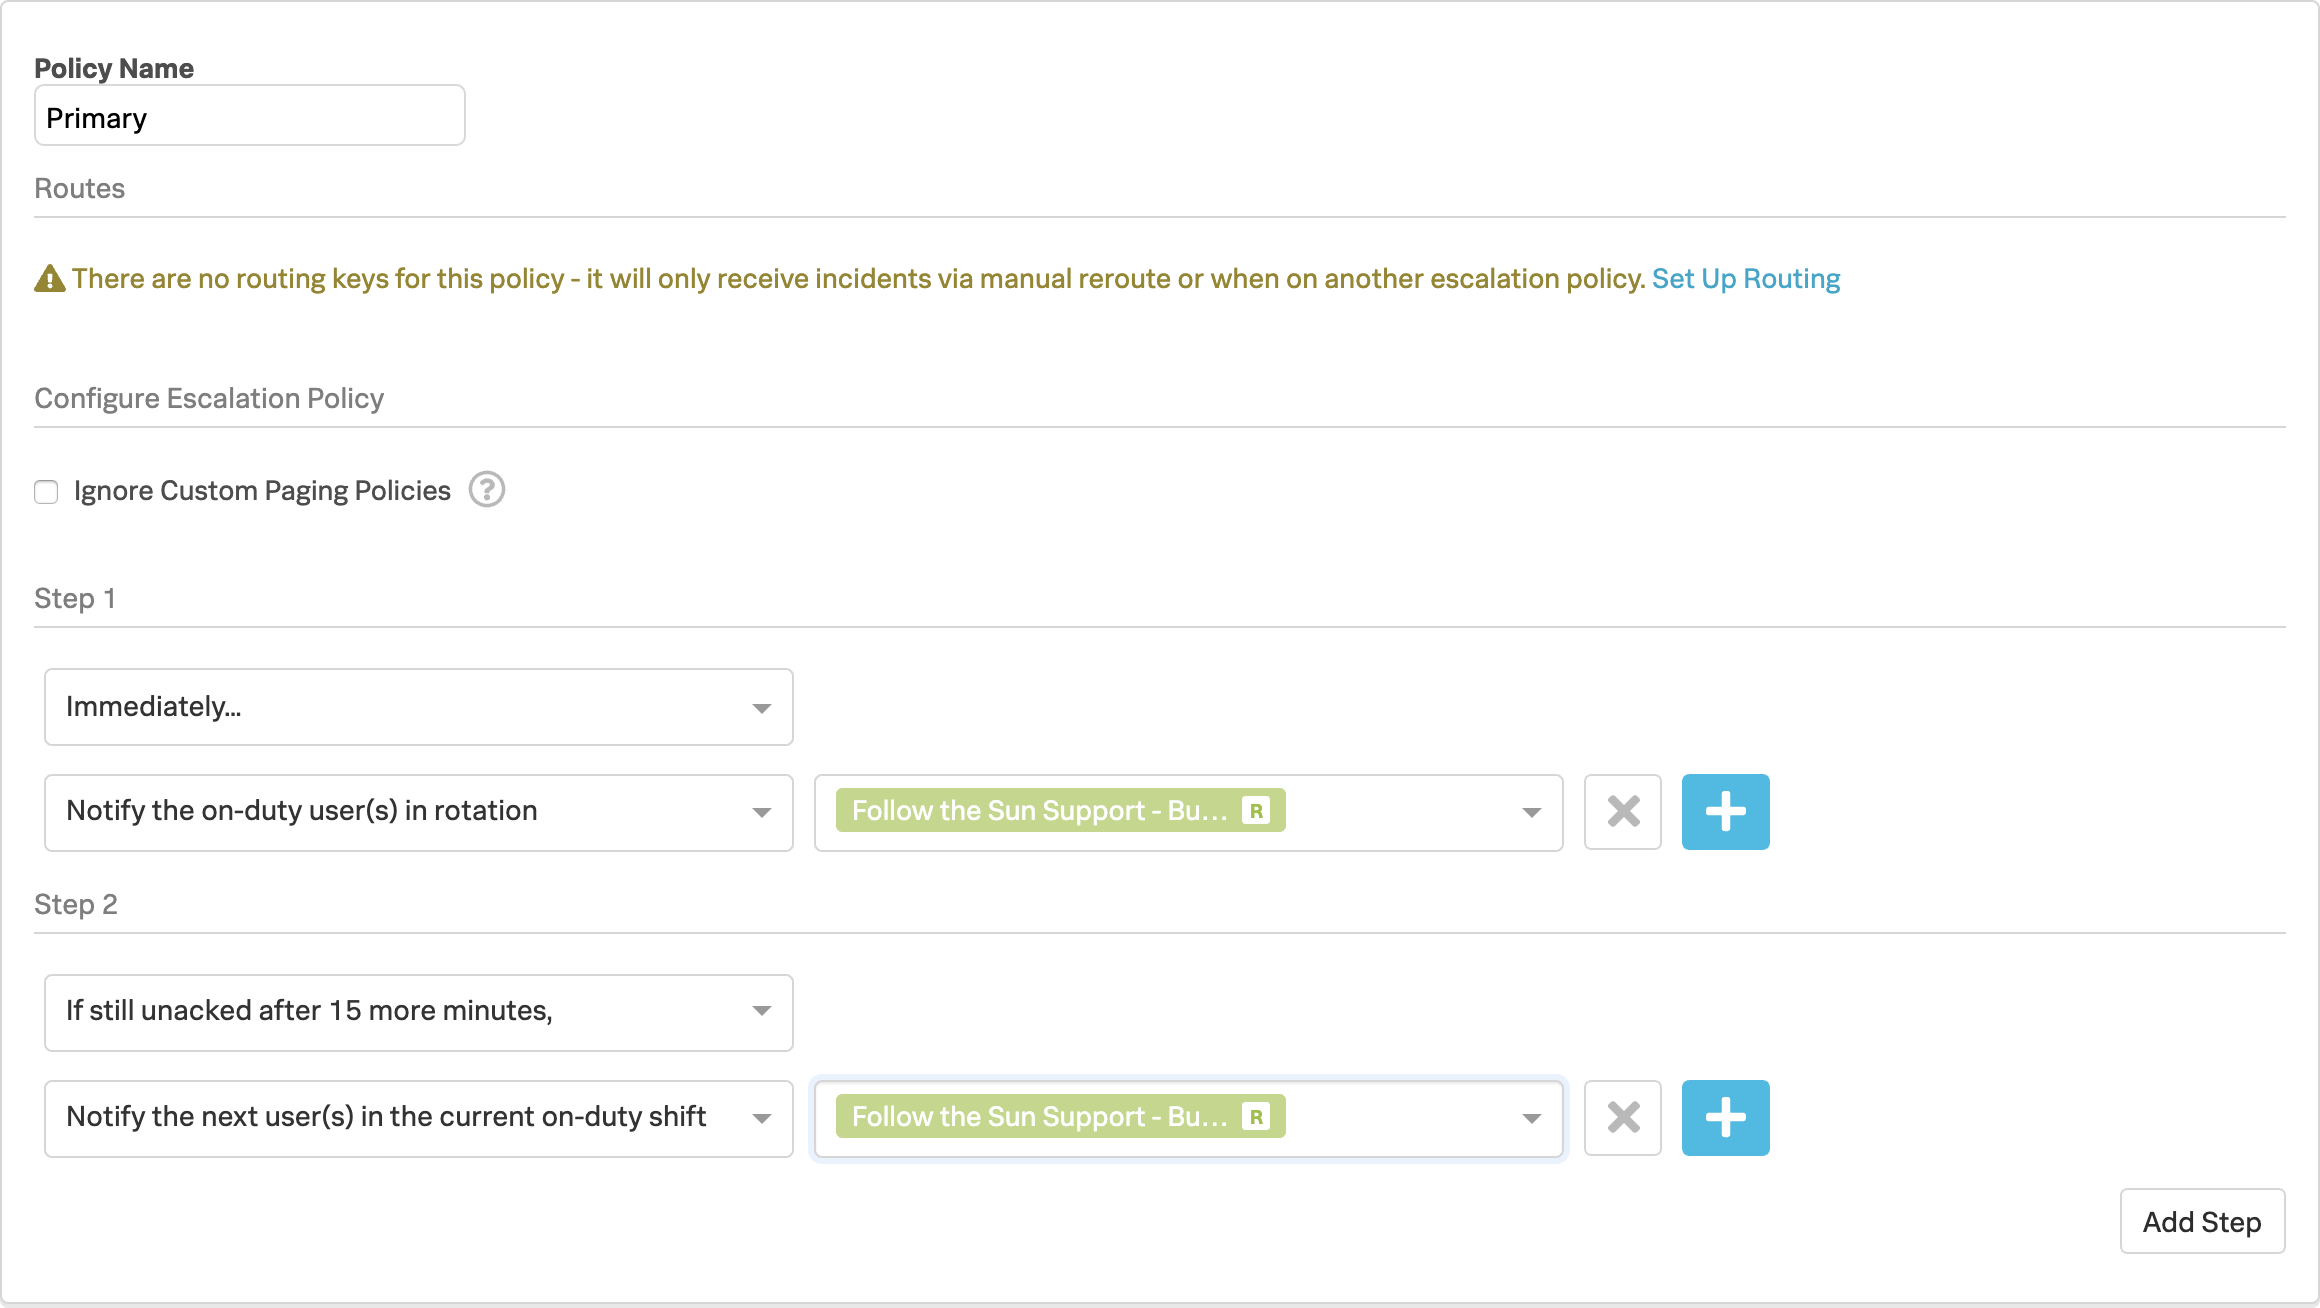
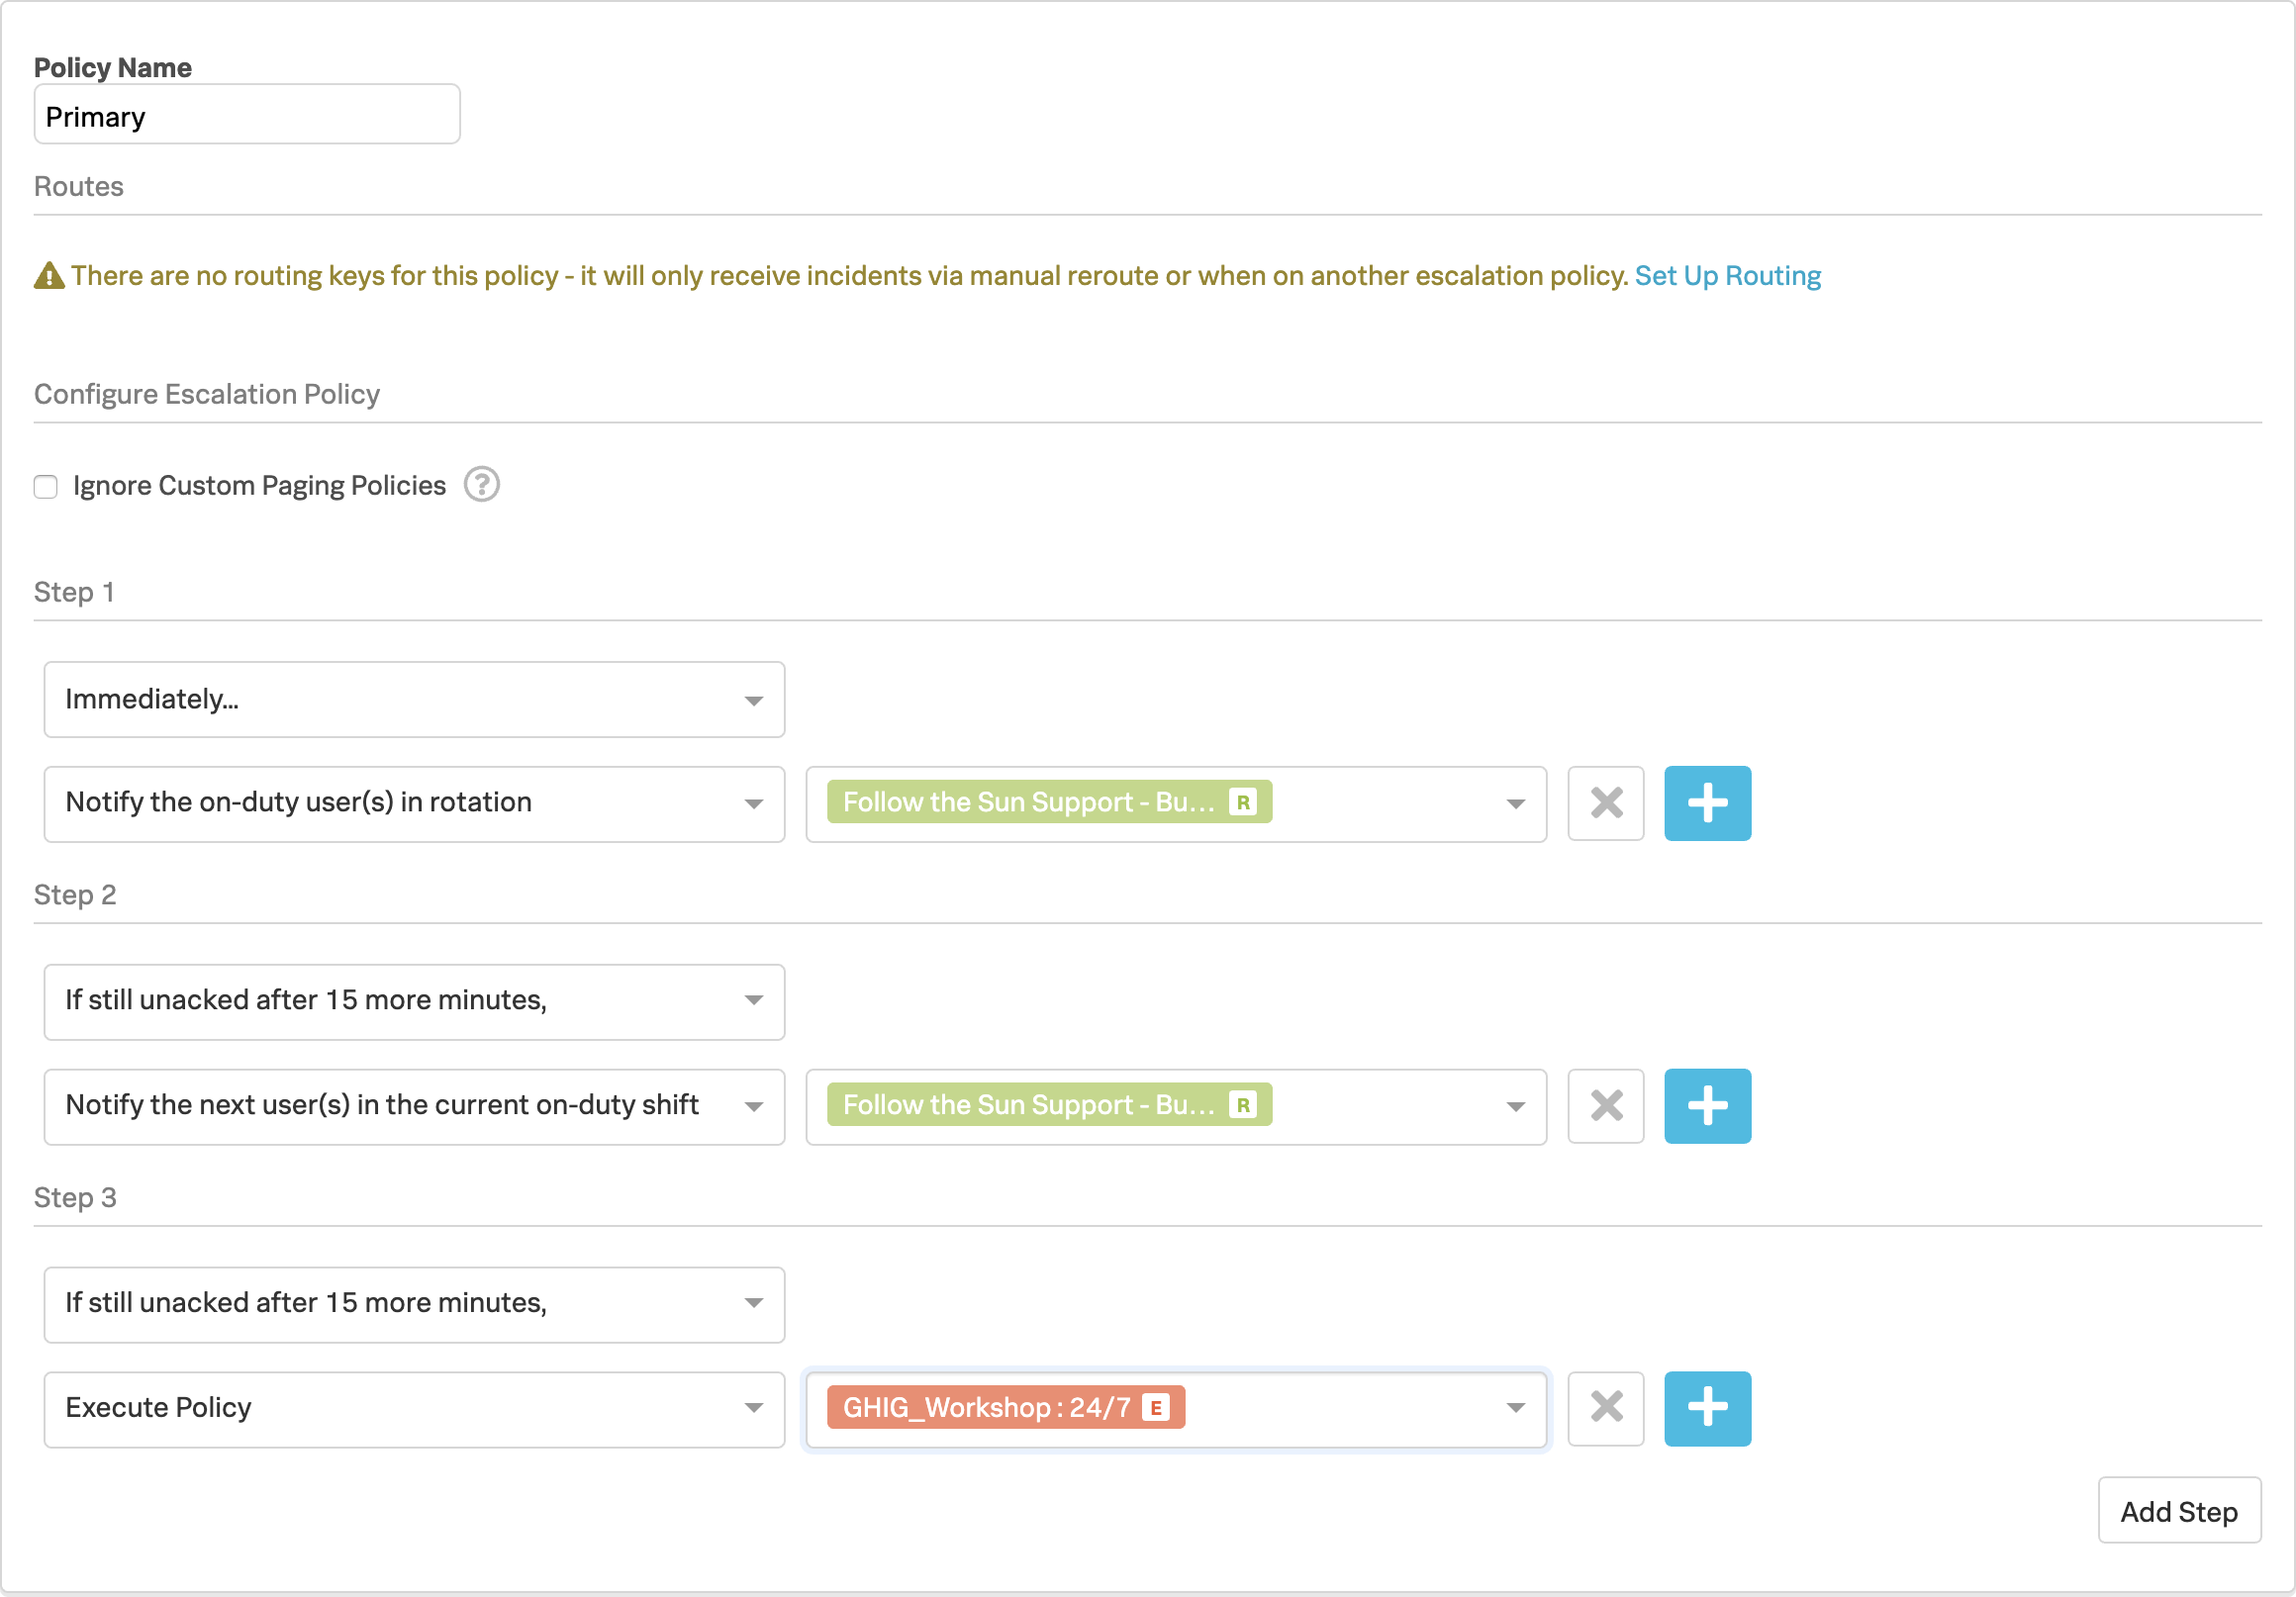
- Policy Name: Primary
- Step 1
- Immediately
- Notify the on-duty user(s) in rotation → Follow the Sun Support - Business Hours
- Click Add Step
- Step 2
- If still un-acknowledged after 15 minutes
- Notify the next user(s) in the current on-duty shift → Follow the Sun Support - Business Hours
- Click Add Step
- Step 3
- If still un-acknowledged after 15 more minutes
- Execute Policy → [Your Team Name] : 24/7
- Click Save
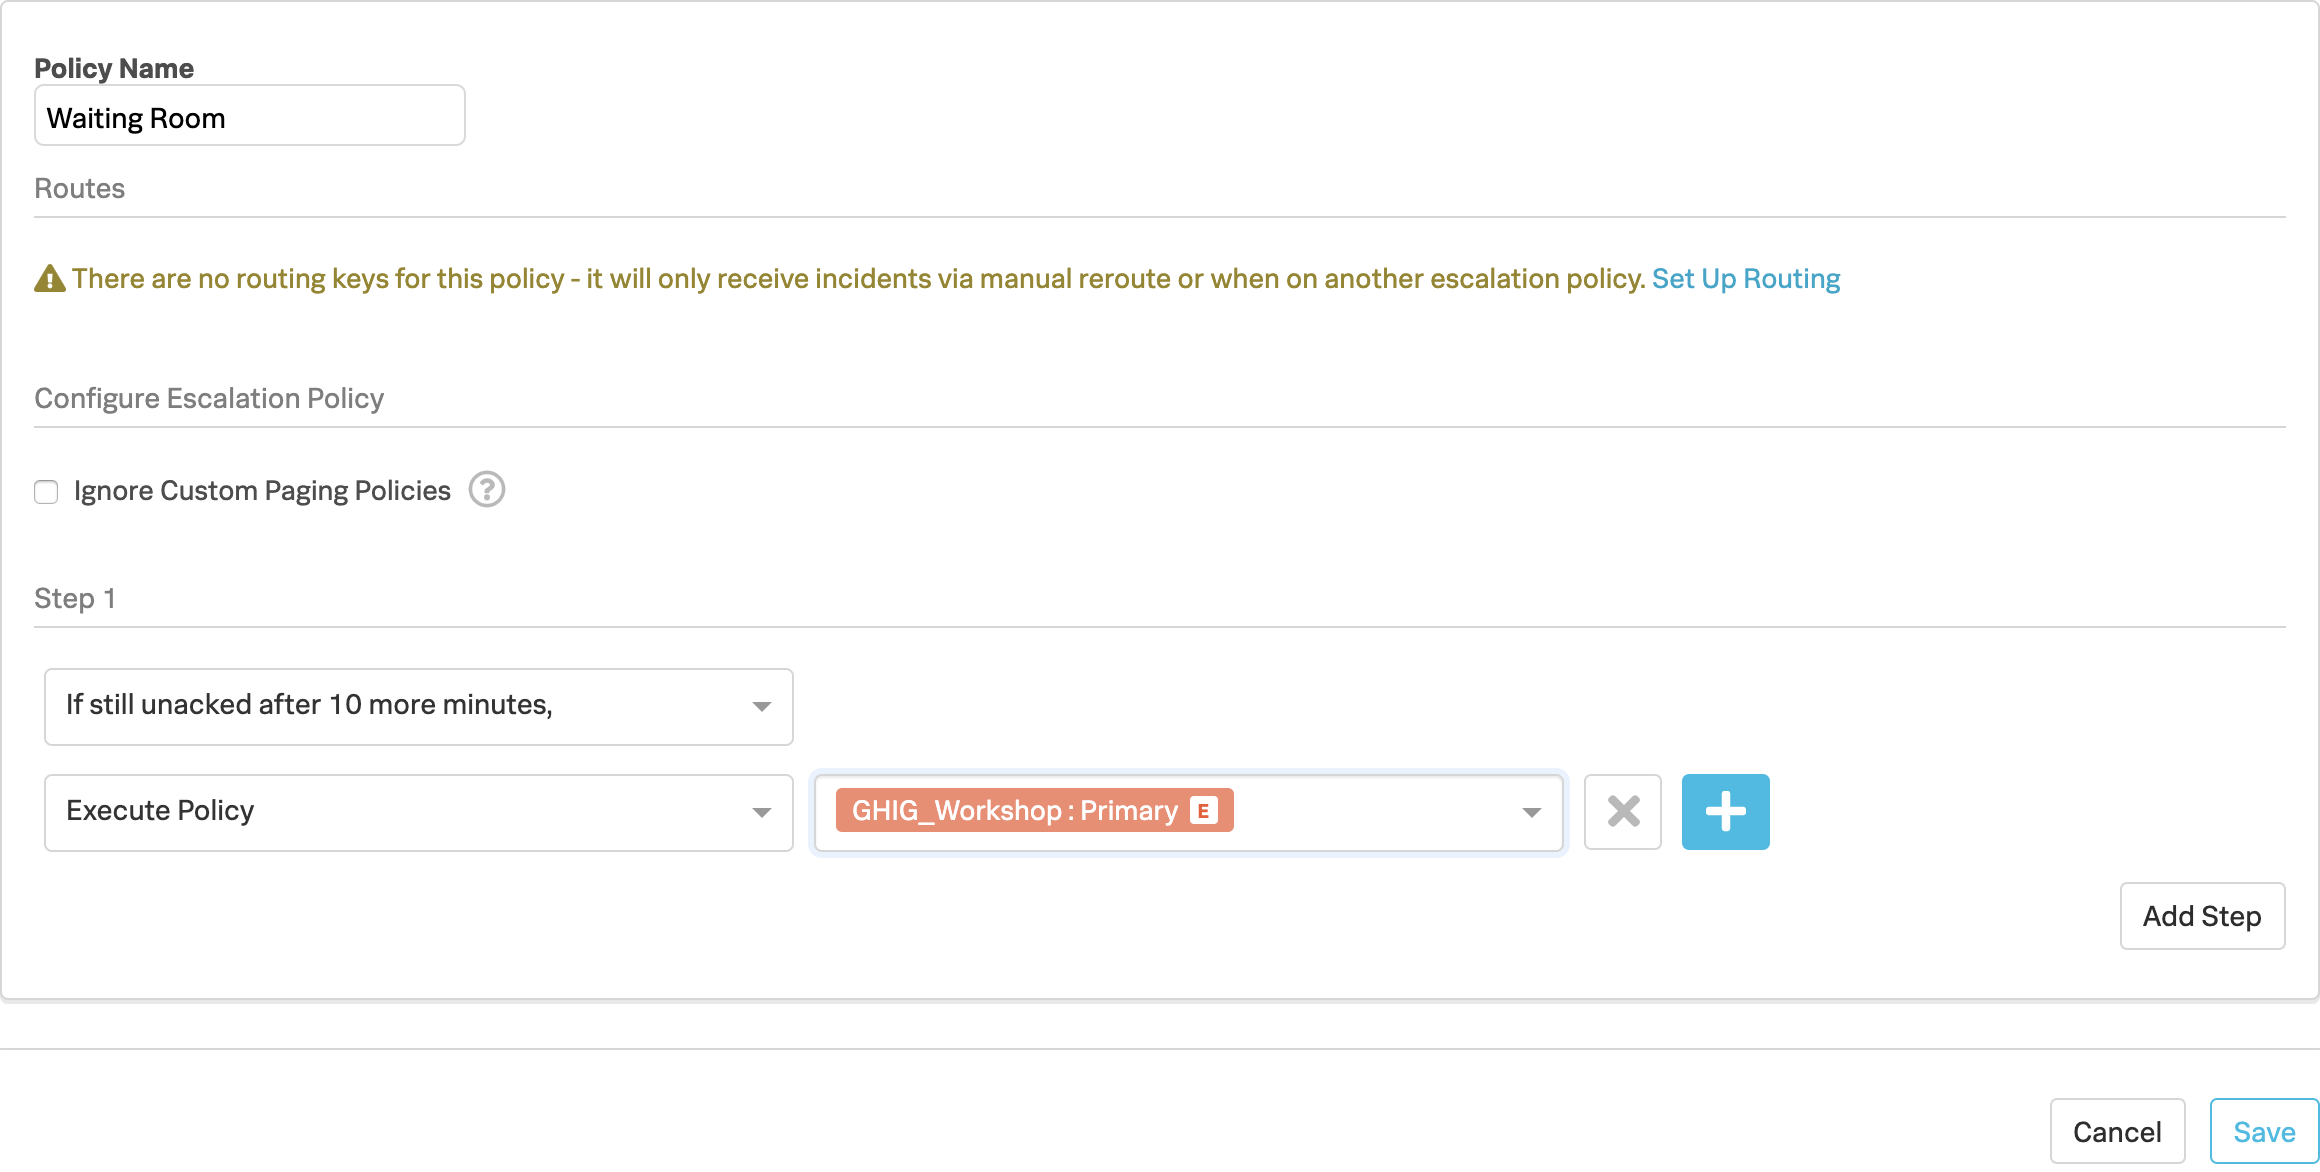
3. Waiting Room Policy
Click Add Escalation Policy
- Policy Name: Waiting Room
- Step 1
- If still un-acknowledged after 10 more minutes
- Execute Policy → [Your Team Name] : Primary
- Click Save
You should now have the following three escalation polices:
You may have noticed that when we created each policy there was the following warning message:
There are no routing keys for this policy - it will only receive incidents via manual reroute or when on another escalation policy
This is because there are no Routing Keys linked to these Escalation Polices, so now that we have these polices configured we can create the Routing Keys and link them to our Polices..
Continue and also complete the Creating Routing Keys module.


