Indicators
About Indicators
Indicator objects describe Indicators of Compromise (IoC).
For more information see the STIX specification: STIX Indicator SDO
New Indicator via Workflow Action
You can feed a Splunk event or field value into the New Indicator form via a workflow action.
Event Workflow Action
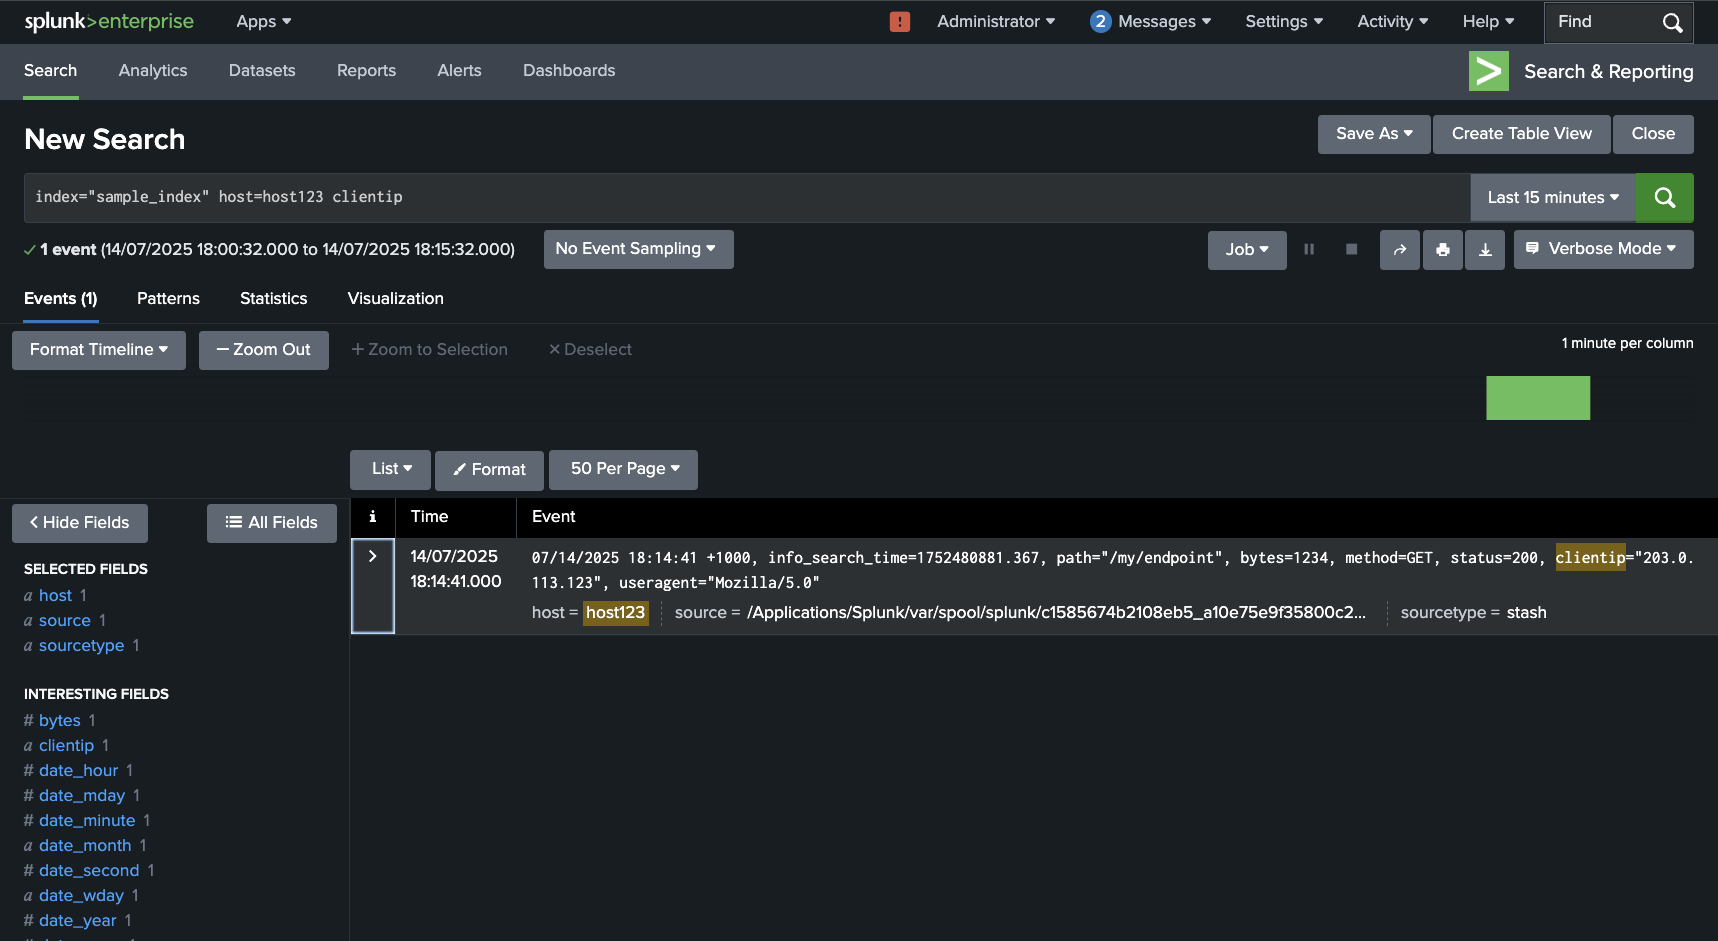
A workflow action can be triggered from Splunk's Search page on an event or field.
For example, given this event, click on the > button to expand the event:
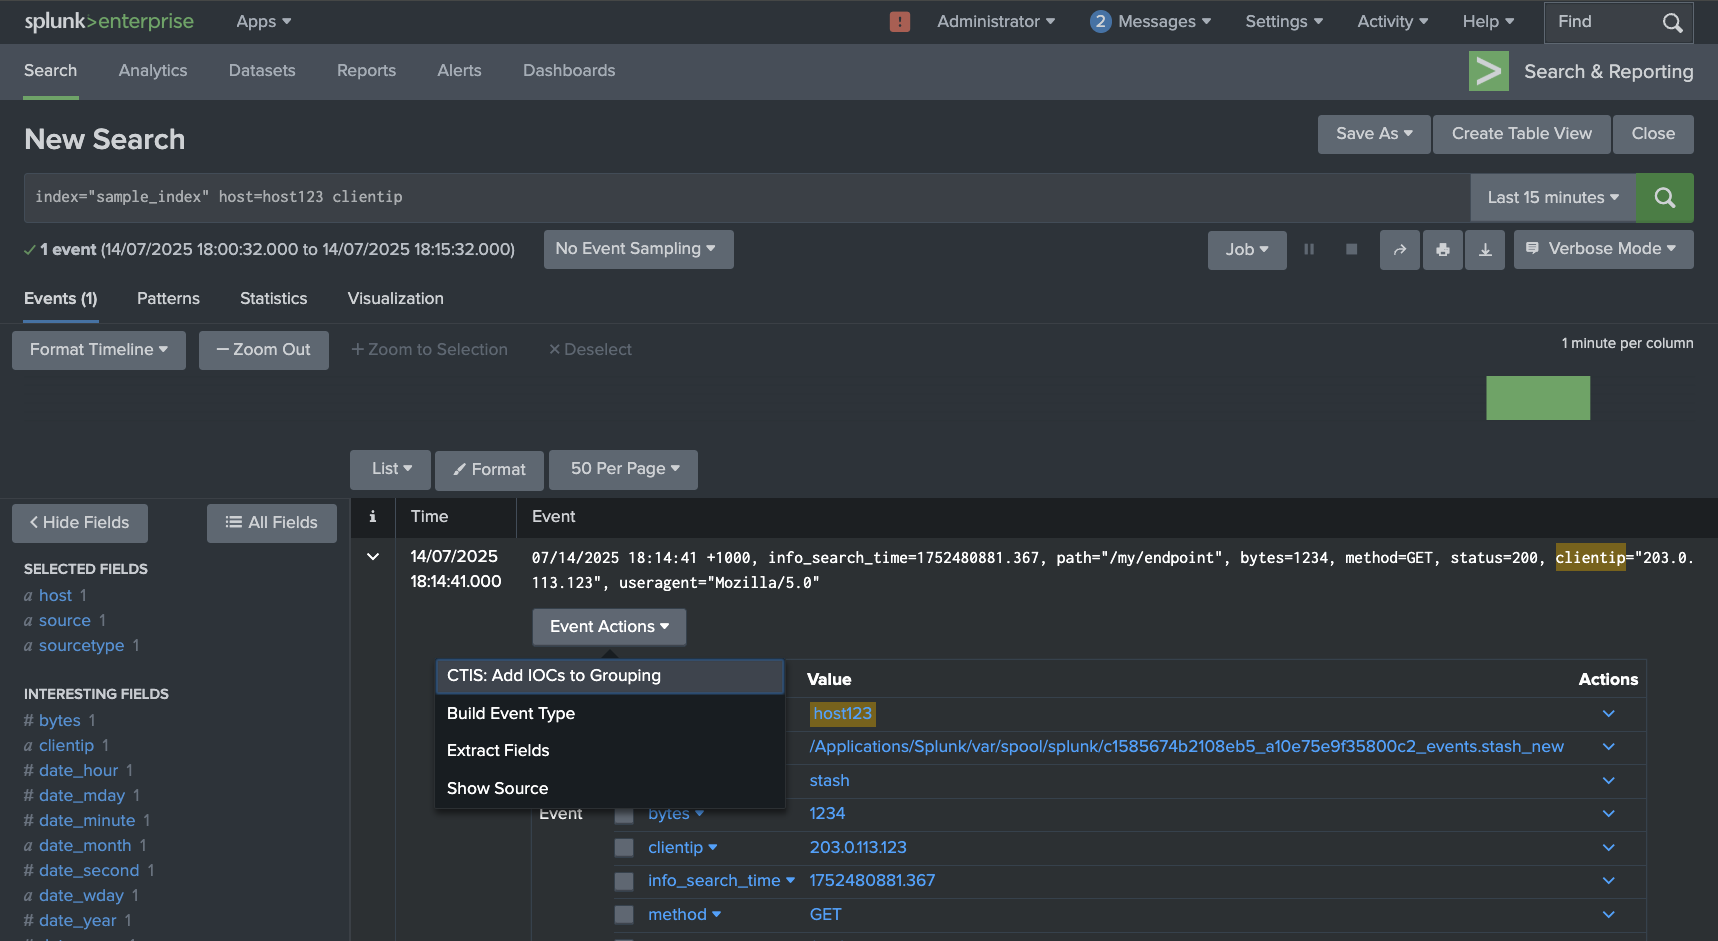
Then, click on Event Actions to list available workflow actions. Then click on CTIS: Add IOCs to Grouping. This will open the form to add new Indicators to a Grouping.
In the form you will be able to enter related details for the new Indicator.
Field Workflow Action
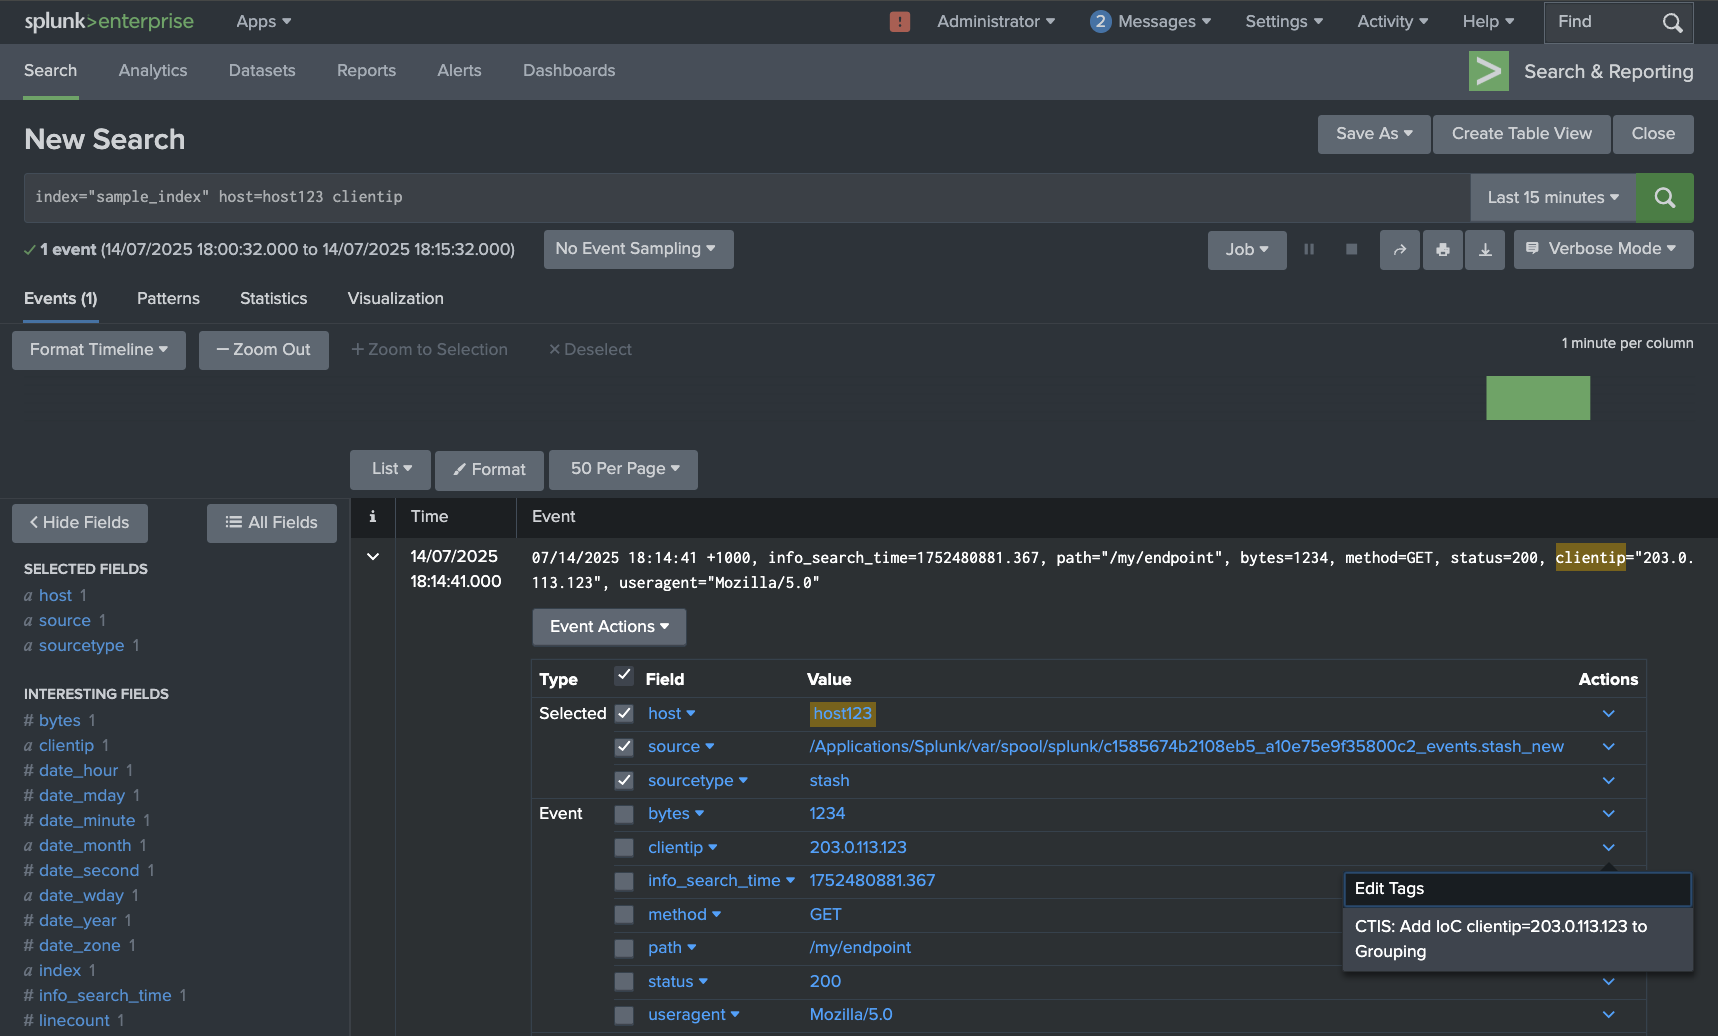
Alternatively, you can trigger the workflow action from a field in the event:
Click on the Actions ⌄ downward-caret field button to show the available field level workflow actions.
Then click on CTIS: Add IoC field=value to Grouping:
New Indicator Form via Navigation Menu
You can also create a new Indicator via accessing the form directly from the navigation menu.
Click on Indicators > New Indicator:
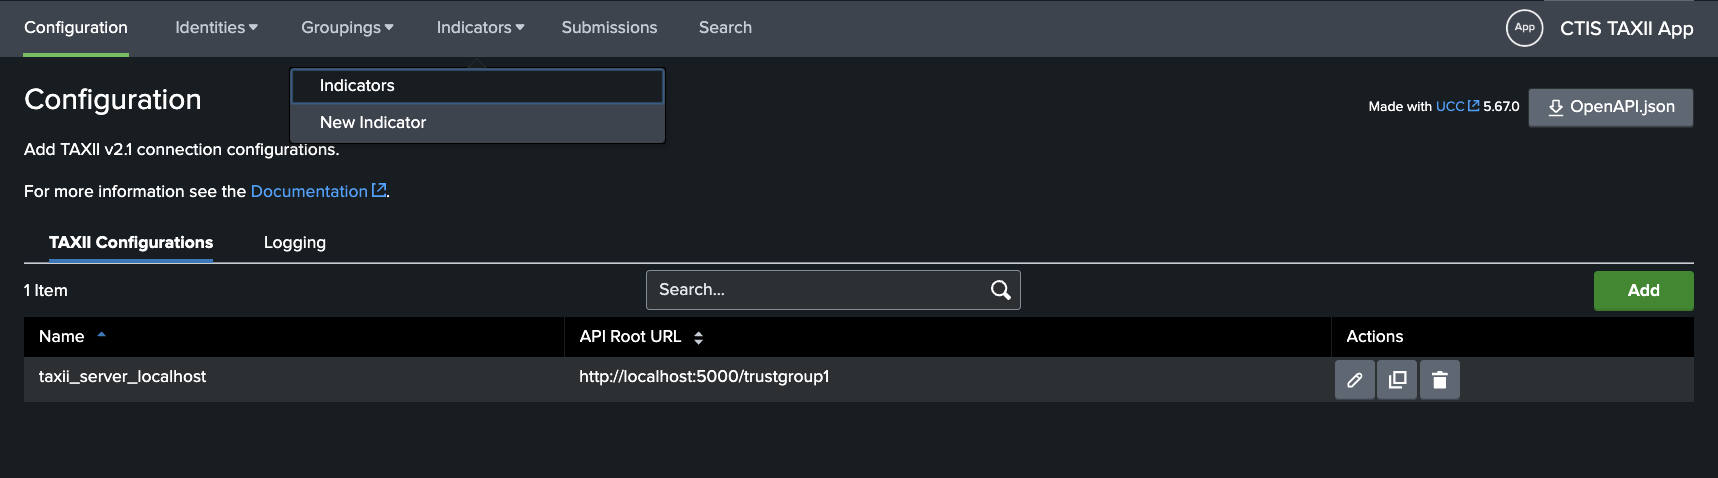
Note that this form is similar to the one used for creating Indicators via a workflow action, but does not pre-populate the Splunk Field dropdown with values from an event.
New Indicator / Add Indicators of Compromise (IoC) to Grouping Form
Once the Add Indicators of Compromise (IoC) to Grouping form is opened via workflow action, fill in the Common Properties section with your required Grouping, Confidence, TLP Marking and Valid From timestamp.
The details in the Common Properties are applied to all new Indicators that you create in this form.
Then, proceed to fill in the details for the new Indicator.
The Splunk Field dropdown becomes populated with field values from the event which was used to trigger the workflow action.
The Indicator Cateogry dropdown and the Splunk Field dropdown are used to generate a suggested STIX Pattern for the Indicator.
As an example below, see that the Splunk field clientip has been selected which uses the value 203.0.113.123 to feed into generating a STIX pattern describing a Source IPv4 Address.
Note that you can manually edit the STIX Pattern if you wish. Validation is performed to ensure that the pattern syntax is valid.
Finally, populate a Indicator Name and Indicator Description for the Indicator.
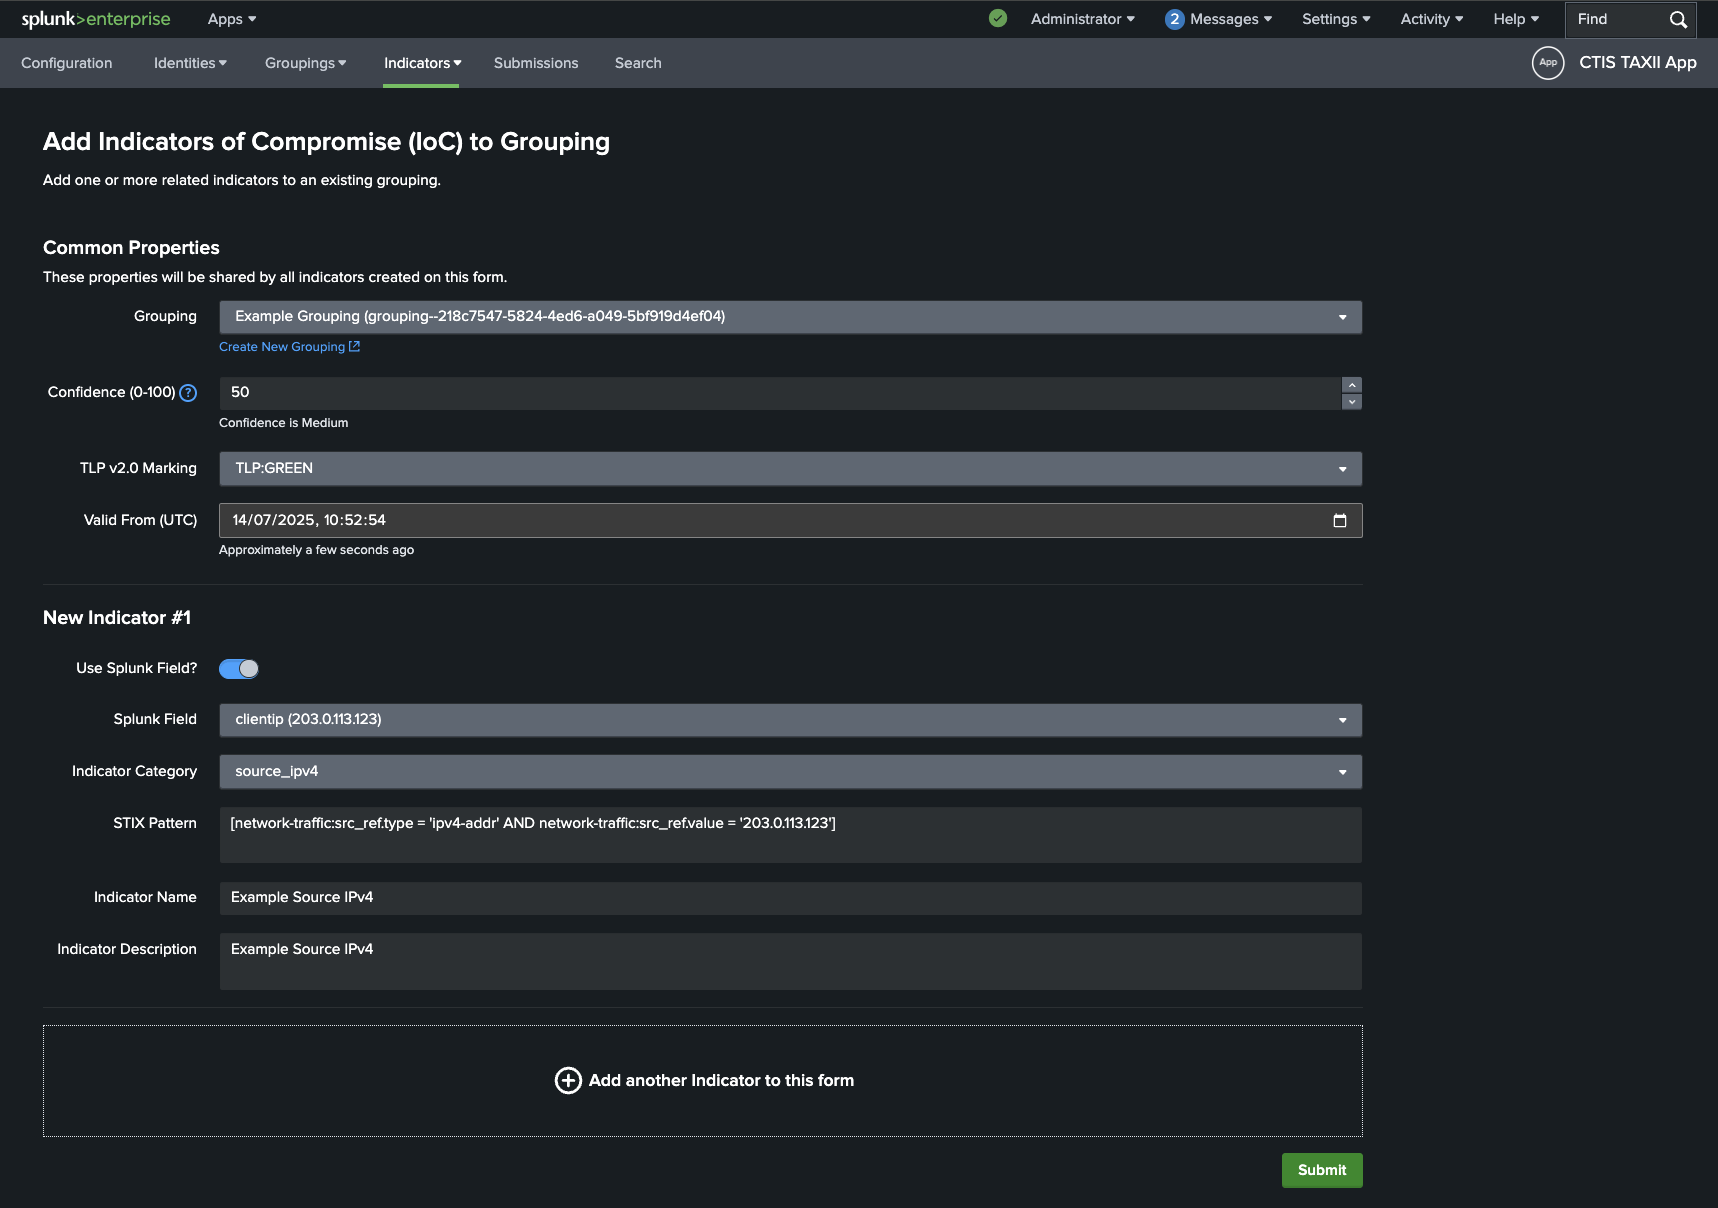
Optionally, you can add multiple indicators by clicking on the Add another Indicator to this form button at the bottom of the form.
Once you are done, click on Submit to create the Indicator.
Indicator Category
The Indicator Category dropdown is used to classify the type of Indicator you are creating and helps with the app's auto-generation of a STIX Pattern via a pattern template.
This field is not a part of the STIX specification and is not included in the STIX SDO generated for submission to a TAXII server.
The list of available categories includes templates for common IoCs such as IPv4 Address, IPv6 Address, Domain Name, Email Address, File Hash, and URL.
If you believe a useful Indicator Category is missing, please raise an issue on Github.
STIX Patterns
For more information on STIX Patterns, see the STIX documentation.
For examples of STIX patterns see here.
Note on Unicode Characters
Note that specifying Unicode characters with \uXXXX syntax is not supported in the app.
You can however, paste the Unicode character you require in the indicator value field or modify the STIX Pattern directly.
For any non human-readable characters such as https://unicode-explorer.com/c/200B, it is recommended to note these in the description field of the Indicator.
Viewing / Searching Indicators
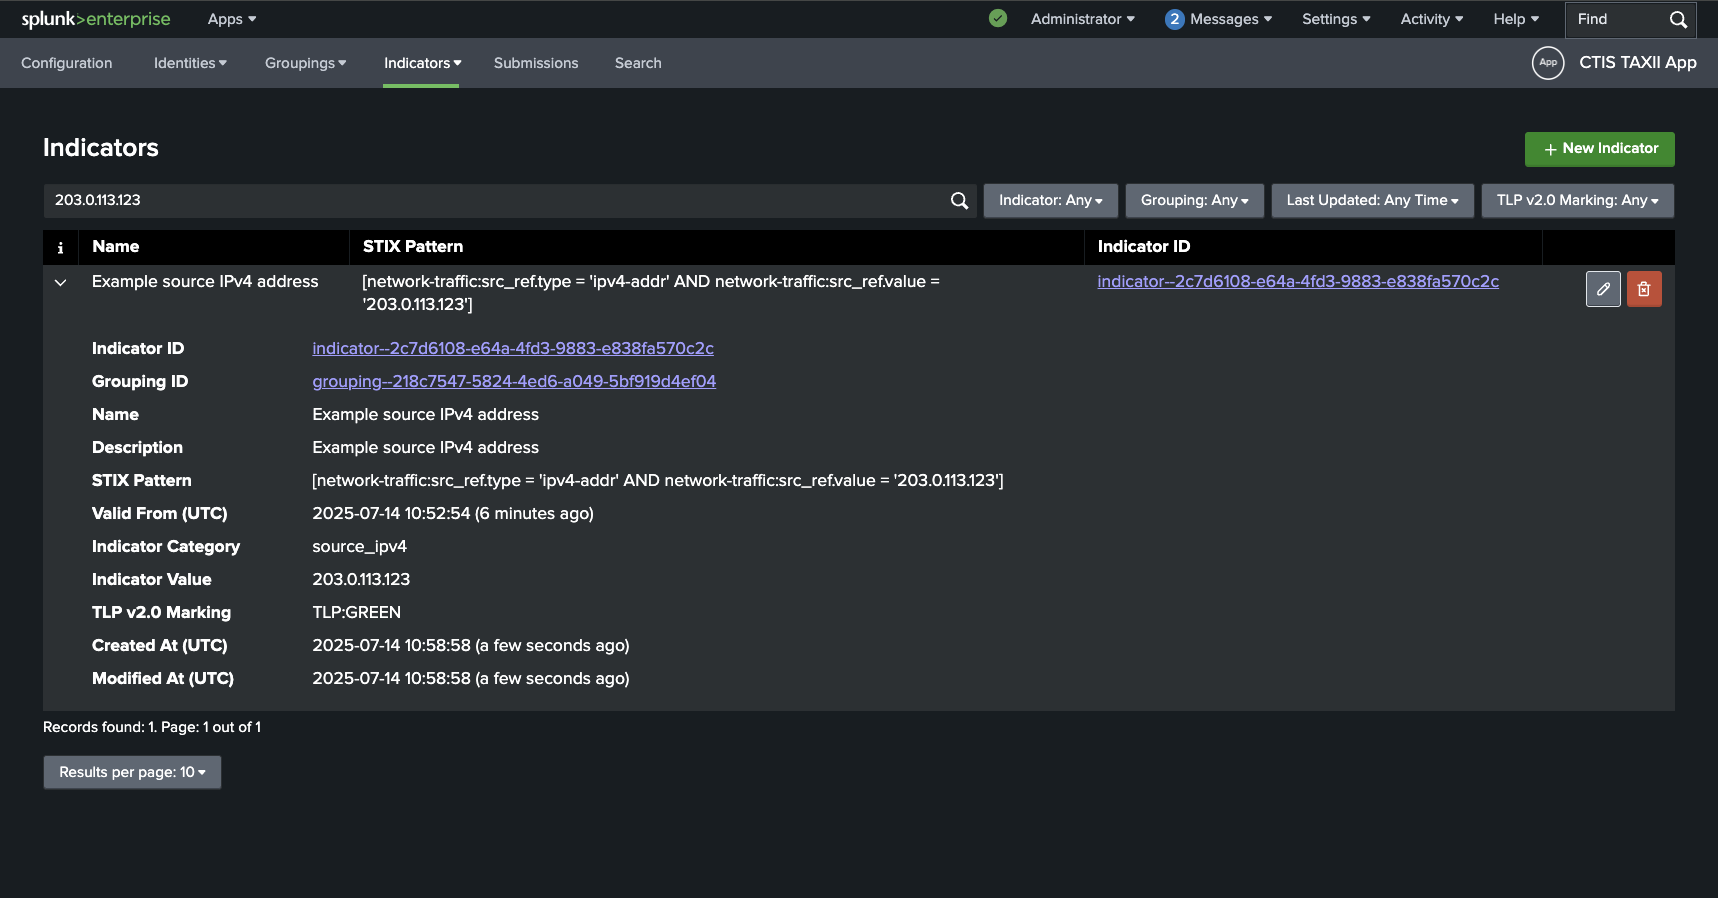
Again, viewing and searching Indicators is similar to the process for Identities and Groupings.
Fields that you can search include: Name, Description, STIX Pattern, Indicator Value, Indicator Category, Indicator ID and Grouping ID.
There are search filter dropdowns for Indicator ID, Grouping ID, Last Updated and TLP v2.0 Marking.
Editing Indicators
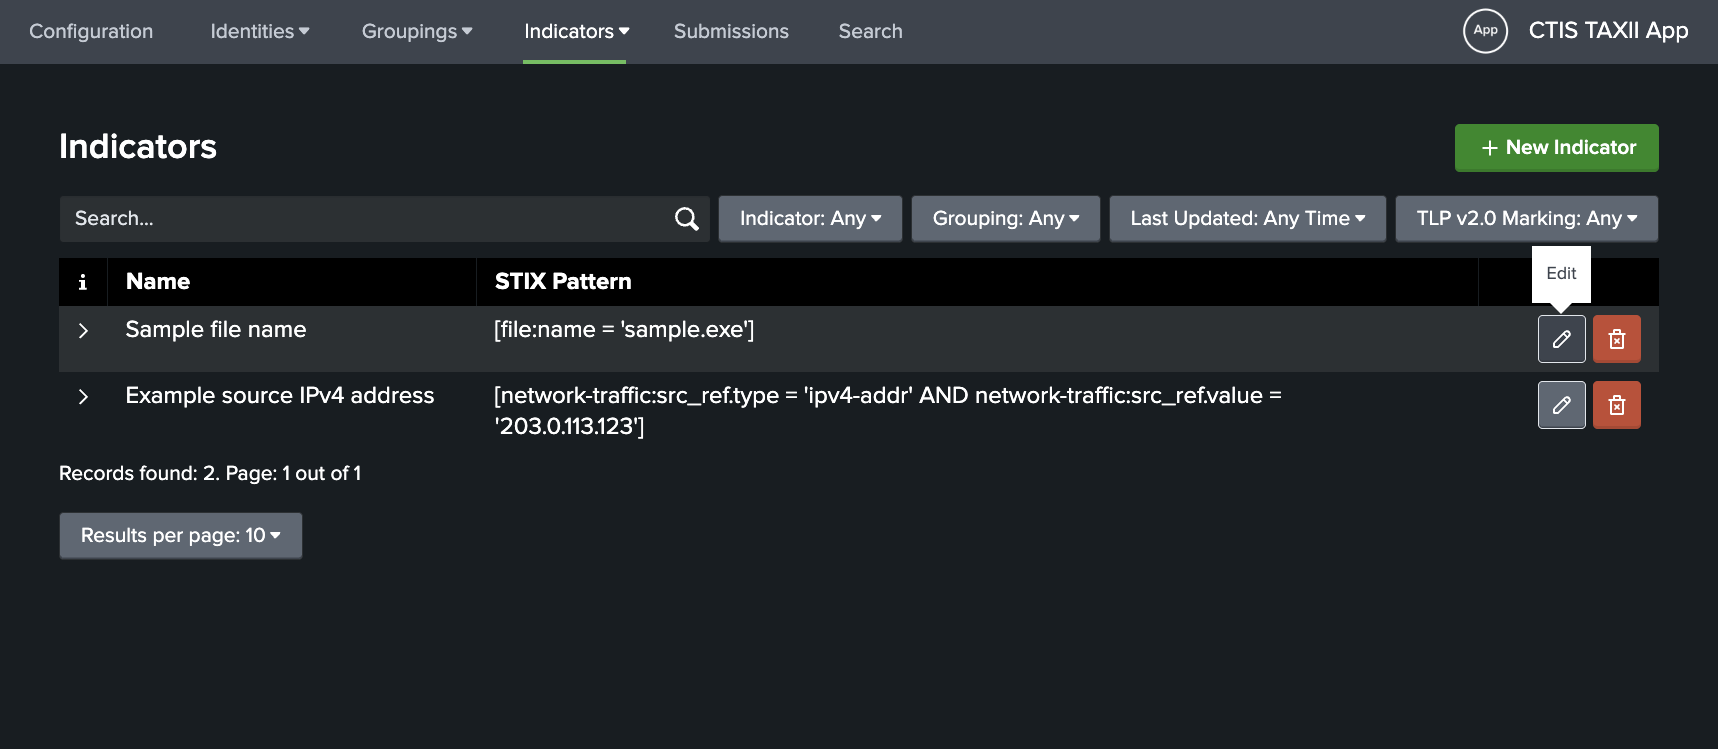
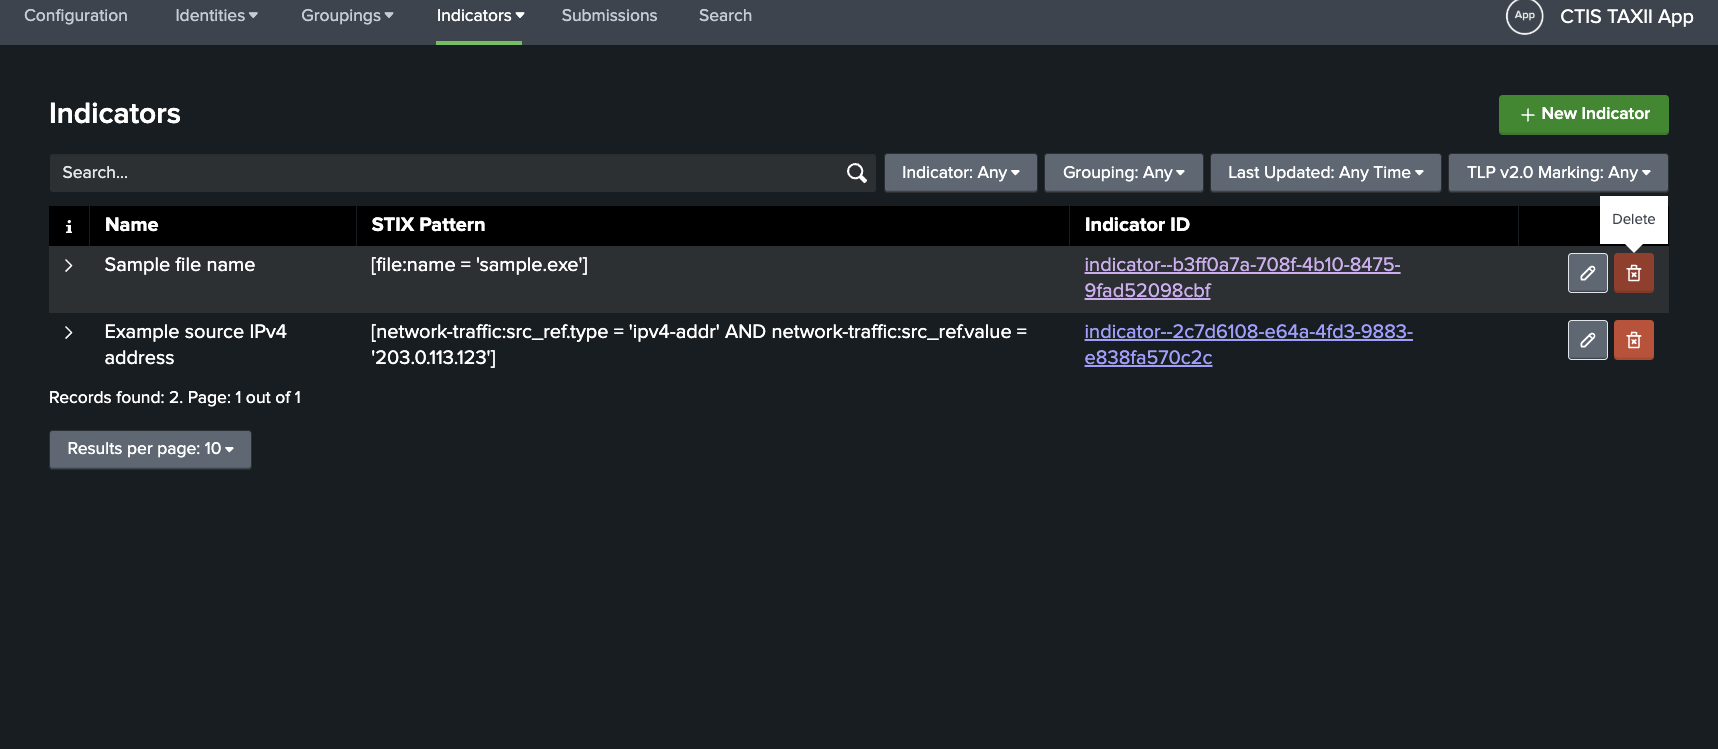
To edit an existing Indicator, click on the pencil button in the Indicator's row.
Deleting Indicators
To delete an existing Indicator, click on the trash can button in the Indicator's row.
You will be prompted to confirm the deletion.
Import Indicators from Bundle File
New in version v1.34.0.
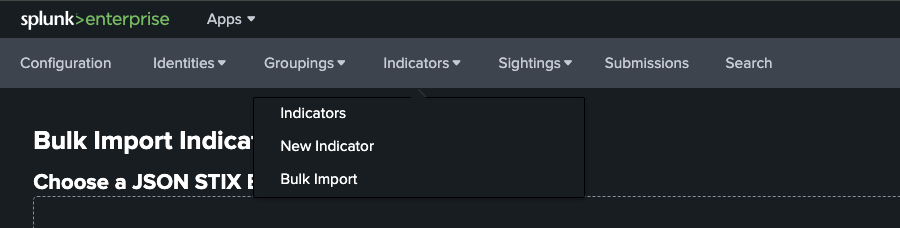
You can import indicators from a STIX 2.1 JSON Bundle file. To do so, navigate to Indicators > Bulk Import in the navigation menu.
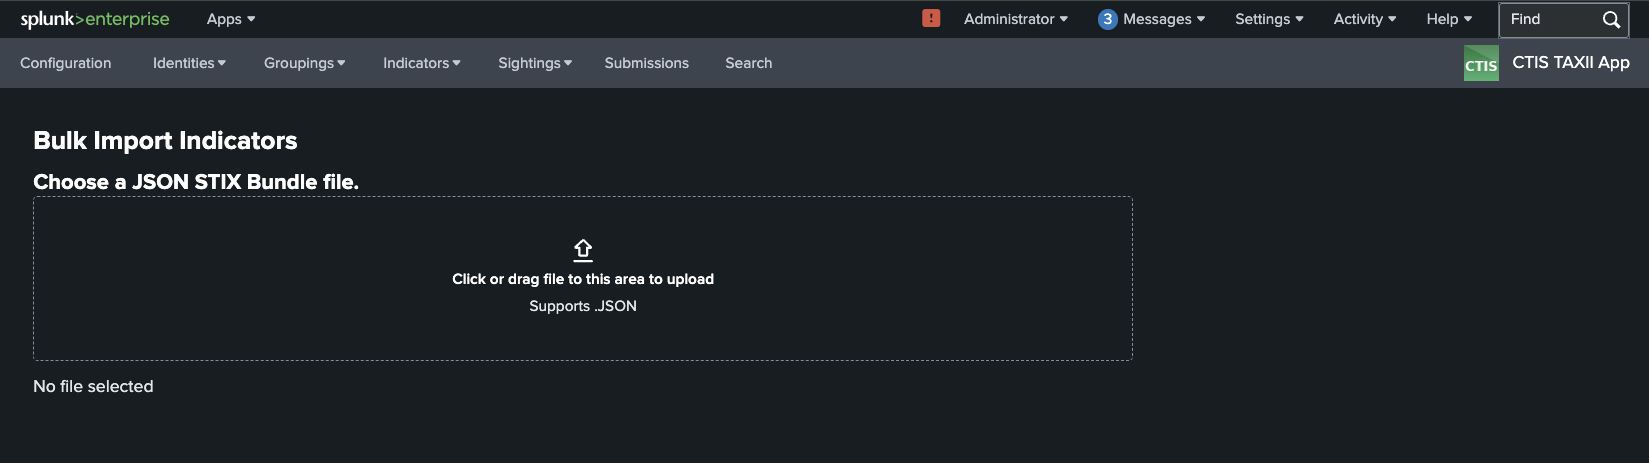
On this page you can click on the rectangle area to browse for a STIX Bundle JSON file. The bundle file should contain at least one indicator object. Any other type of objects in the bundle will be ignored.
All indicator objects are expected to have the following properties at a minimum:
idtype="indicator"spec_version="2.1"createdmodifiedpattern_type="stix"patternvalid_from
After selecting a STIX Bundle JSON file you will be shown a form to create a new Grouping.
The imported indicators will be added to this new grouping.
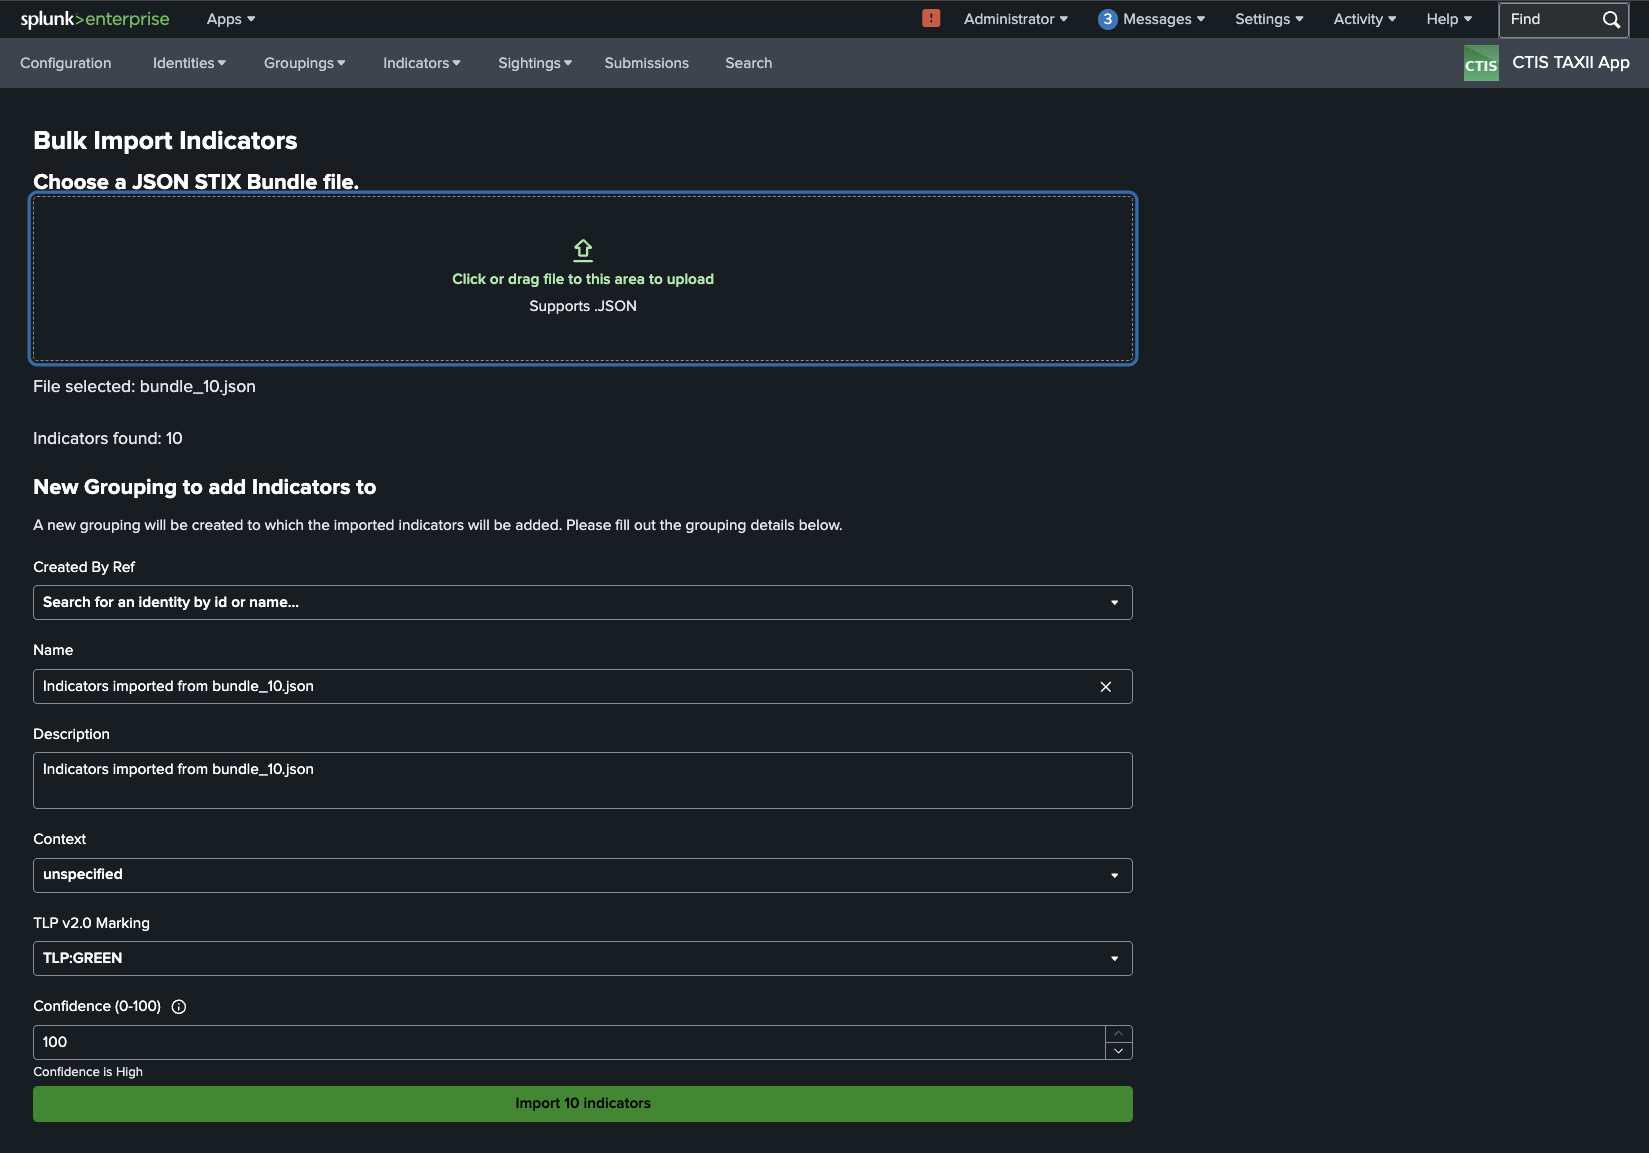
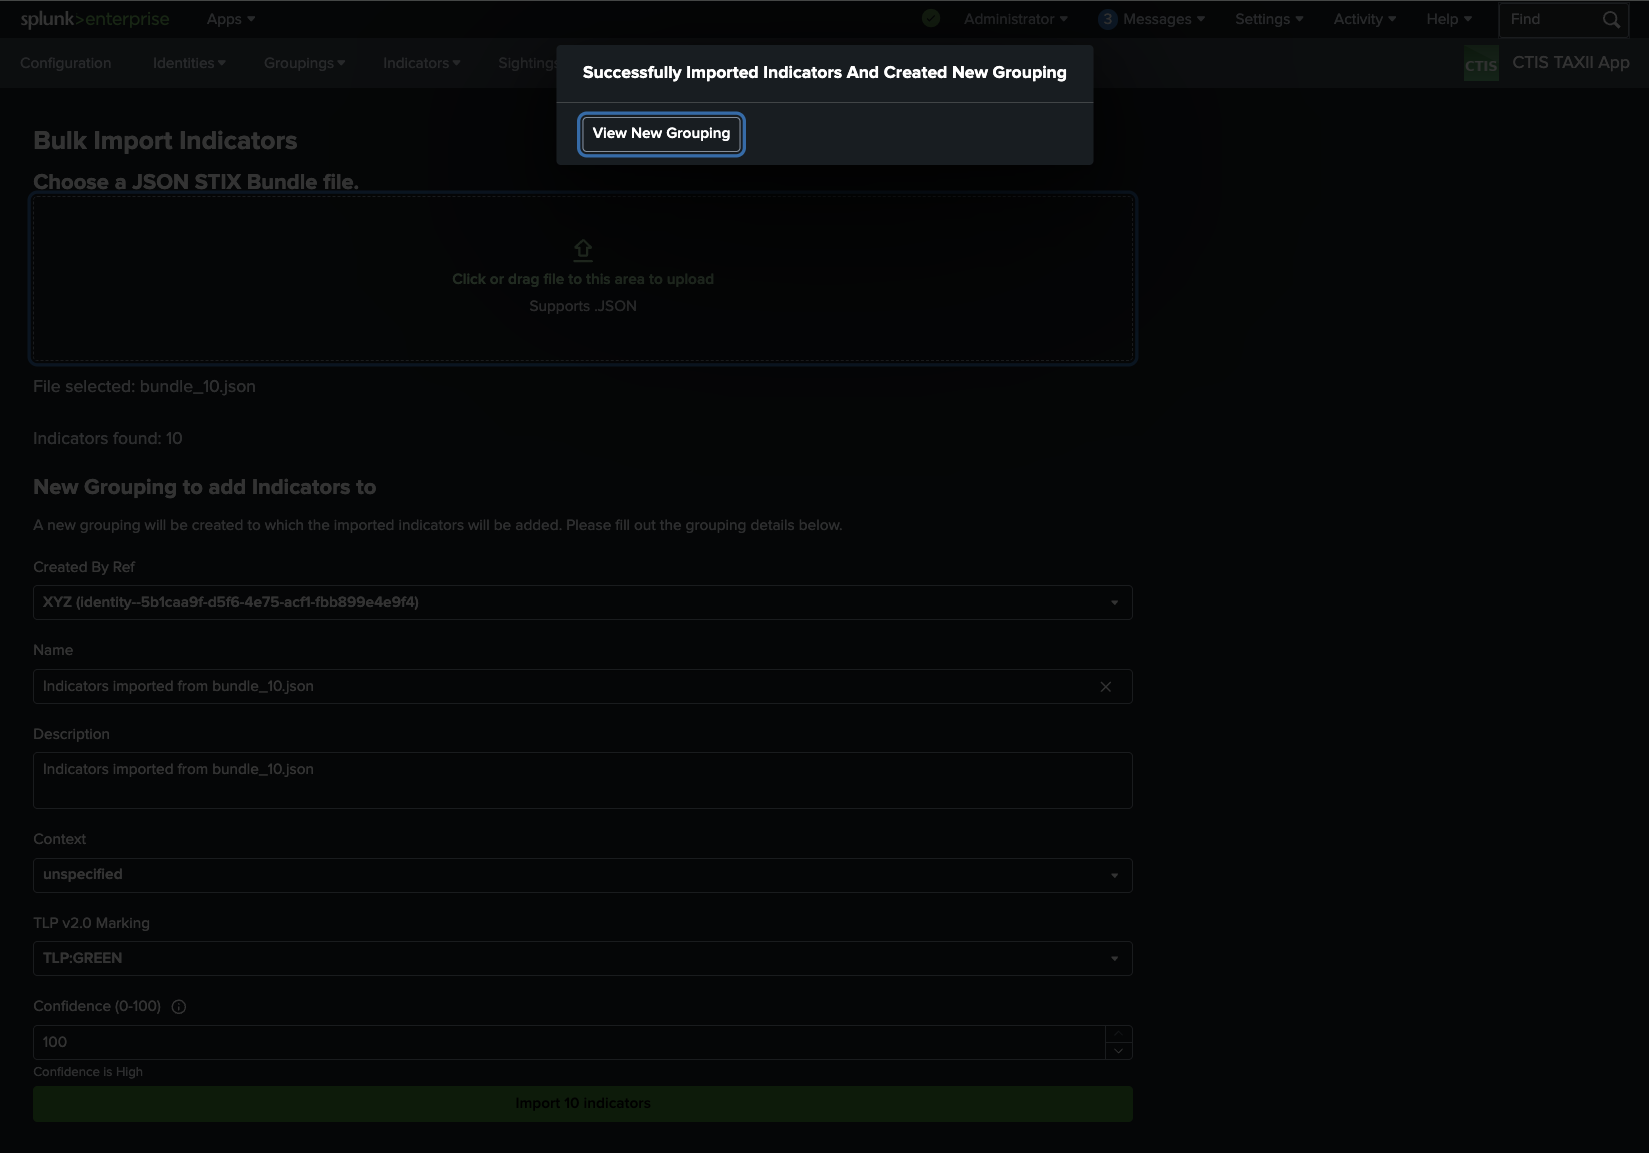
After filling in the required fields, click on the 'Import' button to import the indicators from the STIX Bundle file, and create the new grouping.
Upon successful import, you will be shown a confirmation message and given the option to navigate to the newly created grouping to view the imported indicators.
Error Handling
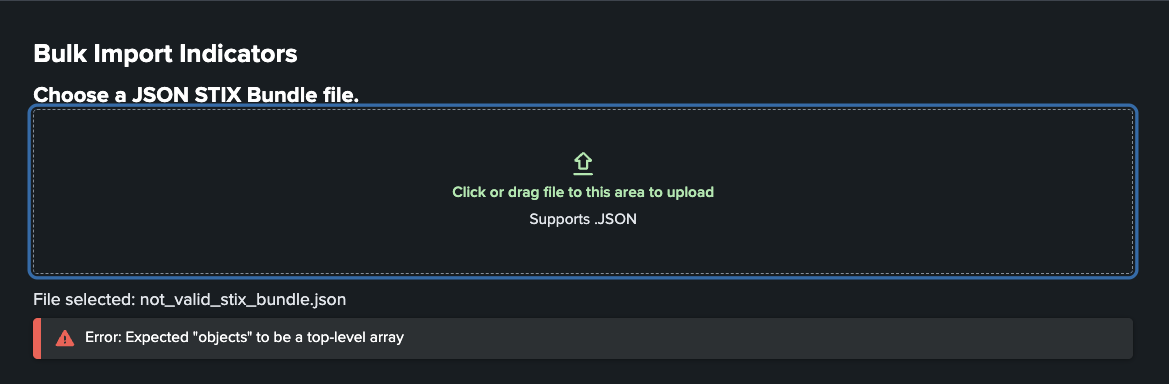
If an invalid JSON file is selected you may see some error message such as:
Importing Indicators with Existing IDs
If the Bundle JSON file selected has indicators with IDs that already exist in the app, you will be required to confirm that you want to overwrite the existing indicators with the new ones from the bundle file.
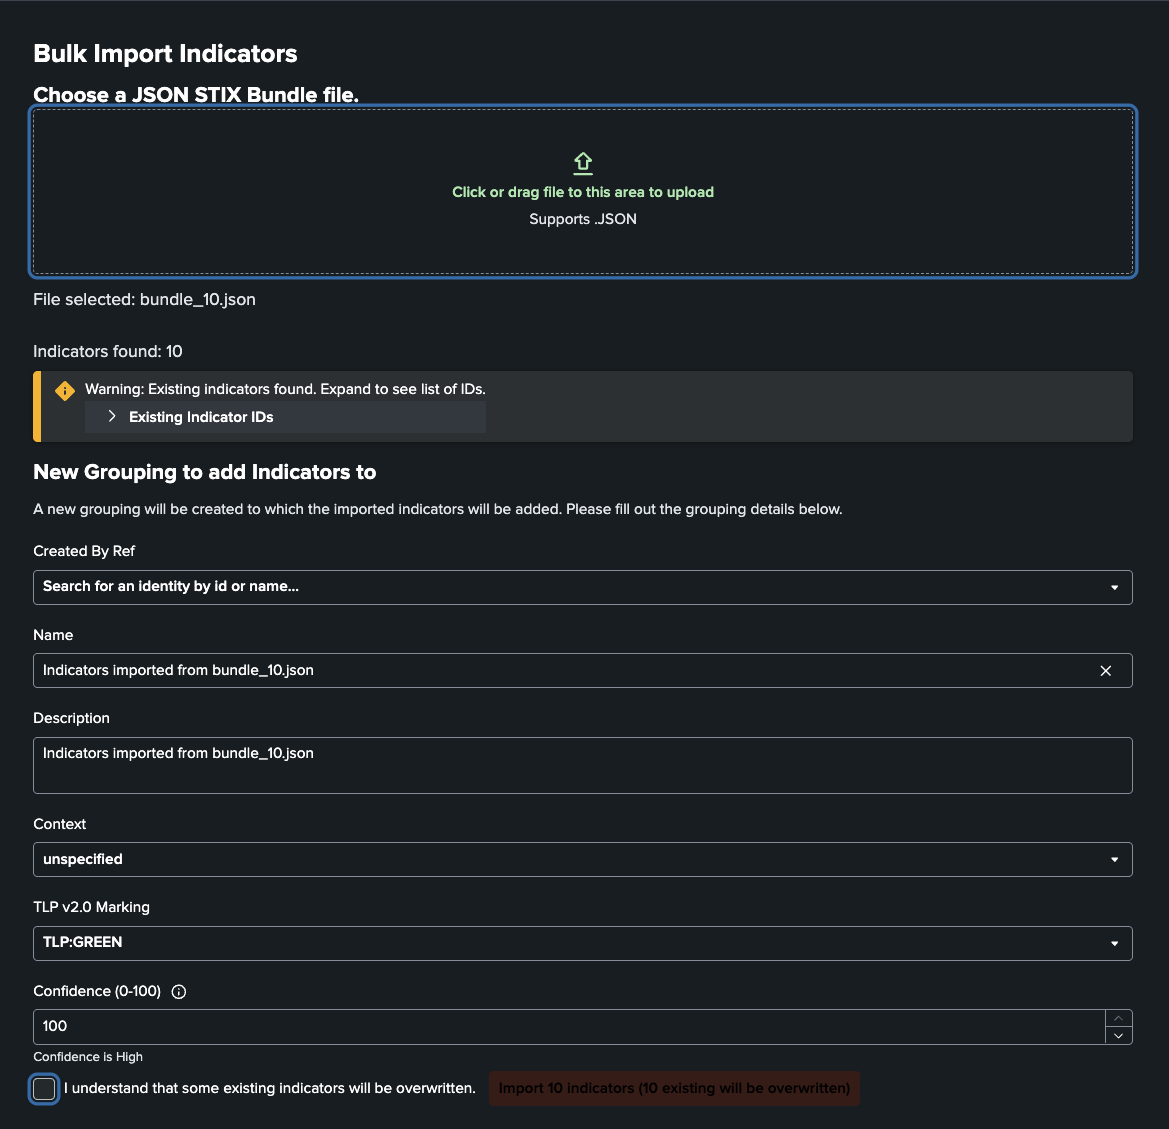
Check the checkbox to confirm that you want to overwrite the existing indicators, and click on the 'Import' button to proceed with the import.

Automatic Cleanup of Revoked or Expired Indicators
New in version v1.37.0
Revoked or expired (valid_until in the past) indicators can be automatically deleted by enabling the Indicators Cleanup job in the app's Advanced Settings configuration. The cleanup job runs every minute by default.